As you will know, I love outfit posts. I love reading, writing, creating and drooling over them, so I thought I would help you guys out. I know how annoying it is to go onto another website and have to put together a collage, or put two images together, exactly central etc etc, so I’ve come up with an 8-step tutorial on how to create your own outfit collage template, to use time and time again! You can do this in either Photoshop or Pixlr, but today I’m using Photoshop CS4 (on Windows).
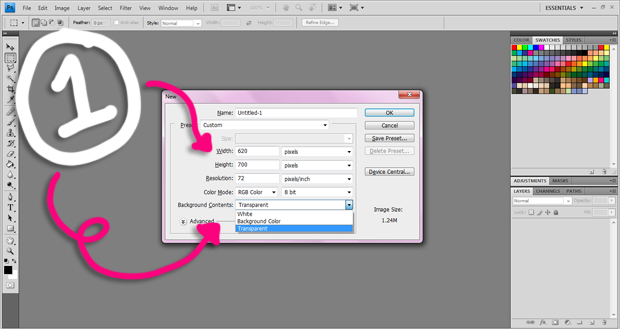
STEP 1
Create a new transparent file. Make sure it’s the correct size you want, because it’s easier than re-sizing it at the end. Just in case you are wondering, all my blog images are 620px wide.
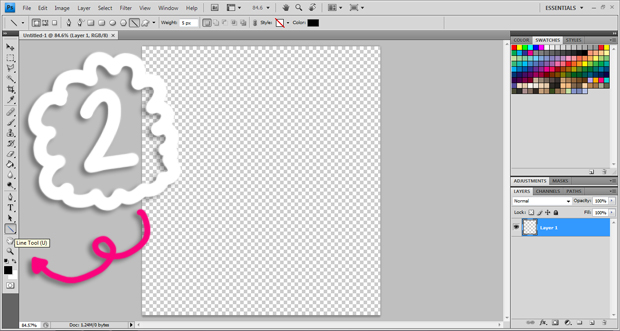
STEP 2
Select the line tool. You may want it to have some sort of effect on it, maybe you want it to look like a paint stroke? Fiddle around and see what you think works best! I prefer just a simple straight line.
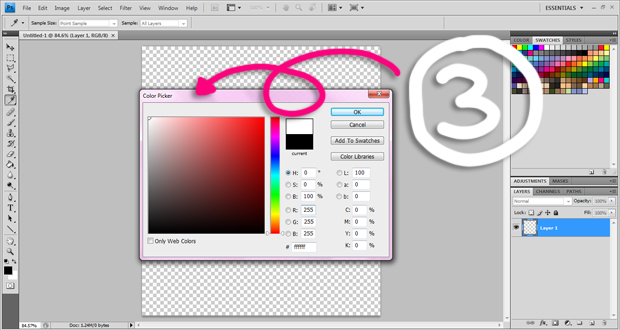
STEP 3
Choose your preferred colour. I chose white as it blends well with my blog’s background, making it look like the images are separated by formatting.
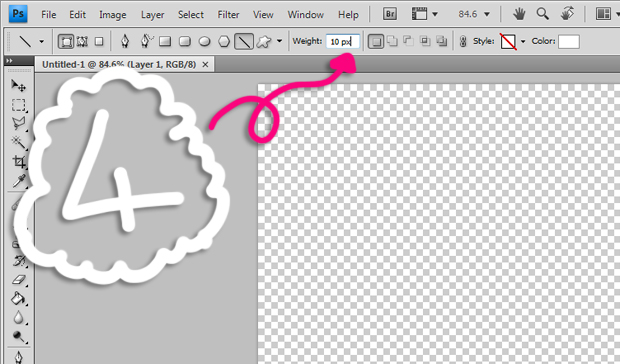
STEP 4
Choose the weight/width of your line, this can be as thick or as thin as you want. I went for 10px wide in Photoshop.
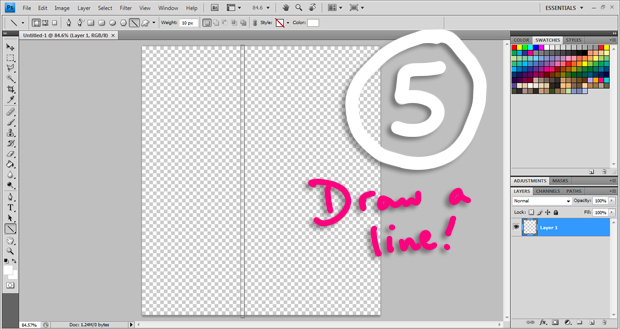
STEP 5
Draw your straight line. You don’t need to center it at the moment, just concentrate on making sure it’s perfectly straight! Easy as pie.
STEP 6
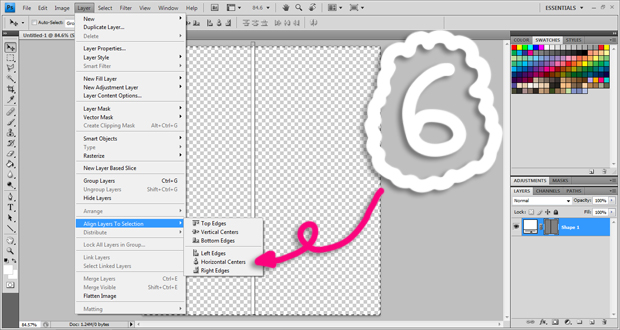
Press Ctrl + A (Select All), then go to Layers, then Align Layers to Selection, clicking on Horizantal Centers. This will make sure it is dead straight in the middle. Of course, if you want it slightly off center, then just drag it to where you want it, and ignore this step.
STEP 7
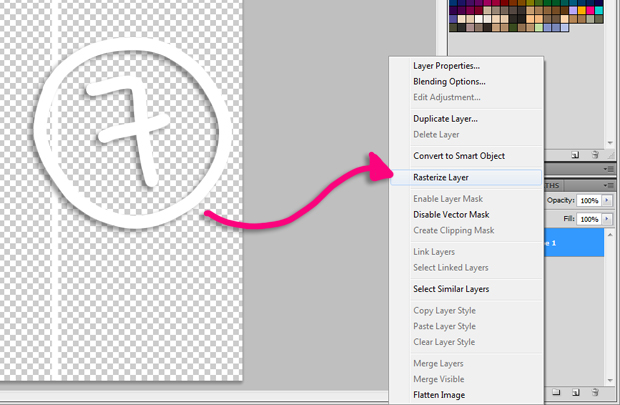
You then want to right click on the line’s layer, and click on Rasterize Layer. This sort of flatten’s the layer so that it’s easier to manage.
STEP 8
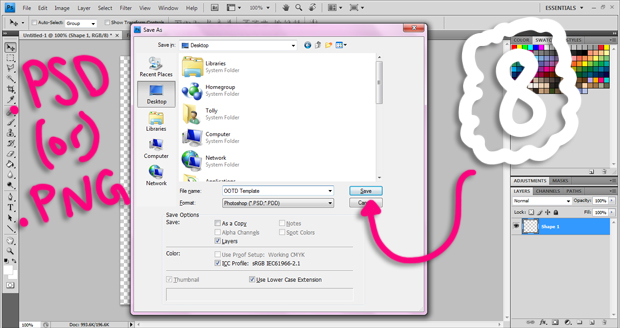
The last step is to save your file as either a .PNG or a .PSD. You may want to save it as a .PNG file so you can open it in other softwares when you don’t have Photoshop to hand… just as long as it is transparent then you’ll be fine!
~ HOW TO USE YOUR TEMPLATE ~
So obviously, you are wondering…. so how do I use my template? Well, it’s super simple. Follow these four simple steps and you’ll have your very own, personalised, template for outfit pictures (or anything else, pictures)…
STEP 1
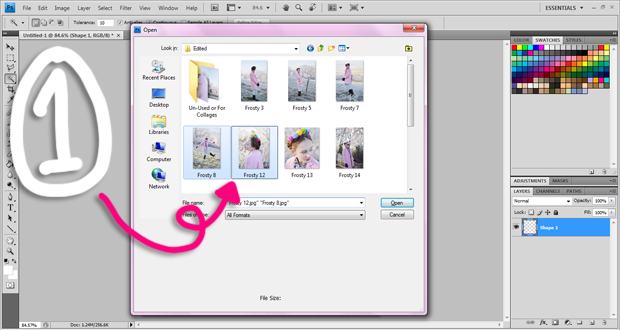
Open up your file, and the two images which you wish to put side by side. I usually go for either 2 full lengths, or 1 full length and a detail!
STEP 2
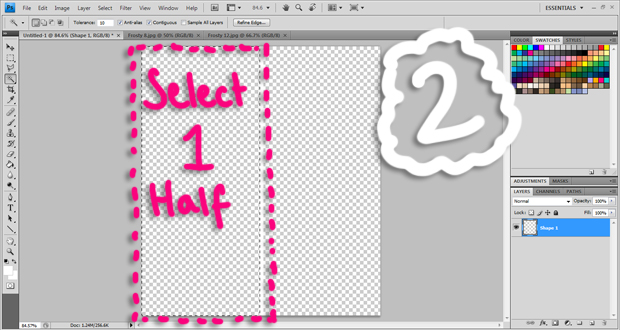
Go to your template file, and select one half of the template (make sure you haven’t selected your line down the middle).
STEP 3
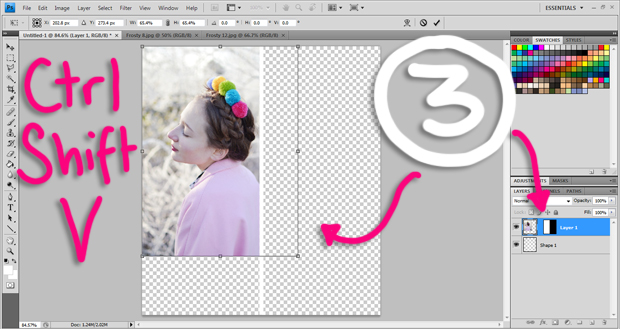
Copy one of the images you opened up, go back to your template, and press Ctrl + Shift + V (Paste Into). This will put the image into just that one half. Drag and re-size the image to how you want it to look. The bits of the image that aren’t visible, go underneath the line and aren’t deleted, so you can move it around a bit afterwards!
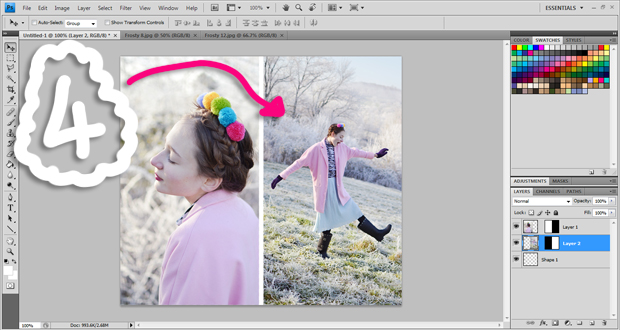
STEP 4
Repeat with the over half, selecting and pasting into the correct space… and voila! A perfect outfit template.
To make this even more personalised or custom, you could add more lines to create a grid, or have an image floating in it’s own space. It’s really all down to ‘Paste Into’, so you can be really creative with it! Good Luck!
HOW TO TAKE OUTFIT PICTURES // OUTFIT PICTURES FEATURED
