Tolly Dolly Posh Fashion
Tolmeia Gregory New Site
Browsing Category

DIY & Lifestyle

DIY tutorials, lifestyle posts and anything inbetween…

Blogging: Time, Effort & Energy

By June 29, 2014 DIY & Lifestyle

This post was going to be about a random piece of banana fibre I found (see here), but I changed my mind and it’s now about blogging. I’ve seen a lot of these posts lately, and I just want to get my words out there. I’m not sure how this will go, but I guess we’ll see!

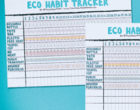
blogging time effort energy(Thinking of selling personalised downloads of this? Comment if you like the idea!)

I sometimes say that blogging really isn’t anything special, and I don’t really understand when people say ‘You’re an inspiration’, but when my parents said to me ‘You don’t really know how much work you put into it [my blog]’, it kind of clicked. On top of doing home work, spending time with my family, and trying to just have me time; I’m on my Twitter, emails, Facebook and Instagram promoting myself, brands and anything random to please you, the readers. I feel like other bloggers try and hide the fact by saying ‘I only do it because I love it’, and some of us do, but at the same time, we’re writing and tweeting because people enjoy it. I know it might sound like that isn’t much to you ‘non-bloggers’, but actually when you add it all up, it really is.

Lily Melrose, or LLYMLRS, wrote a really short and sweet blog post about why you shouldn’t give up blogging, and her thoughts were exactly the same as mine are now. Basically, if you don’t put cake mixture in the oven, you won’t get a cake in the end… or if you don’t put the effort, time and energy in, you won’t get all the fun stuff… I prefer the cake version.. yummm cake! I’m not saying that if you’re not doing ‘well’ (well = your own definition of course), that you’re not putting enough effort in, but it might mean that you haven’t been doing it for that long, or maybe you’re setting your standards too high, or putting too many eggs over flour in your mixture (eggs/flour = different content).

These ingredients can mean whatever you want them to mean personally, so I can’t tell you the perfect quantities (#ImSoGoodAtTheseCakePuns), but when you look at these so-say ‘big bloggers’, you have to understand that they whisked and mixed, and put their cake mixture into the oven to get where they are today. Just because their cake is golden and gooey (…just give me my medal now…), doesn’t mean they didn’t think of giving up.

Your goals are your own. Whether you want blogging to take you to a full time job, or you just want to reach 100 followers within 6 months, it will take time and effort. Set mini goals along the way, and slowly (or quickly, depending on how much time you put in), you will reach them. Hey, one of my goals this year was to do a product collab, and I have done it (see here)!, which means it is possible. A cake takes patience, and so does a blog…

You Might Also Like

Teen Blogging in Blogosphere Magazine Issue 4

By June 18, 2014 DIY & Lifestyle, My Style

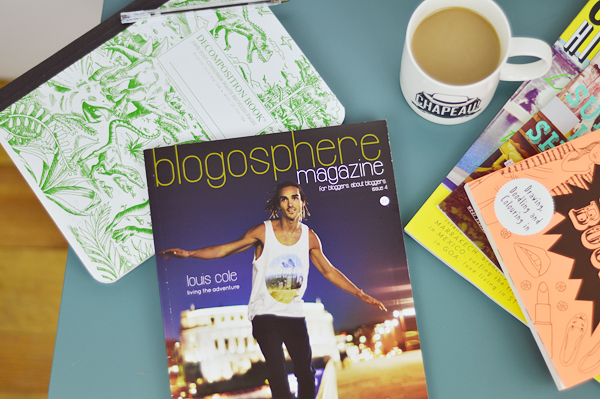
Howdy! I’m back again, with a pretty exciting post! You may or may not know that I recently wrote an article on teen blogging for the blogging magazine (that’s a whole lot of blogging), Blogosphere Magazine in their latest Issue #4! I thought I would give you the low down because if I do say so myself, it’s a pretty cool issue 🙂 Just so you know, the Company Blog Awards results are in and unfortunately there was nothing for me! 3rd time lucky for 2015? I hope so! Thanks so much if you voted/nominated though, it means a lot! 

blogosphere magazine issue 4 louis cole teen blogging blogosphere magazine issue 4 louis cole teen bloggingBLOGOSPHERE ISSUE 4* – E-VERSION £3 – PRINTED VERSION £4 // DINOSAUR NOTEBOOK*

Blogosphere is a magazine written for bloggers and by bloggers. From photography to *cough* teen blogging, each issue covers everything you might want to know whether you are a reader or a writer. Don’t forget every issue has an awesome cover star and interview, Issue 4 is with Louis Cole, with past issues being covered by Essie Button and Fleur De Force‘s faces, so you could say it’s a pretty high profile publication. They allow bloggers to submit pitches, and mine was one of the few to be accepted! Woop!

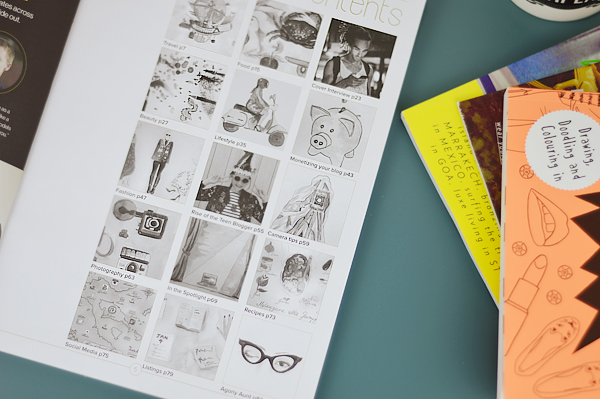
Cover Interview (p23) – I never used to really ‘get’ Louis Cole, but after reading this interview and watching a few more of his vlogs, I finally do. He’s so down to earth and generally lovely and doesn’t come across as ‘fake’ as some other vloggers. If you want to know more about how he lives his adventure, I would definitely recommend reading this!

Photography (p63) – I don’t follow enough photography bloggers seeing as I love snapping away, and it is so nicely put together! A short piece, but is lovely to flick through!

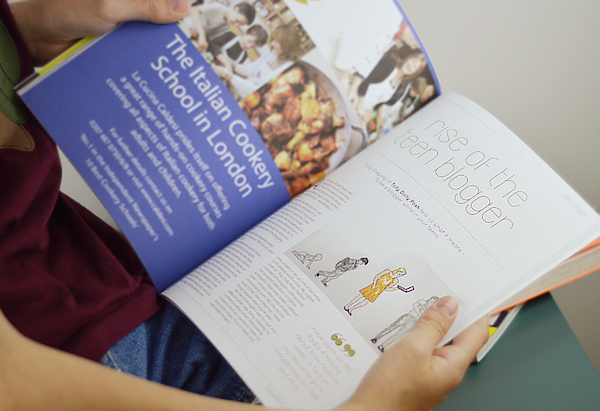
blogosphere magazine issue 4 louis cole teen bloggingRise of the Teen Blogger (p55) – Da-dah! The article which was written by yours truly! Pretty snazzy, huh? I decided people need to know the ins and outs of what us young bloggers get up to, and I thought well, why not share it in a magazine? It’s a 3 page article (cray cray), where I discuss what I’ve achieved so far, the pros and the cons, as well as 4 of my favourite fellow teen bloggers. It’s accompanied by some of Blogosphere’s very own illustrations also! Want a bit of a cheeky snippet?

”Blogging, like anything, doesn’t really bring much for a while, unless you know somebody who can get your name under somebody’s nose. It wasn’t until I was about seven months in that I decided to pluck up the courage to send an email to a brand. I got a reply, and, within the following two weeks, an outfit post on my father’s iPhone was published.’

It was really fun to write and finally see it all on high quality paper, with my picture on the contents page. Essie Button (previous cover star like I mentioned) said in one of her vlogs that she was reading the issue… I squealed inside of the thought that she may have read my thoughts… wahhh! Make sure you pick up your own copy here and tweet me your thoughts @TollyDollyPosh 😀

You Might Also Like

3 Bottle Cap Fashion DIY Ideas

By June 15, 2014 DIY & Lifestyle

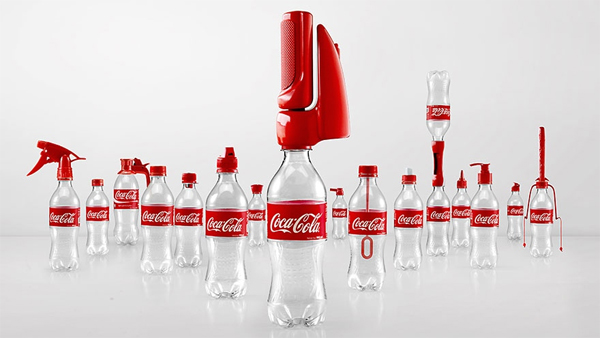
Honey, I’m hommeeee! Sorry about the delay, but if you didn’t know already, I’ve been home in the UK for a while again, back tomorrow! I hope you didn’t miss me too much 😉 Shall we get on to the post now? Yeah! It’s just a quick one but I hope you like it nonetheless… I found out about Coca-Cola’s new idea to stop the waste of their bottles, and I suddenly had a light-bulb moment! Why not think of 3 easy ideas which can be made with house hold items… especially bottle types?! Genius… hehe (Images via Pinterest & Coca-Cola)

3 fashion diy ideas bottle caps coca-cola 2nd life

The whole idea, like I said, is to reduce the waste of Coca-Cola bottles. So they’ve come up with a scheme (only in available in Vietnam currently, I believe!) to give out packs of bottle tops with different uses. From spray bottles, pens, sharpeners, to toys, and even lights! I think it’s such a cool idea! I want one… I would 100% pay my very own money for a pack. Would you?! 🙂

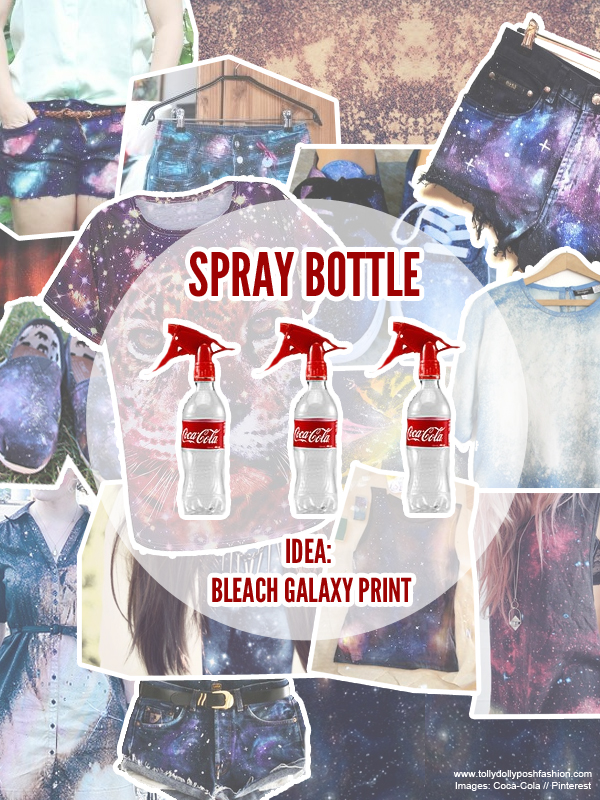
3 fashion diy ideas bottle caps coca-cola 2nd lifeSPRAY BOTTLE – BLEACH GALAXY PRINT

My first idea is so simple. Just pop some bleach (or paint) in to an old spray bottle, and spritz at your shorts, top or shoes, and then just add on some details for that whole ‘galaxy’ look. I’ve never been the biggest fan, but I think if you put your own twist on it, you could create something really cool! My favourite version of this is the bleached jumper!

TUTORIAL #1TUTORIAL #2TUTORIAL #3
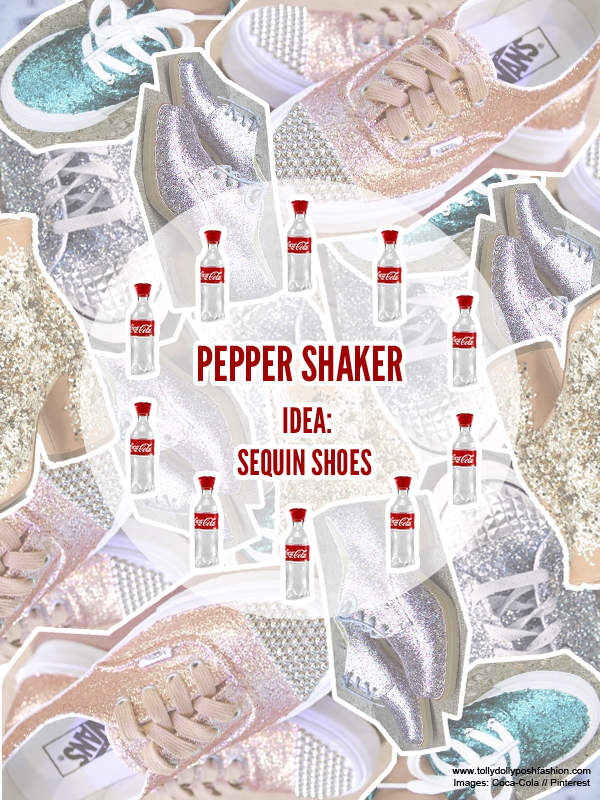
3 fashion diy ideas bottle caps coca-cola 2nd lifePEPPER SHAKER – SEQUIN SHOES

This is probably my favourite idea! Take an empty pepper/salt shaker (I mean, you could do it full if you really wanted that kind of vibe…), fill it up with glitter/sequins, and then glue all over your desired shoes, and sprinkllleeeee! All you have to do after is just touch up any bare patches, but if you get a good glue, this should be really easy and fun to achieve! I think turquoise glitter looks awesome!

TUTORIALS (ALL OVER THE INTERWEBS) 
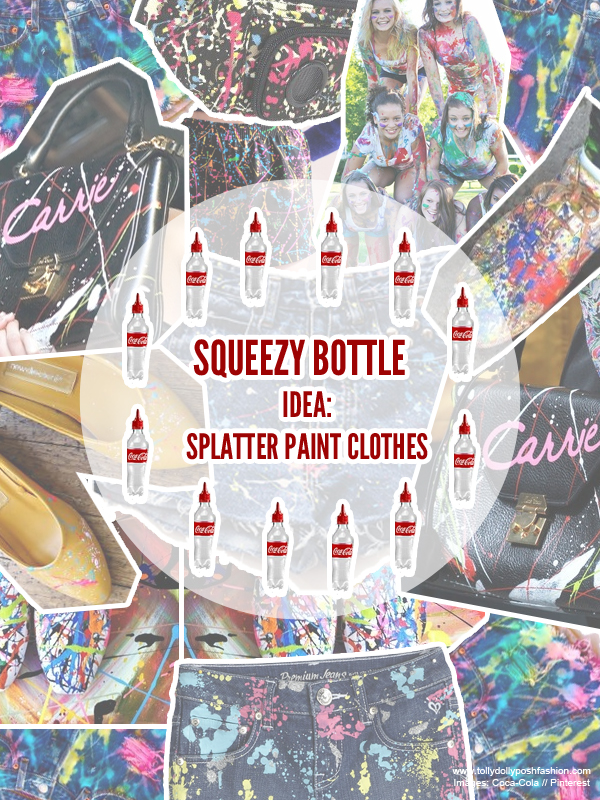
3 fashion diy ideas bottle caps coca-cola 2nd lifeSQUEEZY BOTTLE – SPLATTER PAINT CLOTHES

This brings back my Carrie Diaries memories *sobs that it has been cancelled*…. and also ART lessons! Fill up an old ketchup bottle (or a few), with coloured paint, and splatter it all over your item of choice! I would recommend putting a small amount in the bottle, which will help it ‘squirt’ rather than just squeeze, to create the splattered effect. Or do it with a fine paint brush to do the Carrie Bradshaw bag… I still haven’t shown you mine! You guys must remind me 😉

TUTORIAL #1OTHER TUTORIALS

What other household items would make awesome DIYs? Let me know in the comments, I would love to know! I shall see you in my next post with some graffiti… say whatttt?!

You Might Also Like

Blogging Studio Tour + Video

By May 21, 2014 DIY & Lifestyle, My Style

Hello everyone, WOW 2nd post of the day (first one is here)! If you have been following me on Twitter/Instagram, you won’t know that my oldest brother recently moved out, leaving the perfect of rooms for me to have a blog studio! I know it might sound crazy to have a room just for blogging, but I promise I don’t just blog in it haha! This post is going to show you round it and a few bits and pieces that I have bought recently! I also made a YouTube video, just to see it in more detail!

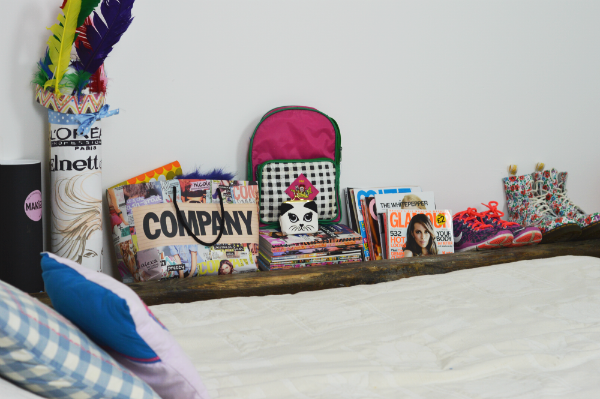
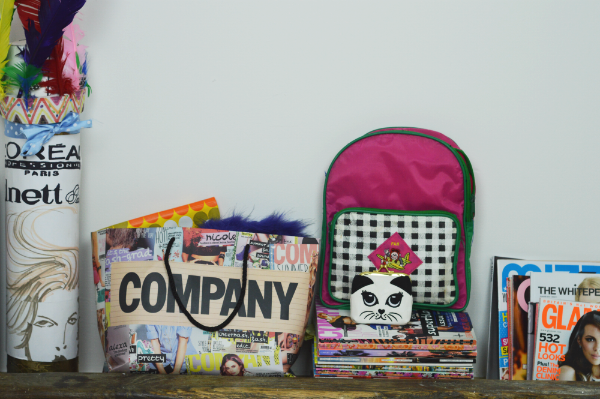
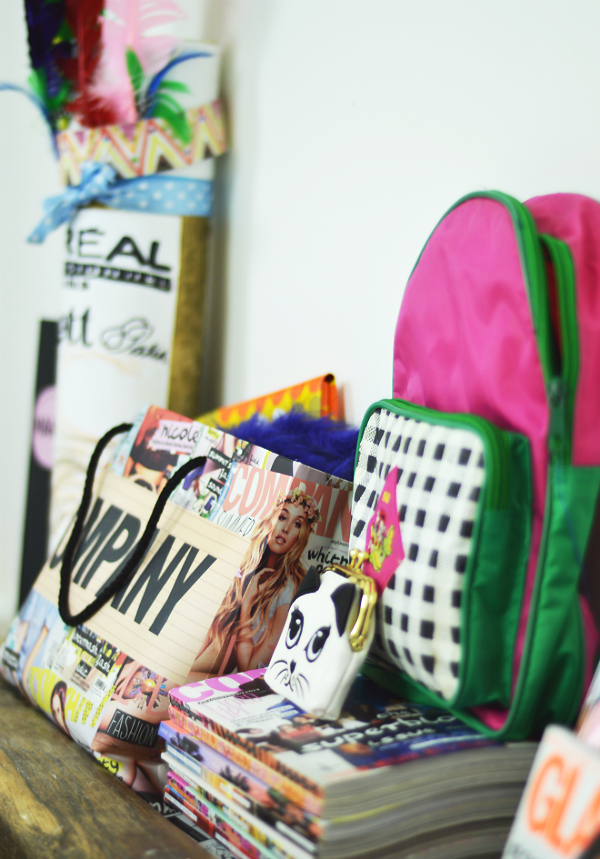
blogging studio tour youtube video blogging studio tour youtube video blogging studio tour youtube video JUMBO HAIRSPRAY (DIY)//COMPANY BAG (BLOG AWARDS)//RUCKSACK (JUMBLE SALE)//PURSE (NEW LOOK)//VARIOUS MAGAZINES//NIKE TRAINERS (JD SPORTS)*//DR MARTENS (MASTERSHOE)*

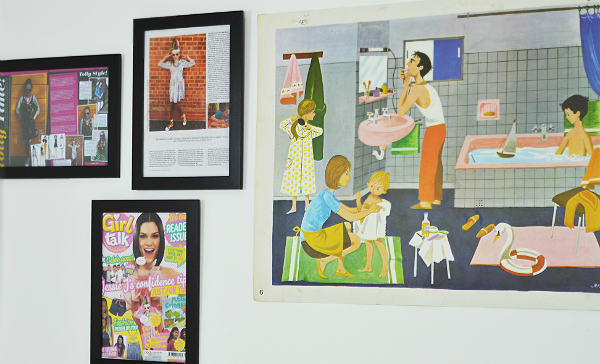
Backdrop Decor & Bed Area: This is one of the main parts of the room I wanted to focus on. Now I have my soft boxes, I want to start doing more YouTube videos as an added extra, so having a good backdrop space was key. There’s a sort of trough against the wall, which is a perfect space for putting bits and pieces, and of course I had to put some of my favourite shoes, magazines and accessories. I think it looks really colourful but definitely still portrays the whole ‘blogging room’ feel.

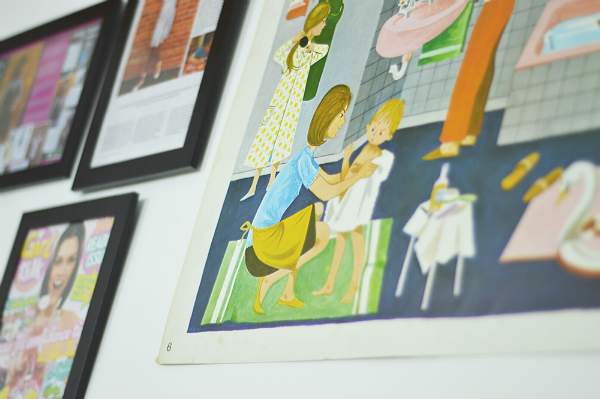
blogging studio tour youtube video blogging studio tour youtube video NYTTJA FRAMES (IKEA)//OLD FRENCH PRINT (JUMBLE SALE)

Backdrop Wall: When I saw this print, I was instantly drawn in by it. It has such a nice, fresh, colourful and illustrative feel to it, and it was only 5 euros. It’s the perfect size, and compliments my magazine clippings really well. I knew I had to pop these frames up, and they only cost about 6 euros for all three. I would definitely recommend them as they are cheap as chips and aren’t too shiny so they don’t glare in bright lights – one of the reasons I love them so much for my backdrop! 

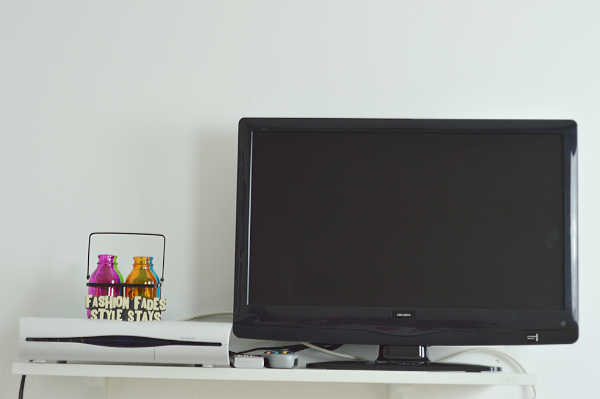
blogging studio tour youtube video COLOURFUL JARS (JUMBLE SALE)//QUOTE WOODBLOCK//TV & SKY BOX

TV Shelf: Seeing as the room is still being used as a spare bedroom, the TV is staying where it was before. I added a cute little decoration which I stole from Mama Posh (she still hasn’t realised… shhh!), and placed my little quote wood block there too. It just makes the shelf a bit less boring and takes the ugliness away from the old clunky Sky box.

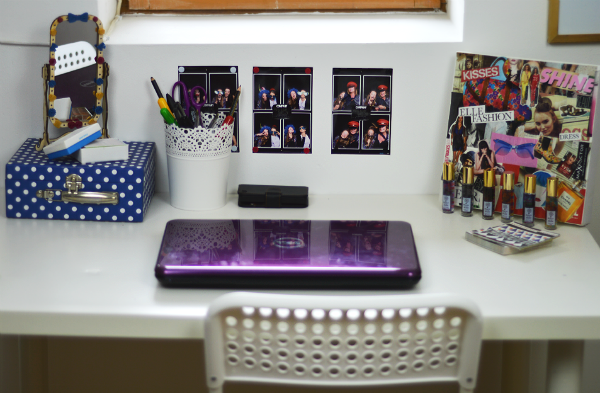
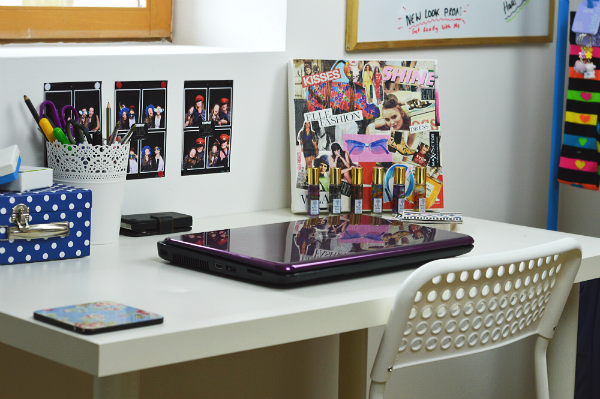
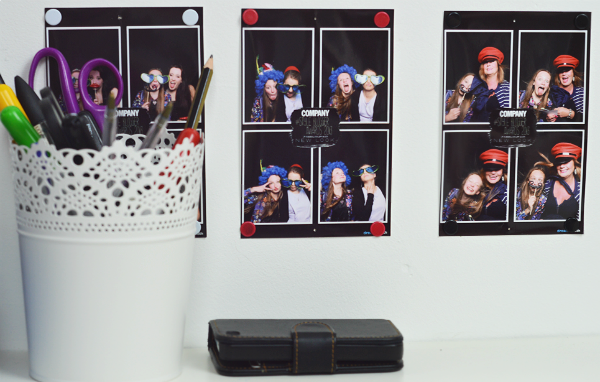
blogging studio tour youtube video blogging studio tour youtube video blogging studio tour youtube video DESK//ADDE CHAIR (IKEA)//SPOTTY BOX//CANVAS (DIY)//MIRROR (MAKIES)*//SKURAR PLANT POT (IKEA)//NOTEPAD (OXFAM)//PERFUMES (MUSIC TO MY NOSE)*//PHOTOBOOTH PICTURES (BLOG AWARDS)

Blogging Zone: This is obviously where the magic happens… or where the blogging happens. I switched my brother’s old clunky office chair, for this super duper cheap IKEA chair… less than 10 euros! Don’t forget the blogger essential… lace trim style plant pot! I’ve had this canvas for a while now, it used to be in our living room… slightly out of place, but now it looks perfect! I also love the cute reminder of the Company Blog Awards! It reminds me of why I love blogging so much 🙂 Shame there is no iMac really… one day… one day! The good thing about this area though is that it can be used as a second backdrop! Bonus points!

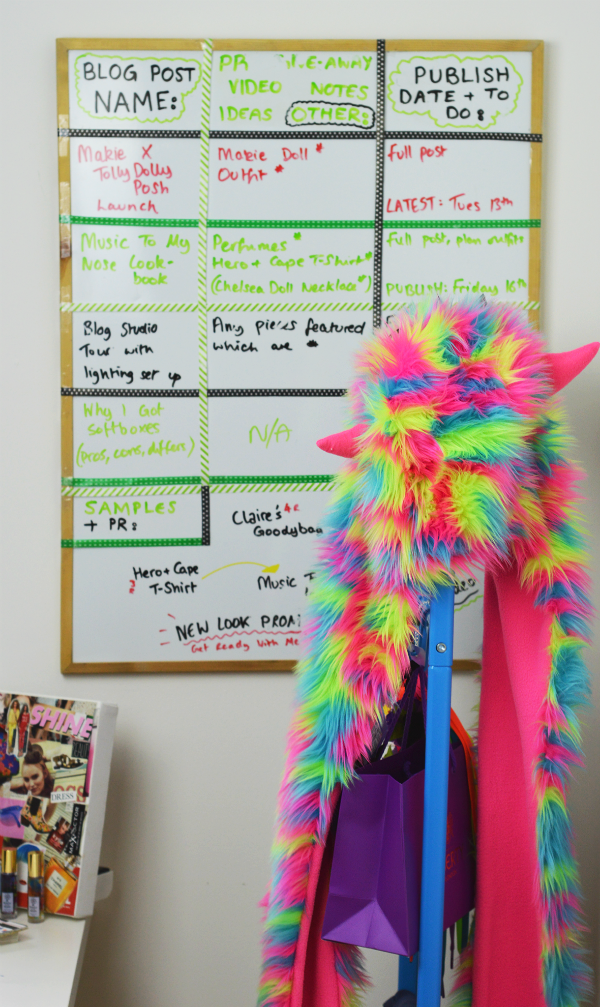
blogging studio tour youtube video WHITEBOARD (STAPLES)//FRAMSTALA GIFT RIBBON (IKEA)//MALA WHITEBOARD PENS (IKEA)

Blogging Whiteboard: I was going to have to buy a new one of these whiteboards, but my brother was kind enough to leave his for me. Although I use Google Docs to keep my blog schedule updated, this will be super helpful. I can just look up at it and know exactly what I need to do next. I simply taped some of this IKEA ribbon into a grid, and wrote in the spaces! Super easy 🙂 Sneaky peak of my… old schedule haha 😉 I love how the whiteboard pens match the ribbon too… cute details!

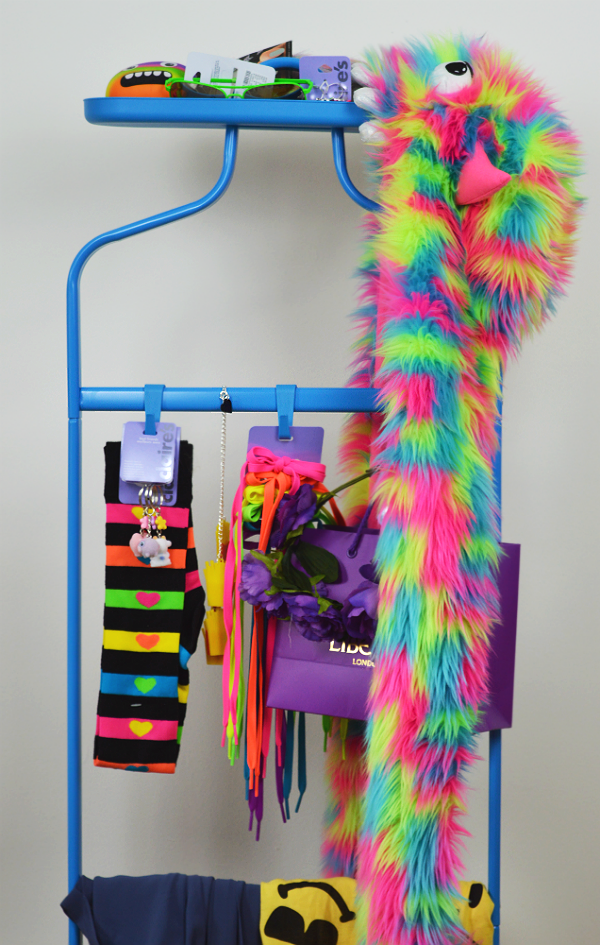
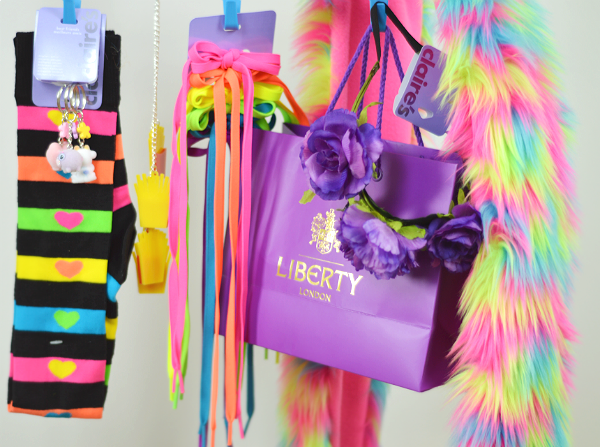
blogging studio tour youtube video blogging studio tour youtube video blogging studio tour youtube video MULIG VALET RAIL (IKEA)//NEON ACCESSORIES (CLAIRES)*//JUNK FOOD NECKLACE (CHELSEA DOLL)*//BAG & FABRIC (LIBERTY LONDON)*

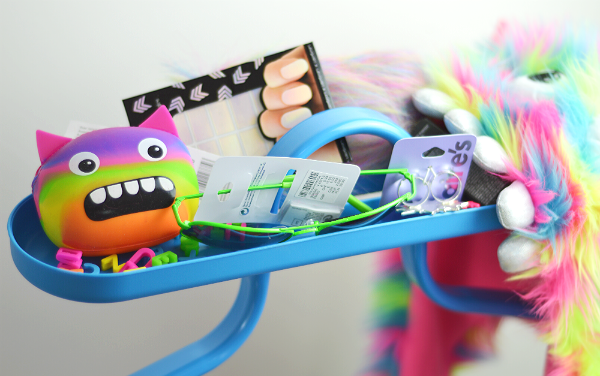
Samples Rail: I hope I don’t come across like I am showing off, but I do get sent things as gifts for my blog from time to time (..the things with the * by them..), so having a place to keep track of new pieces is really handy as a blogger. I was originally going to get some hooks, but this little rail is super handy! It has spaces to hang clothes, as well as a space to put small bits and bobs. I love the colour too! They do it in white as well if you’re wondering! The one thing I would say is that it doesn’t come with wheels! It’s super cute though and I can look at all the pretty things on it easily enough 🙂

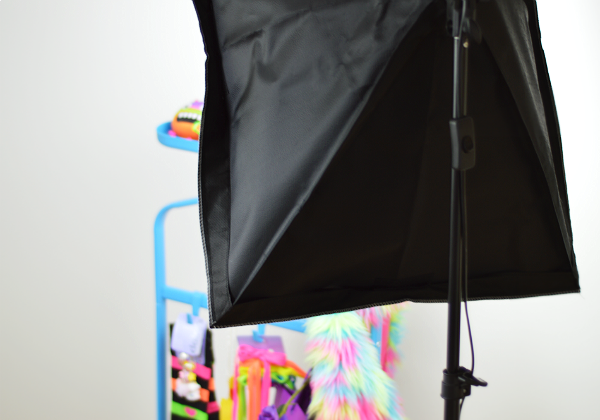
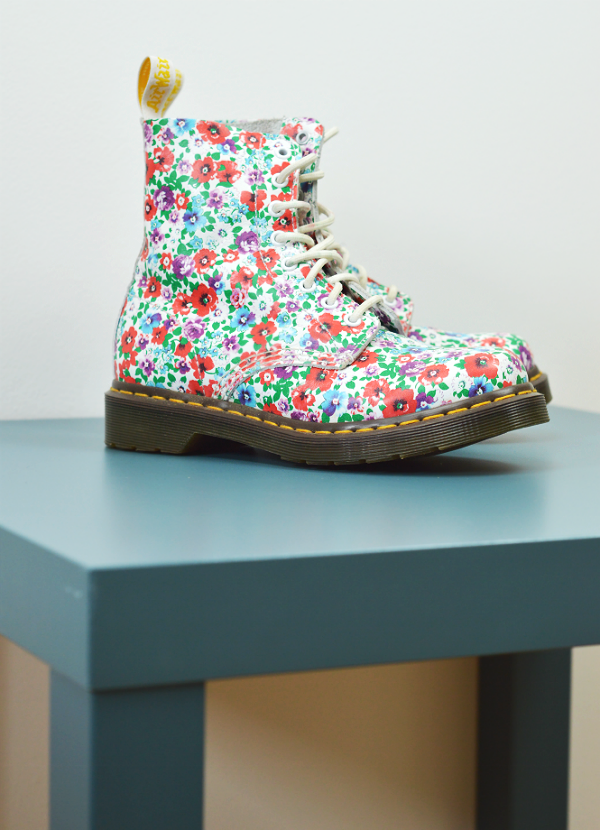
blogging studio tour youtube video blogging studio tour youtube video SOFT BOXES (EBAY)//DR MARTENS (MASTERSHOE)*//LACK SIDE TABLE (IKEA)

Photography: As I’ve already mentioned, I recently invested in some soft boxes. One of my next blog posts will explain why, but I thought I’d show them here too! They’ve been so good so far, and I’m super happy I got them now! I don’t need more clothes… so these sorted that out! Haha! Along with my lights, I picked up one of the IKEA side tables. I never knew they did matte versions, so I chose the blue one. It’s perfect for taking pictures of products and makes it look so sleek and professional. I also got some IKEA wrapping paper just in-case I want to swap the blue for a cute print instead. I love the way it looks and I am extremely happy with the colour choice… even after my little panic before paying!

So that’s it! That’s my blogging room! As I love blogging, I love using it and having the lights up makes me feel extra cool! Haha 🙂 It also makes my bedroom feel much more relaxing than it used to because now it can be my ‘chill room’. What do you think of it? What would you put in your blog room? Speaking of blogging, the Company Style Blogger Awards voting end on May 23rd! WHAT?! It would be amazing if you could click here and vote for me on Tab 8! Thank you so much!

You Might Also Like

Embellished Dinosaur Sunglasses DIY

By April 29, 2014 DIY & Lifestyle, My Style

Hello! How are you again my friend? Or maybe you are new here… doesn’t really matter because everybody is welcome. Let’s explain this post before I get too into my rambles… You may have read this post recently about a brand I discovered, and that sparked a light bulb above my head *ding* Why not do a DIY? I’m all about supporting brands, but if I can save a few bob here and there, than I would rather put my own spin on things, so me being me, I am bring you along for the ride and sharing how exactly I re-created these embellished dinosaur sunglasses… Quick note! The Company Magazine #StyleBloggerAwards nominations close tomorrow (aka 30th April), so I would love if you could nominate my blog as Best Teen Style Blog! Click here to do so! Thank you!

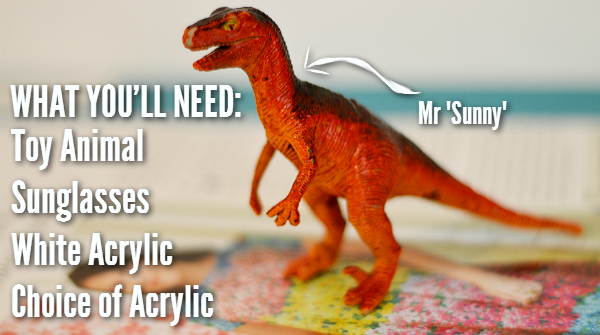
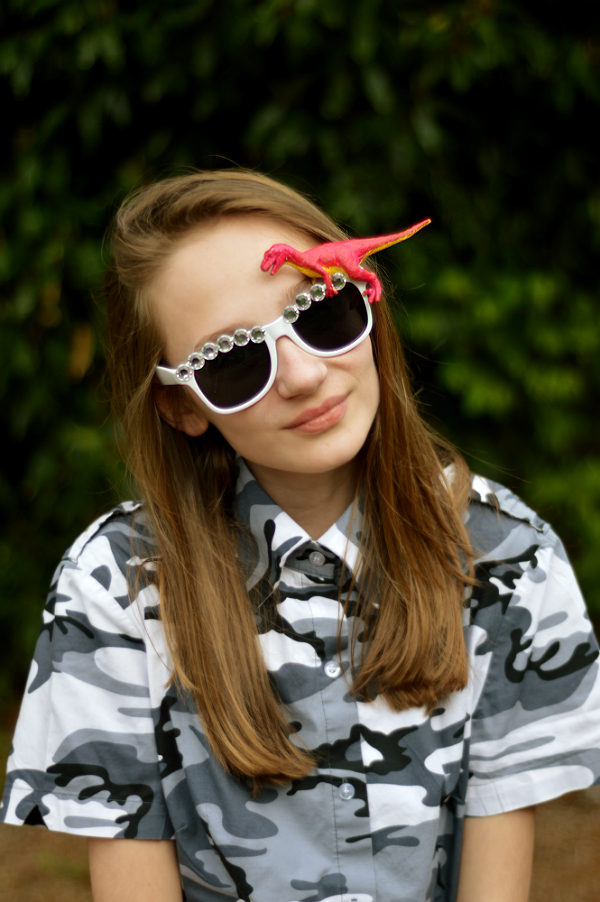
diy embellished dinosaur sunglasses spangled TOY DINOSAUR €0.50 (JUMBLE SALE), SUNGLASSES (eBAY), WHITE ACRYLIC (ART SHOP), PINK ACRYLIC (DALER ROWNEY), YELLOW ACRYLIC (PEBEO STUDIO) & OPTIONAL EMBELLISHMENTS (ART SHOP)

This is basically a list of things you will need… obviously. I went for a dinosaur toy for mine because I like they way they look, plus when you see a basket full of them at a jumble sale, and you are in need of a toy (for DIY purposes… duhh), you obviously don’t pass it by, do you? My sunglasses were really cheap ones which I previously used for this sunglasses DIY. The acrylic paints you can get from anywhere really, I personally prefer the Pebeo Studio ones as they are surprisingly more opaque than the usual Daler Rowney tubes. Oh and don’t forget to name your animal of choice… I asked my brother and he said ‘Sunny’… how original, heh? You can also get some embellishments, but these are of course optional… I think the dinosaur might be enough in itself for some people!

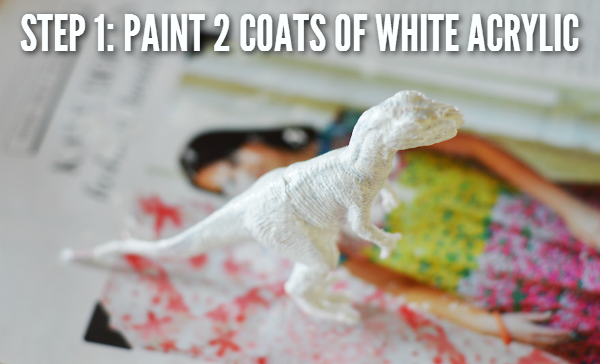
diy embellished dinosaur sunglasses spangled The first step is to paint 2 smooth and even coats of the white acrylic. This helps the colour you put on top really stand out, and also get rid of the previous colour. I could have kept mine red, but there were a few chips on it, so this covered things up! If you have coloured sunglasses you could even keep it at this! I feel sorry for the lady in my ASOS magazine… her dress was so perfect… naughty Mr Sunny getting it all covered in dinosaur footprints! 😉

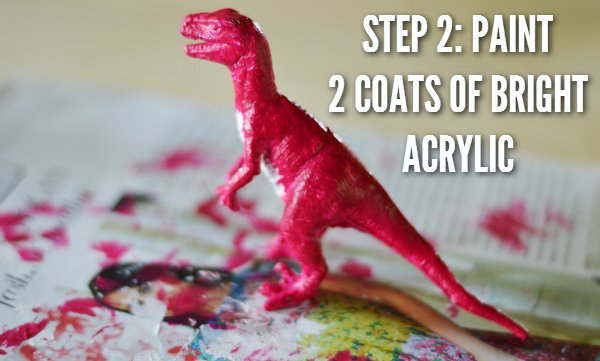
diy embellished dinosaur sunglasses spangled Then you want to paint 2 coats of your acrylic of choice. You may notice that I have left a white space on his tummy… this is because I wanted a bit of a gradient for added definition, but again, this is only optional. If you want it a block colour, then paint it all in and ignore the next step…

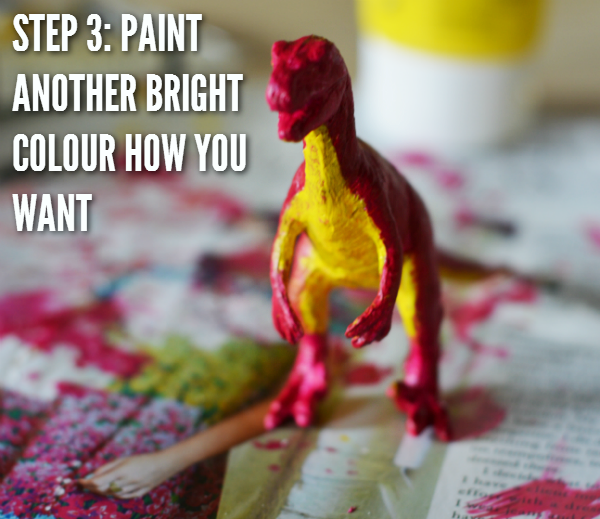
diy embellished dinosaur sunglasses spangled The third step is to fill in the space we left. If you decide you want it a block colour, then ignore this like I mentioned. I think he looks really cute with the pop of yellow! Make sure you are patient with this bit… I rushed because it was getting dark for pictures (#bloggerproblems), so parts of it ended up being a weird orangey, patchy colour. At first I used a sponge to get a gradient effect, but because Mr Sunny has annoying hands (do dinosaurs have hands?!), I ended up going in with a small brush as it was getting a tad messy. I also painted all the way down underneath his tail for an added effect.

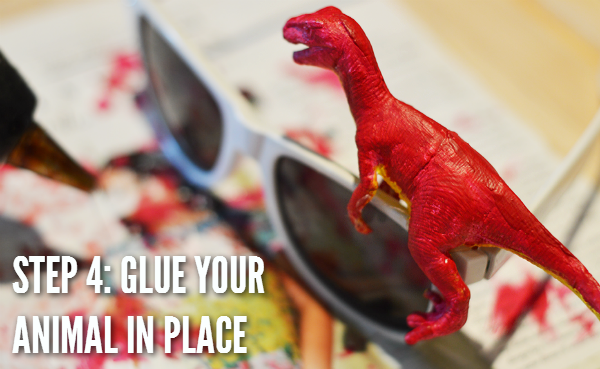
diy embellished dinosaur sunglasses spangled Ergh, ignore the change of light… one day I shall own soft box lights so all my pictures will be perfect! Ha! Step 4 is a little tricky. I recommend waiting until your toy is 100% dry (maybe even wait a day), so the lens of your sunglasses don’t get mucky. For finding the perfect fit, pop on your glasses, then slip your toy friend where you want it to go. I found that Mr Sunny fitted best on the edge… which wasn’t very practical seeing as I can now only close 1 arm/temple of my glasses! You could put yours wherever you like though… just remember that they might not close up! Then whip out that hot glue gun, squeezing some onto the belly of your toy, sticking it in place. Be careful please… I don’t want to be blamed for any burnt fingers!

diy embellished dinosaur sunglasses spangled

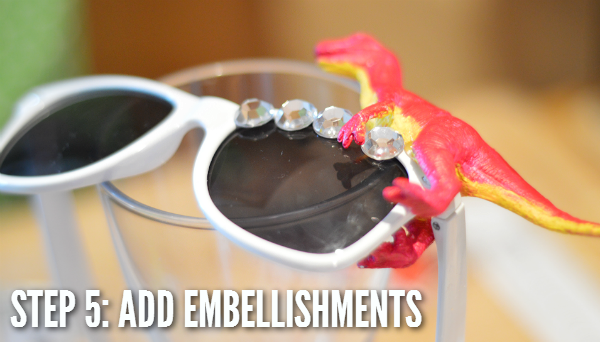
The fifth step is totally optional, but I think it balances the whole thing out. I looked into our ‘buttons’ box, and found these sparkly gems which were the perfect size for my sunglasses. Again, just glue them down with your hot glue gun! I love how it looks like Mr Sunny is holding one of them… maybe their Mr Sunny eggs?… hang on… do male dinosaurs keep the eggs?… maybe Mr Sunny got divorced before the babies were born… and Mrs (or not Mrs anymore) Sunny decided to leave him with them all… Yep, okay I am a tad bit weird discussing an inanimate object’s relationship.

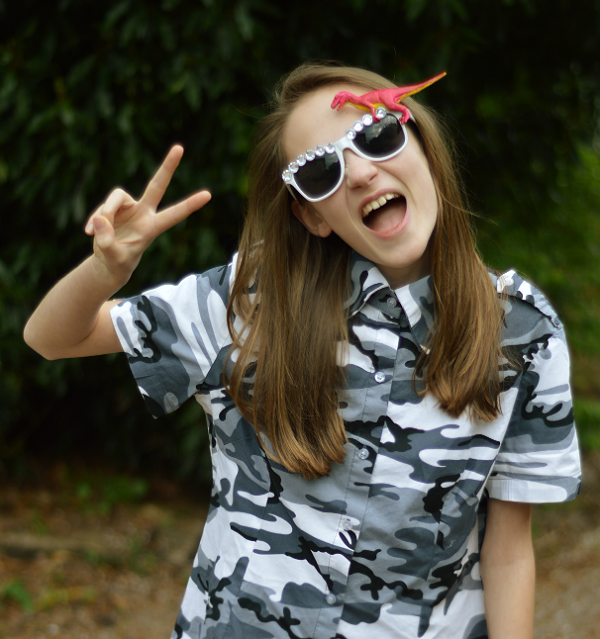
diy embellished dinosaur sunglasses spangled diy embellished dinosaur sunglasses spangled diy embellished dinosaur sunglasses spangled diy embellished dinosaur sunglasses spangled diy embellished dinosaur sunglasses spangled CAMO BLOUSE €2.00 (JUMBLE SALE)

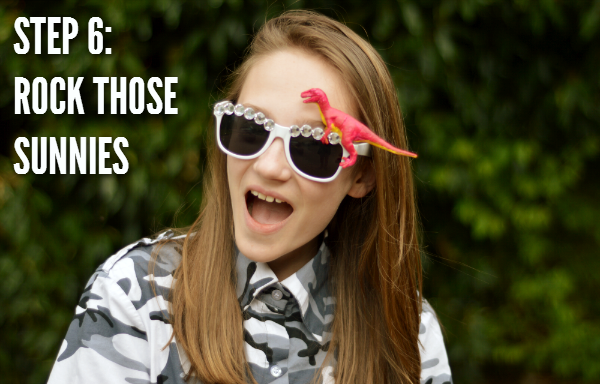
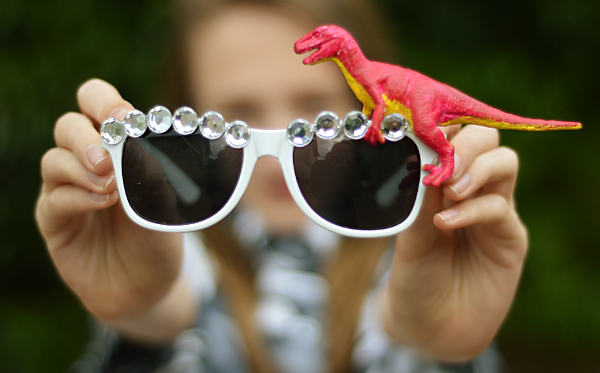
Dah-dah! The final step is to… ROCK THOSE SUNNIES! YEAH! Papa Posh said I was brave to think I might wear these out… maybe I’ll save them for my trip to England, where wearing crazy clothes seems to be more acceptable. I love them though, and I love how Mr Sunny turned out. Do you like his colourful make-over? I certainly do! I do have to say, I’m not sure these will become my every day pair of sunglasses for this summer, but I am sure they will get used *fingers crossed*… and I will be sure to report back on how many strange looks, and laughs I get from the locals… Did I have a bit too much fun with editing that one picture above? Yes. Do I regret it? Absolutely not.

If you re-create these sunglasses, do make sure to tweet me (@TollyDollyPosh), or tag me on Instagram (@tdposh) and I will be sure to RT and have a gander!

If you liked this post and you would like to see more, do leave a comment, and maybe even nominate my blog as Best Teen Style blog here! Thanks so much! 😀

You Might Also Like

Bundle: An Online Blogging Community

By March 12, 2014 Competitions, DIY & Lifestyle

Over the past few months, I have kept something under wraps… I have been hinting in tweets with *cough* from time to time, but I haven’t actually ever told you what I was doing, so today is the day! There are a few reasons why I didn’t tell you, but if you read on, you will know exactly what I am talking about! 🙂

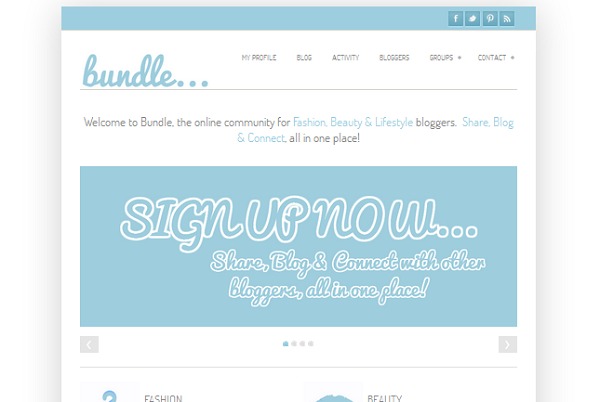
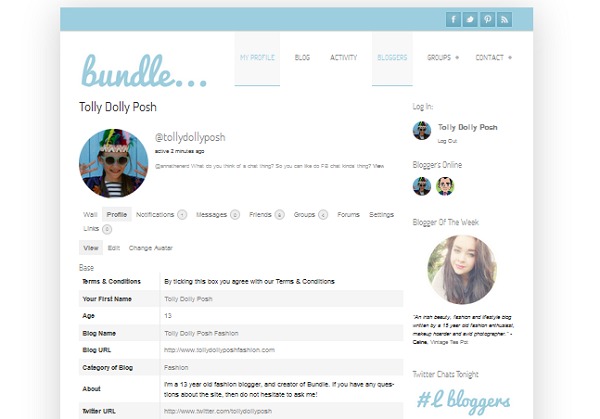
bundle magazine online blogging community fashion lifestyle and beauty bloggersThe thing I have been working on for the past few months is a new site! It’s not another blog, don’t worry TDPFashion is certainly staying put, but it’s created by moi! A while back (i.e last August), I had an idea, and I decided to give it a go. That idea, was an online community, just for bloggers! A place where bloggers can connect, share and blog all in one tidy space without any non-bloggers (we love you really) getting in the way! So after a while of forgetting about it, the new year called for a new start. I got back to it and really started it up. After getting test bloggers, and turning the site off and on again over 100 times, I believe it is ready to let my baby free! If it wasn’t ready then I wouldn’t be writing this blog post… duhh! The site is called Bundle (Mag), mainly Bundle but with a blog/magazine on the side!

The reason I didn’t tell you until now is because I know some people may judge when they hear ‘a teen blogger has made an online blogging community‘. Some people might think it is a bit of a naff site made on Wix (we’ve all been there), and that it really has no purpose. I am here to prove those people wrong! I hope it doesn’t seem like a naff site, because although I couldn’t get high-end site designers to help me, I have tried my best to make it look and feel good! It was really interesting learning how a community site works and how to pull it all together, and I hope you like the outcome of it all! It’s really easy to sign up, you can watch this video here too…

bundle magazine online blogging community fashion lifestyle and beauty bloggersgive-awayI really like it! I think it’s really helpful, and I have already found some great bloggers just from gathering up test ones! As you can see there are many features… you can add people as friends, talk in groups and forums, become blogger of the week, find out what Twitter chats are on, you can even write for the Bundle ‘magazine’! How cool?! Make sure you sign up as there is a give-away for £100 at MasterShoe My Shu! That is pretty cool, I must say… I really do hope you like it and I definitely recommend signing up… 😉 hehe!

Thank you so much for supporting my ideas as usual! That is one of the kicks of starting new projects because I know you guys will love it! 😀

You Might Also Like

Blogging Top Tips: Cameras & Lenses

By March 10, 2014 DIY & Lifestyle

I’ve been thinking for a while about getting my Blogging Top Tips series back on the road again, so here I am! It’s back! I’m pretty sure everybody enjoyed it last year, but there were a few things that I missed off the list. In the next few months I am going to cover a few things including Cameras & Lenses, Search Engine Optimisation, and many other things which bloggers might need to know! I hope it is helpful, and that you take something from it!

blogging top tips cameras and lenses for blogging nikon d3200Options for Cameras –

Generally, people say that your blog will be more unique and interesting if you use your own images, and I totally agree with that statement. Using other people’s images for things can make it slightly rigid and boring, in my opinion, so that is why most bloggers will have this question on their mind at some point: ‘What camera should I buy?’  A lot of people go, ‘I think I’ll buy a DSLR’, without even thinking of the other options…

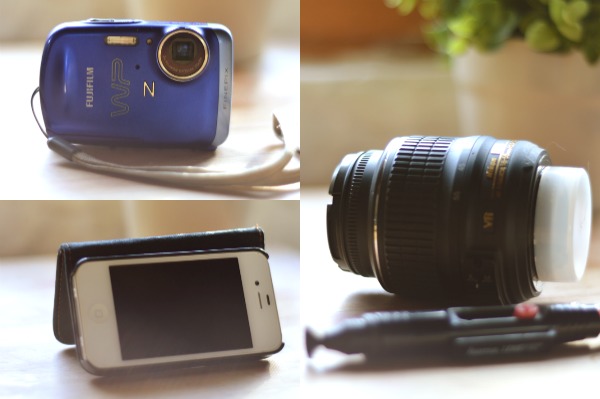
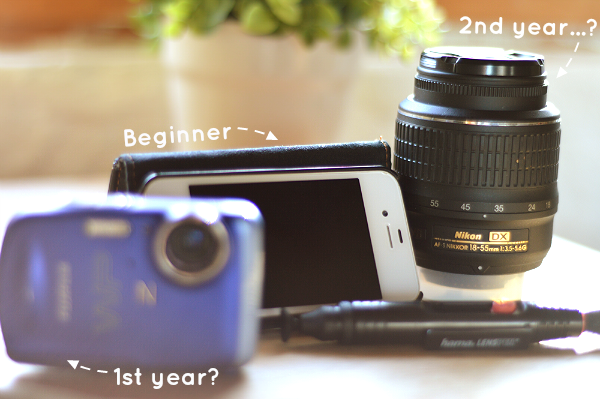
The first option is, your smart phone or tablet. Of course this way of doing it won’t be as high quality, but most people have one with them so it’s an easy option. The second option is a digital camera. For quite a long time I was using an old digital camera which was pretty good quality and just had it’s simple built in zoom lens, and it worked fine. Going for this option it will save you quite a bit of money also. The third option, is going for a Digital Single-lens Reflex camera (a DSLR), which usually have a hefty price tag of over £200, which can be a lot to spend for just your blog. Although these are really good quality and you can produce professional looking shots, you do have to learn a lot more before you can say ‘I’m such a good photographer’ just because you have an expensive camera.

SKIP TO:   Smart Phones & Tablets // Digital Cameras // DSLR Cameras


Smart Phones & Tablets –

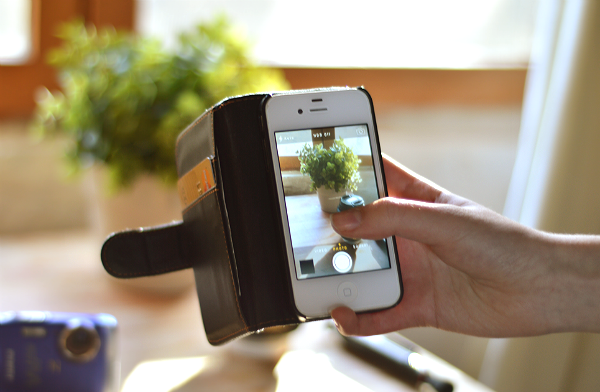
blogging top tips cameras and lenses for blogging nikon d3200Using a smart phone like an iPhone or Android, is actually quite easy. It seems hard to get a good shot but there are several things which will enhance your final images. The 3 things which you need to remember to do are: 1 – Focus, focus, focusMake sure you tap on your screen on the subject to bring it in to focus. It’s the most important thing to make sure you do, as it will increase the quality of your picture. 2 – LightingYou need to make sure you are taking your pictures either outside, or by a window. It will make the clarity of the shot better and it will make focusing easier. 3 – Save in full sizeWhen emailing or downloading the image off your device, make sure you click ‘Actual Size’ because it will save it in full quality, and you’ll be able to resize it to your blog photo width. Another benefit of using a phone is the fact that you can Instagram and share your images directly from your phone! Bonus! If you want to see an example of ‘great’ (IMO) iPhone photography, look at this picture I took last year!

Digital Cameras –

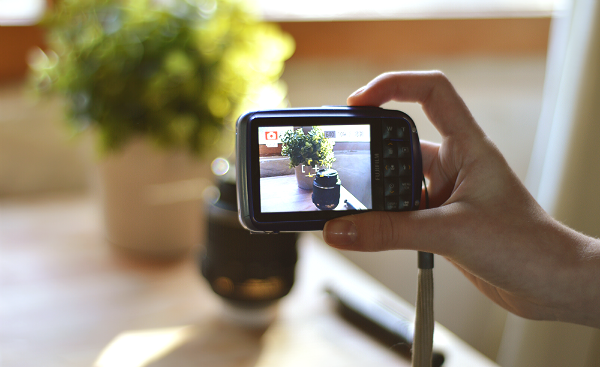
blogging top tips cameras and lenses for blogging nikon d3200Using a digital camera will increase the quality of your shots, create a better depth of field as well as focus things better. The cost of these cameras can start from just £50.00 and have most functions which you might want from a DSLR like filming in high quality, and take great landscape pictures. They’re also compact and small so they are great for things like travel, or vlogging which a lot of bloggers do on the side. I’d recommend investing in one of these if you are starting out and do really want your pictures to be better quality.

DSLR Cameras –

blogging top tips cameras and lenses for blogging nikon d3200This is the part of this post where I really want to let people know why they should and shouldn’t buy a DSLR camera. It may seem obvious to buy one, but they aren’t for everyone. With DSLRs, the quality is outstandingly better than a compact camera or smart phone. Not only can you save images in amazing quality, you can adjust things a lot easier like ISO, Aperture, Shutter Speed etc. There also lots of different cameras for different things, which means making a decision for you is quite easy. Filming quality is immensely better in appearance and sound.

As you can see DSLRs, are good options as they are all rounders, but there are some reasons to be careful on making this big decision. 1 – PriceThe price of these cameras are quite a lot which means you might be saving for a while, or you might be with a loss of coins for a while. 2 – WeightTravelling and using a DSLR out and about, can be quite tricky. These cameras are heavy things so if you are going from one place to another taking pictures, this might get in the way. 3 – Other ExpensesThings like cases, lens pens, SD cards, straps, tripods, lighting (optional) and repairs, all add up in price, so they are expensive to maintain.

Choosing The Right DSLR –

Nikon & Canon are the best brands to go too if you want to buy a DSLR. There are several options from each brand all at different price ranges. If you are beginner with these cameras, I suggest the Nikon D3200 as it is quite cheap compared to others and you can usually get a good deal with a kit lens. When you do come to chose one you need to make sure that you are getting a camera which is compatible with most lenses. The Nikon D3200 which I use isn’t compatible with older lenses which don’t have AF-S, so some lenses can only work with Manual focus. It’s definitely something to think about. Just so you know, all pictures in this post were taken on a Nikon D3200 with a 50mm 1.8d lens!

Lenses –

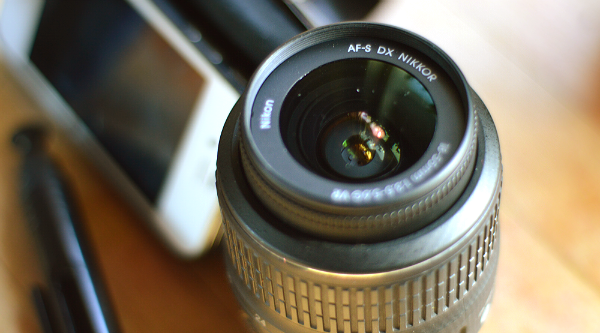
You don’t necessarily need to have more than 1 lens after you have a kit lens because they are pretty good. The difference between lenses include Aperture & Zoom. For most bloggers a kit lens (usually 18-55mm Zoom with f/3.5-5.6) will do, but if you really want your photos to stand out from the crowd and look nice and pretty with bokeh (blur in the background), then you want to look at lenses with lower F stops. The 50mm or 35mm f/1.8 lenses are brilliant options for DSLRs as they have amazing depth of fields and can create awesome bokeh. The 50mm f/1.8 is the cheapest option of all of the lenses for most brands, so I’d definitely look into it.

blogging top tips cameras and lenses for blogging nikon d3200What Now?

You’re probably now thinking, well what now? It’s a hard decision choosing a camera, but if I were you I would go along with something like the above. If you are a new blogger, I would go for (or keep) a Smartphone or Tablet because it is pretty good quality when you listen to the 3 steps I listed. Then maybe move up to a Digital Compact Camera which isn’t that much money and will be helpful even when you are not blogging! When you reach 2 full years of blogging, I would look into DSLRs. Of course this is just what I recommend for newer bloggers, but if you want to, go full steam ahead! My sister who is starting up a baby blog (so excited! 😀 ) has already bought her self the Nikon D3200 and is getting the practice in, so if you feel like it, go with your gut! This is just my opinion and advice!

Good Luck! I also recommend checking out these 3 lovely bloggers who know quite a bit of tech-y photography stuff: Carrie//Natasha//Sarah

You Might Also Like

DIY: Girl Scout Sash Rookie Mag Inspired*

By February 23, 2014 DIY & Lifestyle, My Style

Howdy! So, quite a while ago now, I had an idea. How about I do DIY each month (or every other), not only for myself to learn things, but for some ideas for you guys?! So, I’m here, and I’m doing it for you! This is the first ‘major’ DIY I have done, so please excuse any mistakes, but I hope it is a fun one! Enjoy…
diy rookie mag sash camp rookie my fabrics

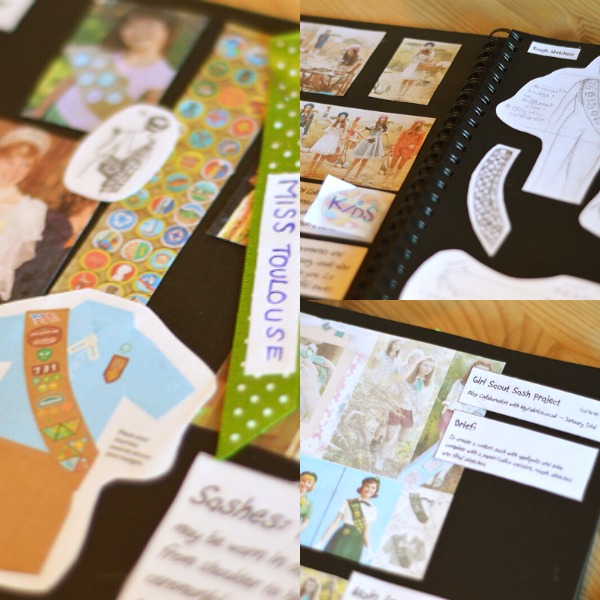
I originally saw this idea in the Rookie Yearbook One, wear they did like a ‘Girl Scout’ inspired shoot, called ‘Camp Rookie’. I thought it was a really cute idea and that a sash could become an awesome fashion accessory. I put a few bits and bobs in my scrap book and started making it up! I also thought it would be cool as Orla Kiely’s SS14 collection was sort of ‘Girl Scout-esque’. So here is my DIY Rookie Mag Sash…
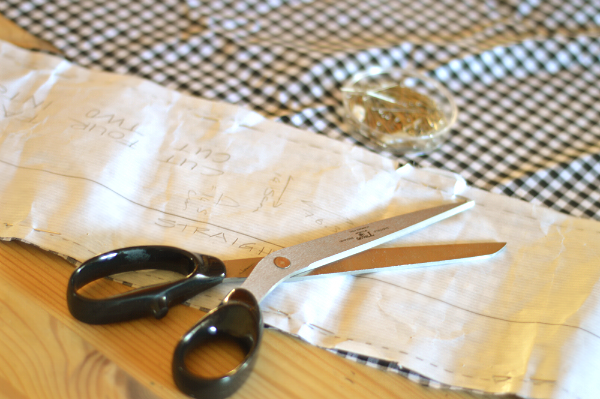
diy rookie mag sash camp rookie my fabricsdiy rookie mag sash camp rookie my fabricsThings You Will Need: Monochrome Check Cotton £6.45/m (My Fabrics)*, Appliqués  (My Fabrics)*, Interfacing, Scissors, Pins, Sewing Machine, Pattern Paper/Baking Paper, Poppers, Un-picker & an Iron.

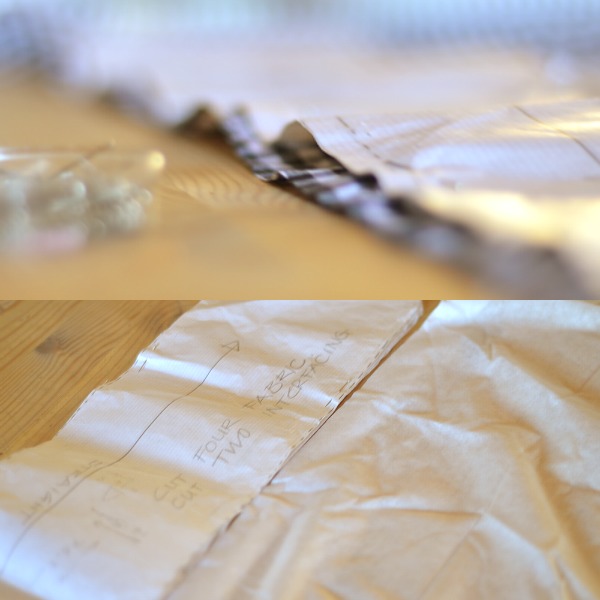
The first thing you need to do is create a pattern. I’ve made a small rough guide for you above, which is the shape you need to go for. I went for 14.5cm wide and 76.3cm long, with the end point being 14.5cm by 14.5cm. You will use this as a guide to cut along. You can either use baking paper, or thick long paper (what I used). Cut that out, and then your pattern is done! You also need some pins out, and of course some scissors to get snipping! On the pattern guide, you will notice I have put ‘STRAIGHT’. This means you need to put the pattern down on the straight grainnot the bias (the stretchy way).

diy rookie mag sash camp rookie my fabricsYou want to cut of the sash shapes on the fabric of choice (make sure you pin the pattern down nice and tight before cutting). I chose this awesome check from MyFabrics who are helping me put together this whole post! The selection on their site is amazing! They have so much and you are bound to find something you like! After you have cut the 4 pieces of fabric, you will want to cut of your interfacing. You don’t have to use interfacing, but it makes the sash more sturdy. Don’t worry about being too neat when cutting as you will be trimming off all the ends later on!
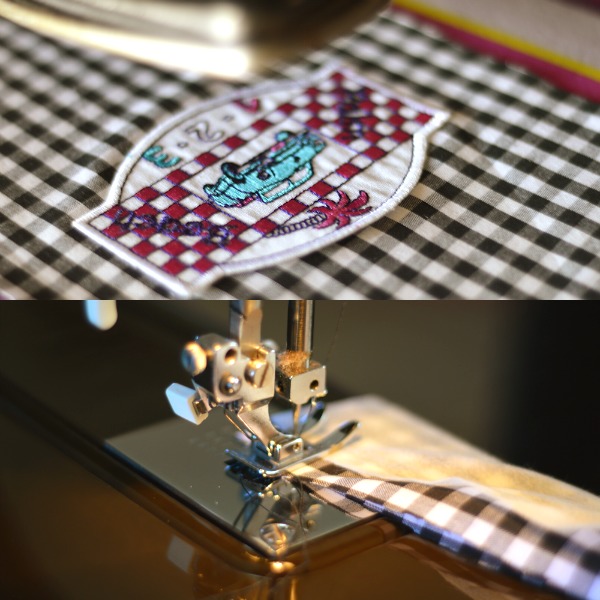
diy rookie mag sash camp rookie my fabricsYou then want to go to your iron. If you are using iron-on interfacing, then at this point you will need to iron the bobbly side onto of the fabric pieces. If your fabric has a pale side, then make sure you are ironing them onto that, but mine was the same on both so there was no need to worry! If you have iron on patches for your sash, then you will need to place and iron, these onto one of the now ‘interfaced’ fabric pieces, obviously, onto the front. You need to make sure to leave 2cm of space on each side, as we will be cutting this off later. I would recommend sewing any non iron-on badges on at this stage. Learn more about Appliqué badges here!

When you have done this, take your 2 ‘interfaced’ fabric pieces, and lay them down interface upwards. Lay them out so that the tops meet (in one long line), and make sure that at least 2cm are overlapping at each ‘top’ end. Do the same to the other two pieces of fabric. Then sew the 2 overlapping pieces together with your sewing machine, just straight down the overlapping part. The below picture is of the 2 ‘interfaced’ pieces and what they should look like…
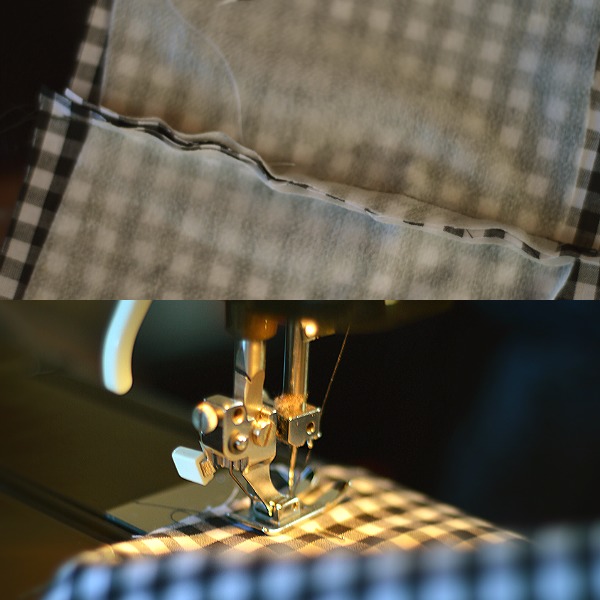
diy rookie mag sash camp rookie my fabricsAfter you have done that, go back to your iron, and flatten the sticking up pieces, down. This is also a good chance to iron them all over again to remove any creases (this makes it easier in the sewing machine). Then you will need to lay the 2 pieces you now have, over the top of each other, making sure they are perfectly in-line, but read this very clearly: You need to have the piece with your iron-on badges on the bottom, facing with the badges, upwards. Then put the other piece with the interfacing facing, upwards. Then you want to pin these, but making sure that the pins are perfectly straight and the heads are not on the outside edge, otherwise you might break your sewing machine needle! Then sew this all up but make sure to leave a big enough gap so you can turn it the right way out. I would recommend leaving this gap near the middle stitch you made earlier. 
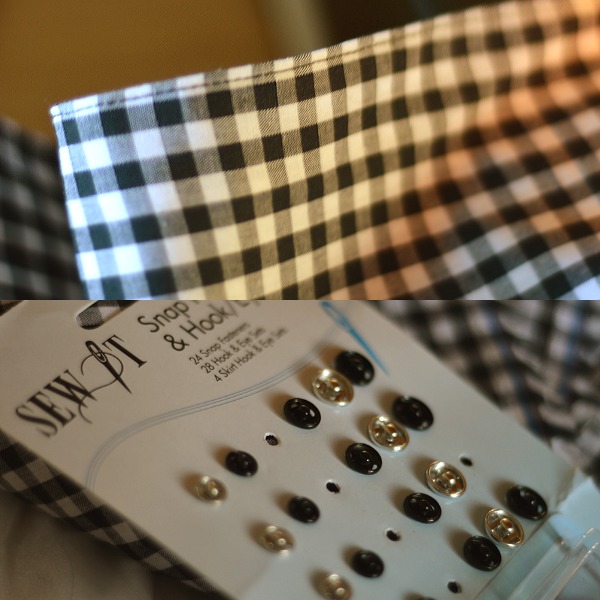
diy rookie mag sash camp rookie my fabricsOnce you have sewn them up, you can now cut off your rough edges, leaving a bit of space around the line you just stitched. Then you will need to pull the fabric through the gap and put it all the right way. After this, it might be a bit puffy. You will need to wet your fingers a bit and sort of roll the edges to get it all straight, making sure you do it all the way round. The points on the end of your sash might be a bit funny and might be still inside the sash, so get an un-picker and slightly pull it out. This will loosen the thread making it a perfect point again. Go back to your iron, and iron it all round very neatly. You then want pop it back into the sewing machine, and go all the way round the sash again, leaving only about 3mm space between the edge, to not only to make the sash a bit neater, but also to close up the gap that is still there.

You can now try on your sash, and find a place down by both points that meet nicely. This will be where you put your poppers. You can put an embroidery stitch if you wish, but I think a popper is a lot more practical. Just sew both pieces on, and voila!
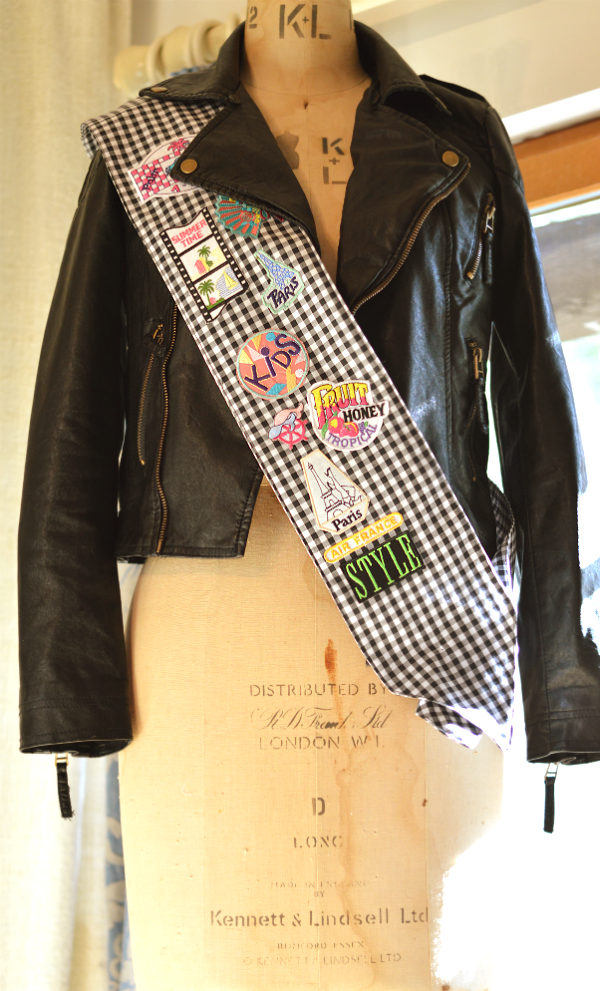
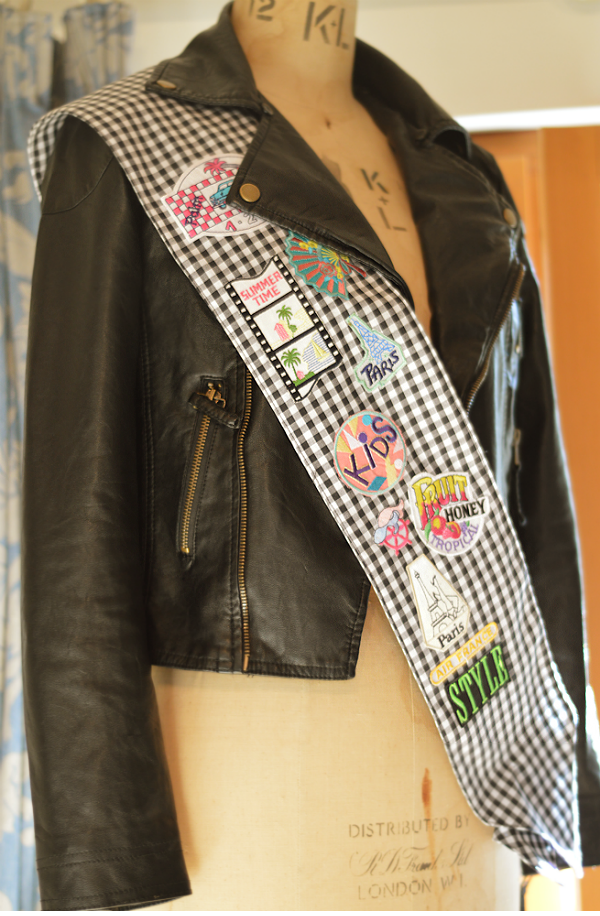
diy rookie mag sash camp rookie my fabrics diy rookie mag sash camp rookie my fabrics diy rookie mag sash camp rookie my fabrics diy rookie mag sash camp rookie my fabrics

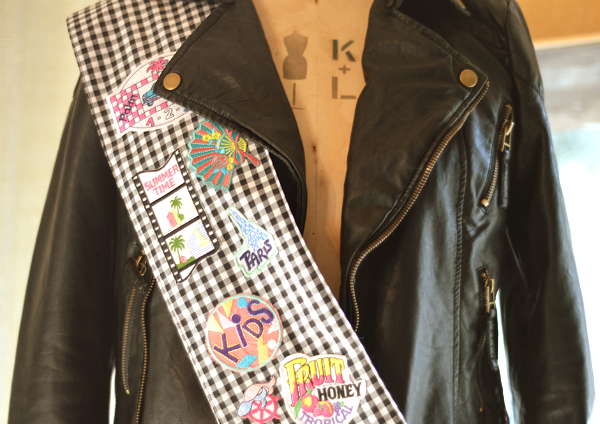
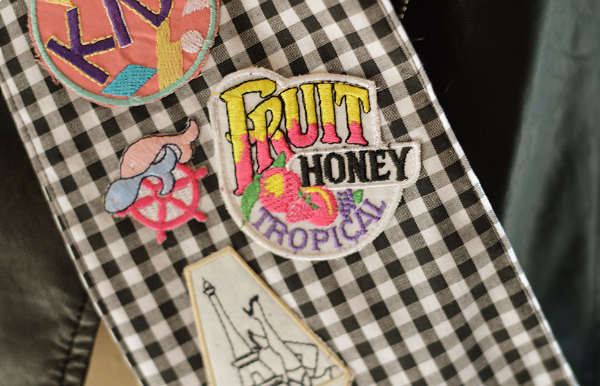
Ta-Da! Job done! I’m really happy with the way it came out as it is quite stiff but you can still move around in it perfectly! I love how bright the badges are and I think making it personal with things like ‘Air France’, makes it properly unique to me! It looks pretty cool around my new faux leather jacket*, non? I think because the checks are monochrome, it will be really versatile and I am sure I will get quite a lot of wear out of it especially in the summer! I really enjoyed doing this little DIY, and if you are interested in making it, but not sure what for, then maybe it would be cool for some kind of photo shoot, or as a gift! There will be an OOTD featuring my awesome sash very soon, so watch out for that! 😀

If you try out this DIY, make sure to take a picture and tag me on Twitter or Instagram! Good Luck! 

(Although MyFabrics provided me with fabric and applique badges, the idea and everything was done by me, absolutely 100%. You can read my full disclaimer here.)
You Might Also Like

Monthly Obsessions: Tumblr, Carrie & Doodles

By January 17, 2014 DIY & Lifestyle, Fashion

I’m back! It’s been so long! I actually feel excited to be writing again! I’m so glad none of you got too upset I was gone 😉 I had a lovely 16 days of chilling with my family and getting lots of baby smiles! I shall not babble on for too long, and tell you how I have been waiting so long to do this post! I’ve been wanting to do a ‘monthly favourites’ sort of post but not things like clothing/products I’ve worn and used, more like things that I have seen and enjoyed looking at… hmm… you’ll get the gist! 😉 (Images from Tumblr/Etsy)

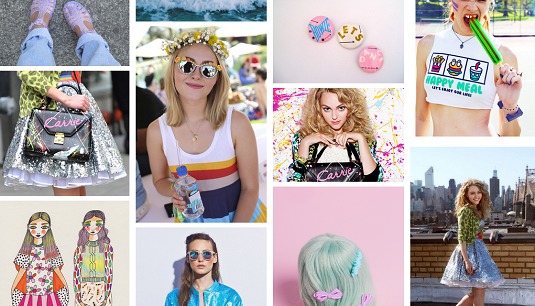
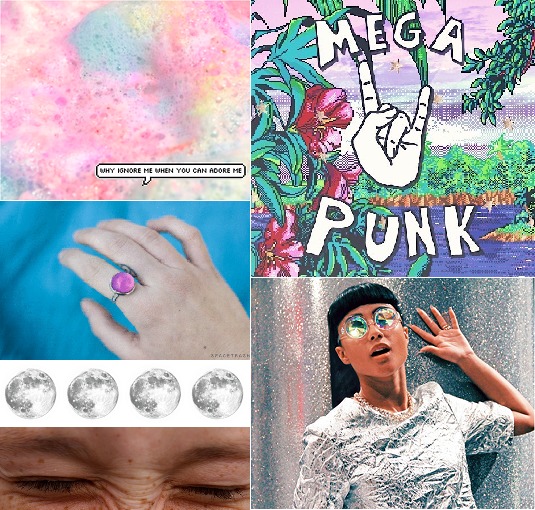
monthly obsessions tumblr carrie diaries outfits freya flavell doodles cryybaby etsymonthly obsessions tumblr carrie diaries outfits freya flavell doodles cryybaby etsyTumblr – My first ever blog, was actually on Tumblr. I don’t really count it as a blog because all I did really was outfits, but after that I sort of left Tumblr, and now I’m back, and oh am I glad. I get so much inspiration from browsing and re-blogging people’s posts. I now know what Pastel Grunge is and I have been left quite confused about what Sea Punk is? I like to post weird and wonderfully coloured things, GIFs of Eddie Redmayne, and gorgeous doodles. If you have Tumblr do let me know because I would love to follow you! You can follow me here or click on the button in the sidebar!
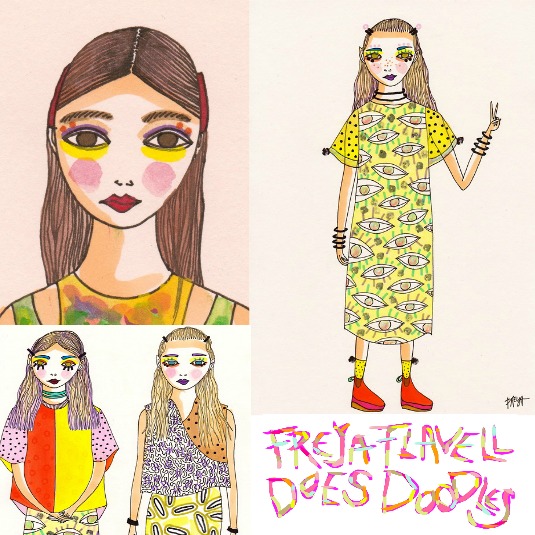
monthly obsessions tumblr carrie diaries outfits freya flavell doodles cryybaby etsyFreya Flavell Does Doodles – I actually found Freya on Tumblr, and I’m in love with her doodles! They are so simple, yet so cute and colourful and she should be really proud of her work. I love finding illustrators who are young and obviously love what they are doing. Her drawings also give me inspiration for outfits and my future hair when I can face up to the fact that everybody and their dogs (that is actually true, their was a programme on it) dyes their hair, and that I will probably end up doing a full shabang rather than just dip dye. Talking of dip dye, doesn’t that purple hair on that one illustration look awesome? Make sure you check out Freya here!
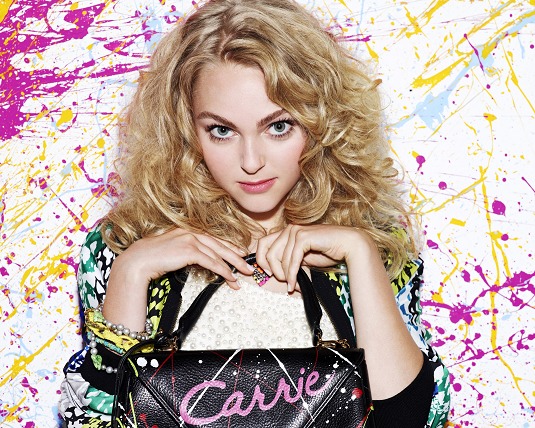
monthly obsessions tumblr carrie diaries outfits freya flavell doodles cryybaby etsyThe Carrie Diaries – Seeing as I am a little bit young for Sex In The City, I recently started watching the prequel with my sister whilst she was over, and even though this is still quite rude and eye boggling at times, (only watch it if you are 13 and over, I warned you) but I really do enjoy it. I enjoy it so much that I am now up to date with the current season. I have ordered the book too so I’m excited to see how well they have portrayed Carrie. Anna-Sophia Robb was a good pick though, she is a really good actress and I have always been fond of her work. Plus, if you want some outfit ideas, then watch this show… or you could follow my Carrie Diaries Outfit Tumblr! 😉

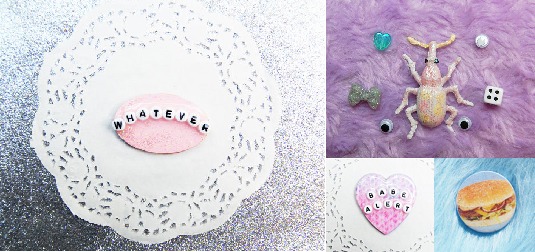
monthly obsessions tumblr carrie diaries outfits freya flavell doodles cryybaby etsyCryybaby – I have started to reach out to individual and more handmade stores instead of just going to my comfort shopping store, ASOS. Whilst searching on Tumblr (surprise surprise), I found Mimi’s store, Cryybaby from Etsy. Being a teen myself (oh my dear waffles (umm) I’m 14 this year!) I love supporting fellow teens, and I love Mimi’s stuff! It’s all so simple, but so cute and pretty darn cheap too! I’m actually going to get a custom necklace made which is pretty cool! Make sure you check out her store! It’s pretty cool!
You Might Also Like

Happy New Year: 2014!

By January 1, 2014 DIY & Lifestyle, My Style

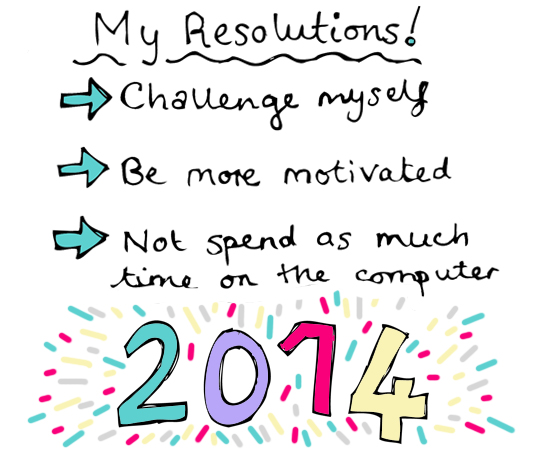
Hello everyone! I know I said I wouldn’t be blogging until mid January, but I decided that I couldn’t just leave without saying Happy New Year could I?! So, Happy New Year! I’m not one for saying ‘New Year, New Me’ because I personally believe that it is just a time to look back and learn from your mistakes, and celebrate your achievements. I’ve already done that in this post, so I thought I would talk about what I want from this year. I feel like 2013 was just the beginning, and that 2014 will be even better… *she hopes* Excuse the messy writing… I scanned it in 😉

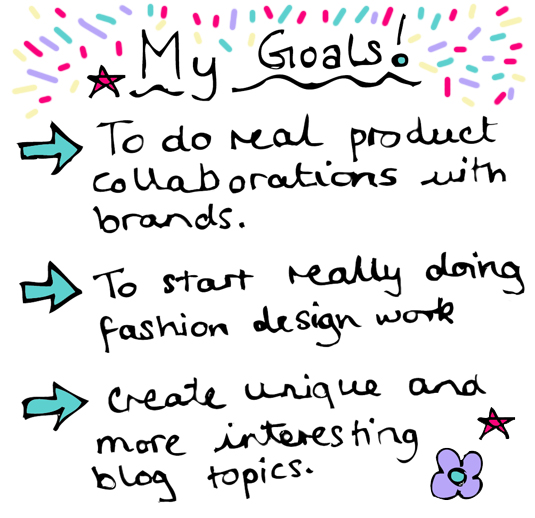
new year 2014 blog resolutions goalsI feel like this year will be the year for me to really push myself, so that is why these are my resolutions. I want to really challenge myself, and not just go for the easy options. I know that sounds weird, but I really want to do things for me, and things which will really help in the future. I also want to be more motivated, to do the things which are more challenging, as well as simple things because I always find myself sitting and back and ‘not being bothered’. I guess, I could use the ‘I’m a teenager’ excuse, but to be fair, I think it would be better if I were to just do things as and when, and my whole life would become a bit easier I guess. Then, the hardest one… to not spend as much time on the computer. It will be hard, but I think I can do it! I will be able to do it! That is when I delete my new Tumblr account… ow, I cannot do that… I just like it too much now…

new year 2014 blog resolutions goalsThese are a few of my goals. Last year (woah, seems weird saying that), my goals were to get featured in something or other (accomplished, yay!) but this year, they are more to just, learn. To just get better, and improve. 2013 was amazing, yes I would still love to be in magazines, but to be able to learn how to go through the whole design process, or learn how to print patterns, I really do not care what it is, I want to know how! I also want to stretch my thoughts and start creating new blog content. Maybe starting and finishing series. I’d LOVE to collaborate with a brand in a design way, it would be amazing. I know it’s possible, and I can almost feel it on the end of my finger tips.  I accomplished 827,920 page views in 2013, and to be fair, I feel I have gained a great knowledge that those numbers don’t matter, and that is why my goals are so different. I am so so so grateful for all the views and followers I have, but I am starting to realise that my knowledge is stronger than the numbers. 827,920 is an amazing number for me though, I thank everyone who comes on here each day/week/month/year, SO much!

I hoped you liked this short little post and that you enjoyed your New Year. I’m now off for a while! I will be back on the 16th January, back in a full blogging swing! So, I shall see you soon! If you are in need of contacting me, then please click hereThank You!


You Might Also Like