Yes, you read that right… today I am not going to be writing this post, in fact, my dad/father/père, also known as, Papa Posh, is taking control! If you didn’t know already, from day 1 (I’m talking iPhone photography days), my dad has taken my outfit photos (no idea why, it’s just stuck), so I thought it might be helpful to get him to write about what he’s learnt, in the form of a ‘Blogger’s Guide to Photography’! Hopefully this will help any of you fellow bloggers and your (family members) photographers! Take it away Papa Posh… (Please note that I don’t have internet at the moment and am using McDonalds as a second home! Ha! I will reply to comments and emails as soon as I can, don’t fear!)
Get the lighting right…
The most important thing is light. I’ve seen the difference the light can make between a duff shot and one that leaps off the page. Try and capture the light and beautiful photos will follow I guarantee it. For your outfit posts or pictures of people, the best time of day to photograph is the ‘Golden Hour,’ which is the last hour or two of sunlight in the day. You can pose with the sun slightly behind or to one side of you to make you glow, which flatters every skin tone.
I’ve noticed a hugh difference doing this when sometimes we set out to shoot at the wrong time of day knowing from the first few images that it’s not going to work and that we need to come back to it later.
Compose your shot…
Much of the editing out of an image can be done with image editors but you’ll never be able to change the angle of the shot once it’s taken so getting the composition right in the first place makes a huge difference. Be very aware of what to leave in and out of the frame… One mistake I made early on was where to stand in relation to Tolly; I’m 6′ 4” tall so I had a habit of not bending my knees to take the shot of Tolly’s outfit shots, which made her head look too large (whoops!).
So, have your photographer bend their knees a bit so that the camera lens focuses on the centre of the body. On the other hand if they bend down too far, your feet will look huge and your head tiny so be careful unless that’s the effect you crave!
Get a decent camera and a nice lens…
Now I know we can all use a smart phone to take photos but you can’t beat the ease of using a DSLR. These cameras give you so much more freedom and precision to snap away in an instant. That’s not to say an iPhone (other brands available) will not deliver the great shot, but your trusty DSLR will be much more practical – it is after all a camera not a phone.
I also recommend investing in a nice lens… for outfit photos and close up shots, I’d now recommend a 50mm or 35mm f/1.8 lenses to give the depth of focus that makes everything look that much better (bare in mind that a 50mm is less practical for full length shots, but it does the job well for the price). Tolly’s deleted more images than I’d like, due to my focus not being as crisp as she needs… so take note of that too. Fussy or what!?
Choose an interesting location or backdrop…
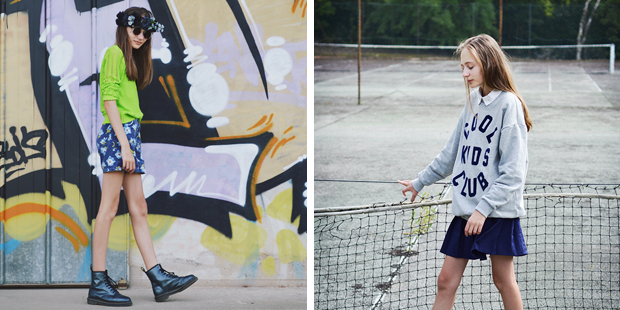
Try and find some interesting walls for your backdrop so that you can quickly and easily pop to the location and take some shots. Use a garage or barn door or make use of natural surroundings. Use everyday props in your shots to add some interest and intrigue! I’ve taken shots of Tolly at markets, on the beach, abandoned tennis courts, antique stalls, next to vintage cars, alongside graffiti… in fact anywhere where she thinks the background will add to the message she’s trying to deliver. So pay attention to what’s around you, and with a little care, your images will add interest for your readers every time!
Avoid using flash…
This is a common mistake to make when you have an all singing all dancing camera that wants to get it right for you, and then doesn’t. Just turn off your automatic flash. Auto flash makes the photo look flat and washed out, don’t let this happen to your photos. Natural light is perfect, so take advantage of it even if this take several attempts. I know it can be frustrating but be patient and you will be rewarded with an image to be proud of.
Hopefully this has helped you and your photographer, and will make your photography sessions a whole lot easier and quicker to get through. Let us know how you get on in the comments! Who knows, you might just see Mama Posh writing a post sometime soon…
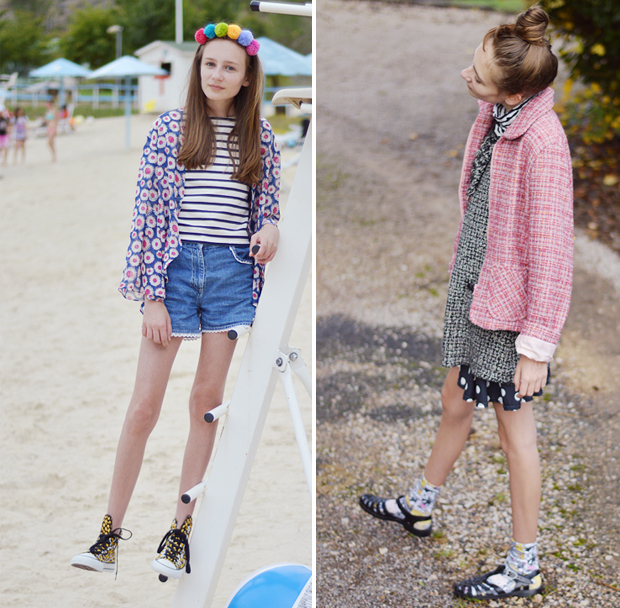
OUTFITS FEATURED: A La Plage // Chanel A/W Inspired // Fat vs Thin Debate // Tennis Court





17 Comments
Great tips, love your blog
Adaora
http://www.always-becoming.com
Great tips! I definitely need to work on composition and finding interesting locations! 🙂
Lauren | shynature.blogspot.co.uk
Hehe ^.^x
These are brilliant tips – especially the mention of flash. It makes my head hurt when I see people using the camera on auto and their flash popping up! :3
Haha, so true! Glad you liked it x
thank you for the tips love your blog xxx its amazing keep going your doing great
Awww thank youuu! x
Loved this post! It’s extremely helpful. There aren’t that many interesting places/different backgrounds to go in my town though so that’s something I need to use my imagination in :)x
My life as Anu | bloglovin
Glad you found it helpful! 🙂 xx
really great post! Papa Posh and you as model make a great team. always love the settings, where you take them. x
Aww thanks so much Christina! <3xx
This is great! Really helpful!
Love
Pili
Pils13.blogspot.com
Aww thank you! Papa Posh says thanks too 😉
Haha good on your Dad and shame about the internet!
http://www.liquidgrain.co.uk
Hehe 🙂 And I know… 🙁 At my neighbours now! x
This was so helpful!! I often use my local park for pictures just because it has amazing scenery!!
Kiana x
teeninthetwentyfirst.blogspot.com
Aww no worries! I think Papa Posh will be glad to hear that 🙂 xx