

Howdy! So, quite a while ago now, I had an idea. How about I do DIY each month (or every other), not only for myself to learn things, but for some ideas for you guys?! So, I’m here, and I’m doing it for you! This is the first ‘major’ DIY I have done, so please excuse any mistakes, but I hope it is a fun one! Enjoy…
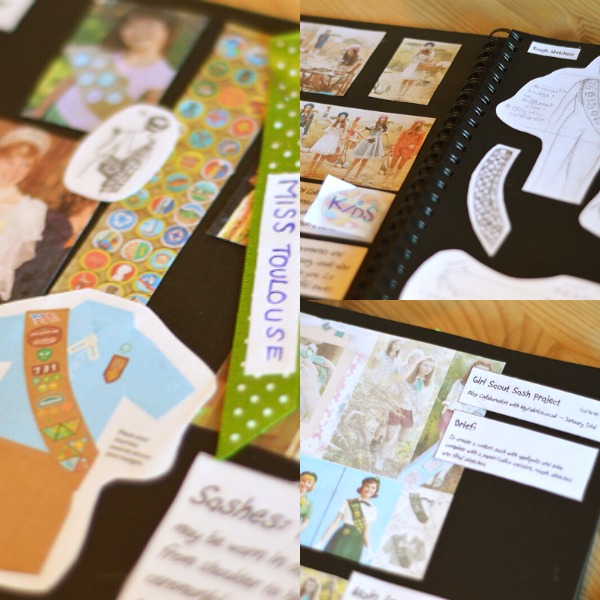
I originally saw this idea in the Rookie Yearbook One, wear they did like a ‘Girl Scout’ inspired shoot, called ‘Camp Rookie’. I thought it was a really cute idea and that a sash could become an awesome fashion accessory. I put a few bits and bobs in my scrap book and started making it up! I also thought it would be cool as Orla Kiely’s SS14 collection was sort of ‘Girl Scout-esque’. So here is my DIY Rookie Mag Sash…
 Things You Will Need: Monochrome Check Cotton £6.45/m (My Fabrics)*, Appliqués (My Fabrics)*, Interfacing, Scissors, Pins, Sewing Machine, Pattern Paper/Baking Paper, Poppers, Un-picker & an Iron.
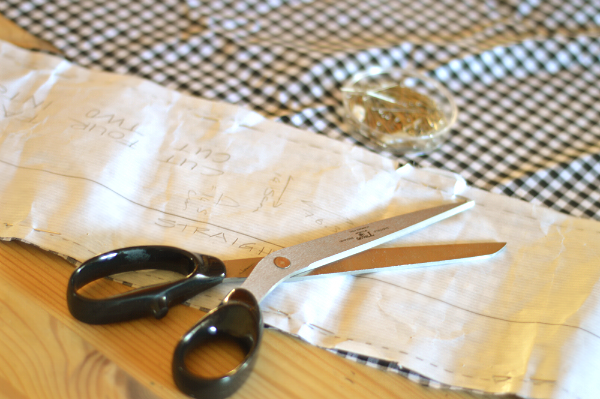
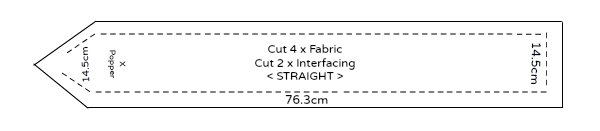
The first thing you need to do is create a pattern. I’ve made a small rough guide for you above, which is the shape you need to go for. I went for 14.5cm wide and 76.3cm long, with the end point being 14.5cm by 14.5cm. You will use this as a guide to cut along. You can either use baking paper, or thick long paper (what I used). Cut that out, and then your pattern is done! You also need some pins out, and of course some scissors to get snipping! On the pattern guide, you will notice I have put ‘STRAIGHT’. This means you need to put the pattern down on the straight grain, not the bias (the stretchy way).
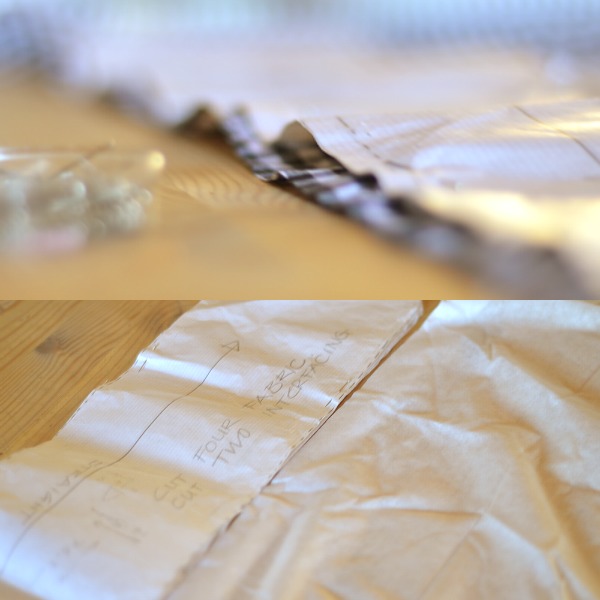 You want to cut 4 of the sash shapes on the fabric of choice (make sure you pin the pattern down nice and tight before cutting). I chose this awesome check from MyFabrics who are helping me put together this whole post! The selection on their site is amazing! They have so much and you are bound to find something you like! After you have cut the 4 pieces of fabric, you will want to cut 2 of your interfacing. You don’t have to use interfacing, but it makes the sash more sturdy. Don’t worry about being too neat when cutting as you will be trimming off all the ends later on!
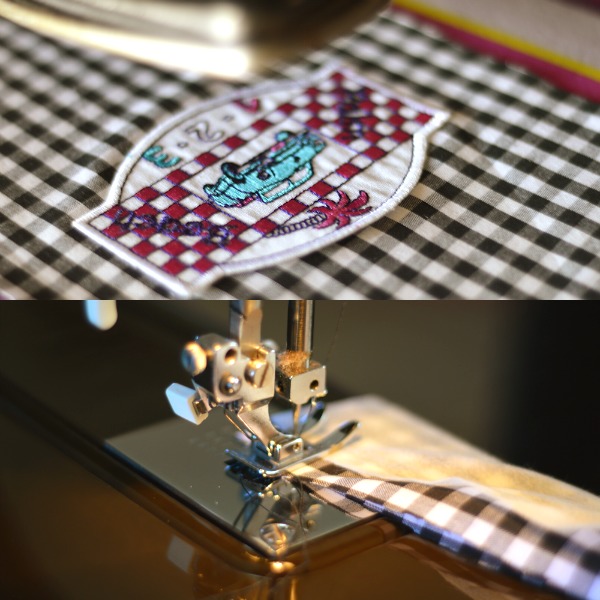 You then want to go to your iron. If you are using iron-on interfacing, then at this point you will need to iron the bobbly side onto 2 of the fabric pieces. If your fabric has a pale side, then make sure you are ironing them onto that, but mine was the same on both so there was no need to worry! If you have iron on patches for your sash, then you will need to place and iron, these onto one of the now ‘interfaced’ fabric pieces, obviously, onto the front. You need to make sure to leave 2cm of space on each side, as we will be cutting this off later. I would recommend sewing any non iron-on badges on at this stage. Learn more about Appliqué badges here!
When you have done this, take your 2 ‘interfaced’ fabric pieces, and lay them down interface upwards. Lay them out so that the tops meet (in one long line), and make sure that at least 2cm are overlapping at each ‘top’ end. Do the same to the other two pieces of fabric. Then sew the 2 overlapping pieces together with your sewing machine, just straight down the overlapping part. The below picture is of the 2 ‘interfaced’ pieces and what they should look like…
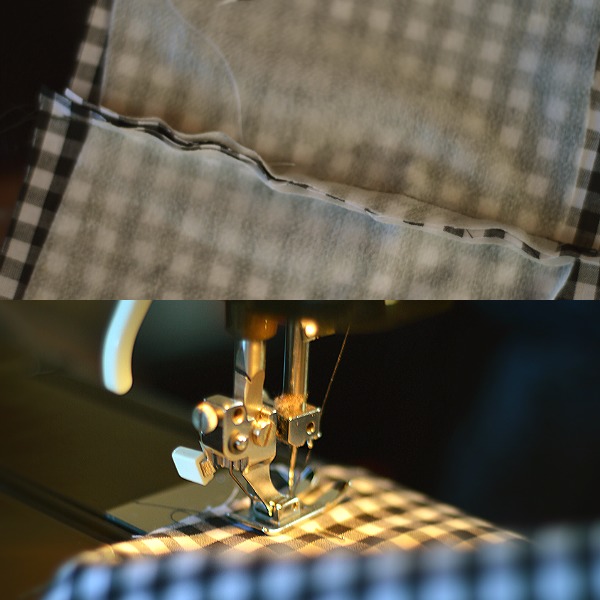 After you have done that, go back to your iron, and flatten the sticking up pieces, down. This is also a good chance to iron them all over again to remove any creases (this makes it easier in the sewing machine). Then you will need to lay the 2 pieces you now have, over the top of each other, making sure they are perfectly in-line, but read this very clearly: You need to have the piece with your iron-on badges on the bottom, facing with the badges, upwards. Then put the other piece with the interfacing facing, upwards. Then you want to pin these, but making sure that the pins are perfectly straight and the heads are not on the outside edge, otherwise you might break your sewing machine needle! Then sew this all up but make sure to leave a big enough gap so you can turn it the right way out. I would recommend leaving this gap near the middle stitch you made earlier.
 Once you have sewn them up, you can now cut off your rough edges, leaving a bit of space around the line you just stitched. Then you will need to pull the fabric through the gap and put it all the right way. After this, it might be a bit puffy. You will need to wet your fingers a bit and sort of roll the edges to get it all straight, making sure you do it all the way round. The points on the end of your sash might be a bit funny and might be still inside the sash, so get an un-picker and slightly pull it out. This will loosen the thread making it a perfect point again. Go back to your iron, and iron it all round very neatly. You then want pop it back into the sewing machine, and go all the way round the sash again, leaving only about 3mm space between the edge, to not only to make the sash a bit neater, but also to close up the gap that is still there.
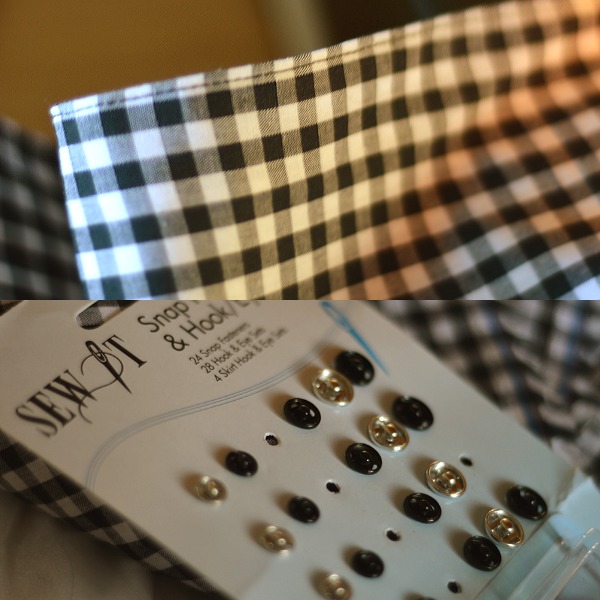
You can now try on your sash, and find a place down by both points that meet nicely. This will be where you put your poppers. You can put an embroidery stitch if you wish, but I think a popper is a lot more practical. Just sew both pieces on, and voila!
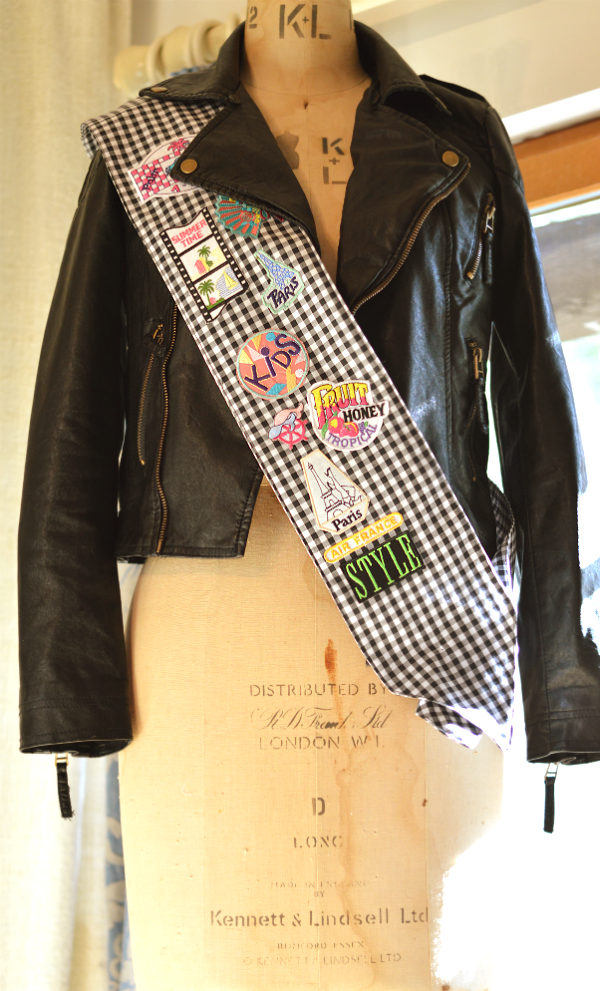
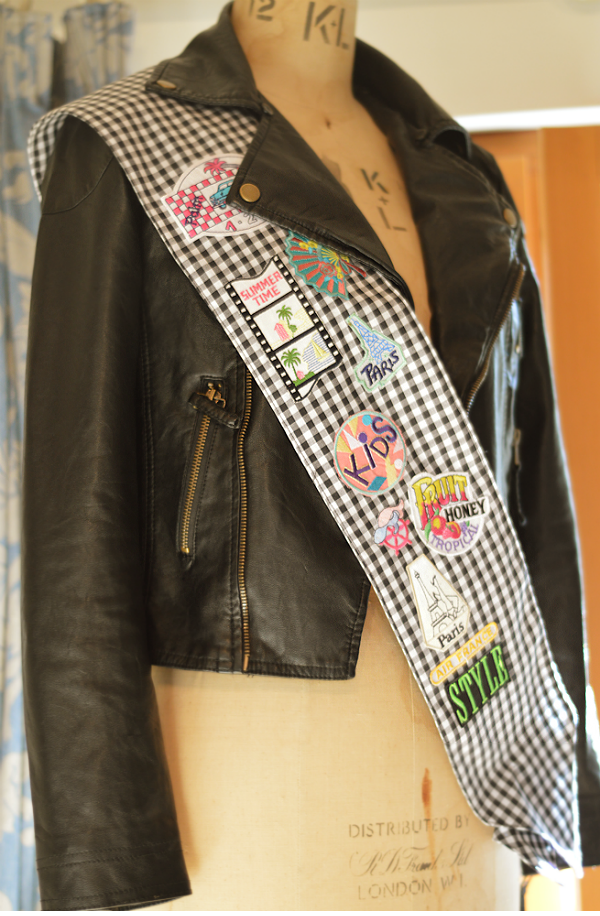
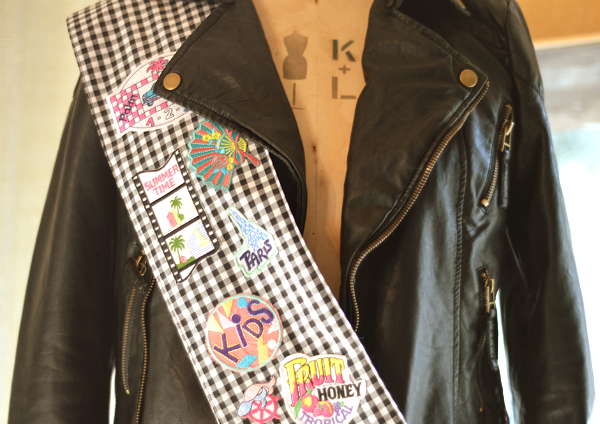
Ta-Da! Job done! I’m really happy with the way it came out as it is quite stiff but you can still move around in it perfectly! I love how bright the badges are and I think making it personal with things like ‘Air France’, makes it properly unique to me! It looks pretty cool around my new faux leather jacket*, non? I think because the checks are monochrome, it will be really versatile and I am sure I will get quite a lot of wear out of it especially in the summer! I really enjoyed doing this little DIY, and if you are interested in making it, but not sure what for, then maybe it would be cool for some kind of photo shoot, or as a gift! There will be an OOTD featuring my awesome sash very soon, so watch out for that! 😀
If you try out this DIY, make sure to take a picture and tag me on Twitter or Instagram! Good Luck!
(Although MyFabrics provided me with fabric and applique badges, the idea and everything was done by me, absolutely 100%. You can read my full disclaimer here.)