Tolly Dolly Posh Fashion
Tolmeia Gregory New Site
Browsing Tag

diy

Upcycling Clothes I Never Wear | Handmade Scuba Bikini

By May 30, 2018 DIY & Lifestyle

Summer (and its storms, it seems) is officially in full swing and fortunately, it came at just the right time for me to finish one of my recent DIY and upcycling projects. Transforming your unused clothes is just one of the many ways you can create a more sustainable wardrobe, so, here’s an example of how to do just that…
How to Make a Handmade Bikini out of Old Clothes

How to Make a Handmade Bikini out of Old Clothes


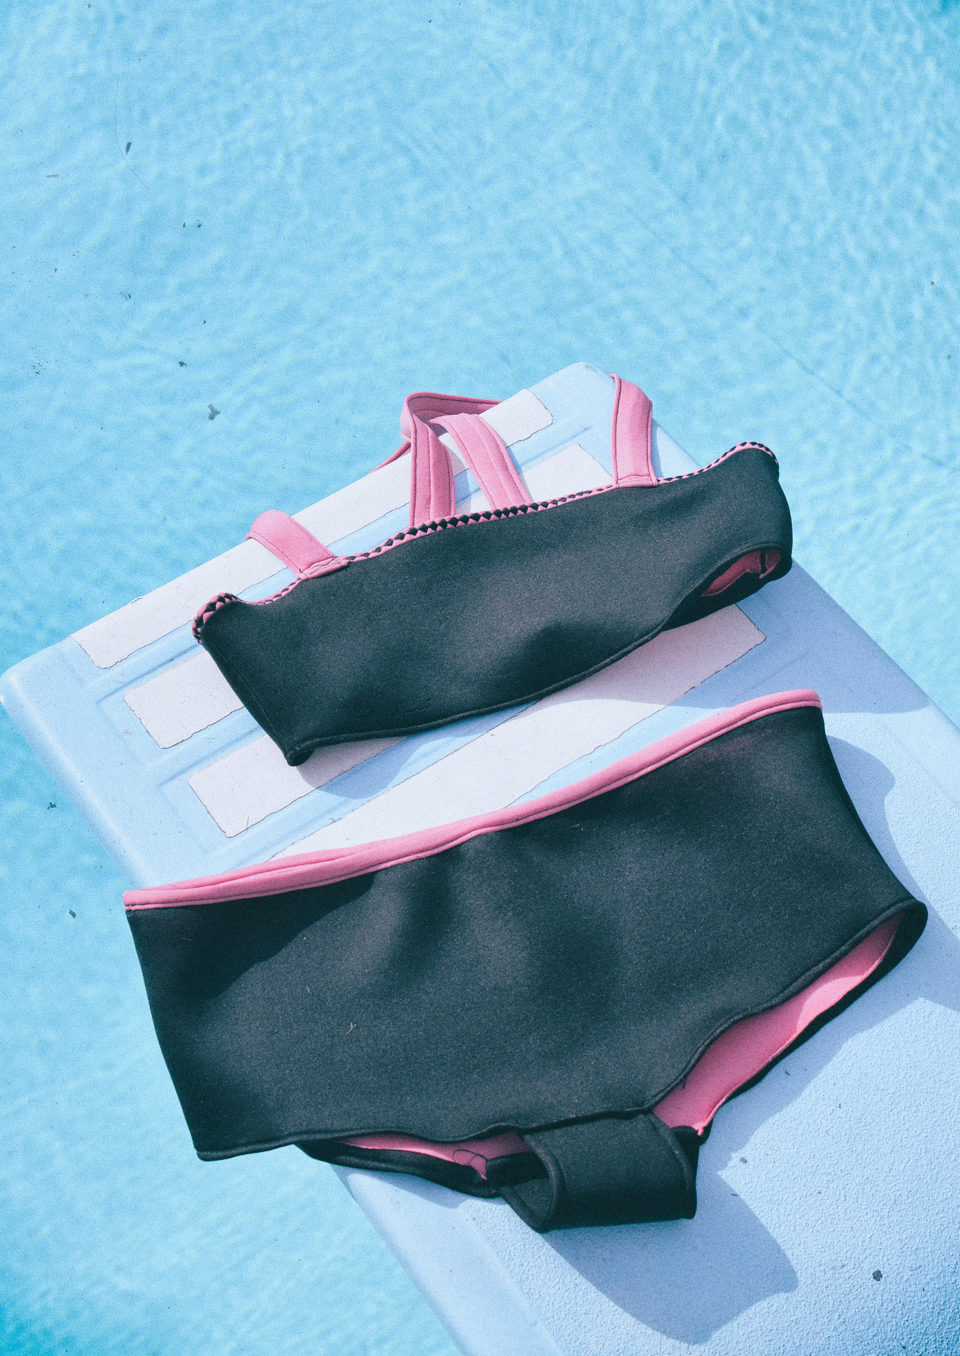
HANDMADE BIKINI – Old Scuba Top (Glamorous – old) // Thread // Sewing Machine // Pins


I’m very grateful for the fact that most of my summer is filled with bright, sunny days, hot enough for a dip in the pool on a regular basis. However, this does mean I use swimwear a lot so eventually, my very slim choice of bikinis and one-pieces (I’m talking one bikini, one swimming costume) will have had their time. My favourite bikini is now ill-fitting and the swimming costume I’ve had for years is a little on the tight side.

I’d been wracking my brain for months on what I could do with certain unworn items in my wardrobe (or in the bag under my bed) and the pink scuba top I owned was proving difficult to work with. That’s until I had a lightbulb moment and decided to take the fabric literally – a scuba top will become a scuba bikini.

Technically, the fabric is just a type of neoprene with no real water-resistant features but it does look and feel just like the sort of material a lot of structured swimsuits are made of, so I decided to give it a go. After all, I wasn’t wearing it so it was a risk worth taking…
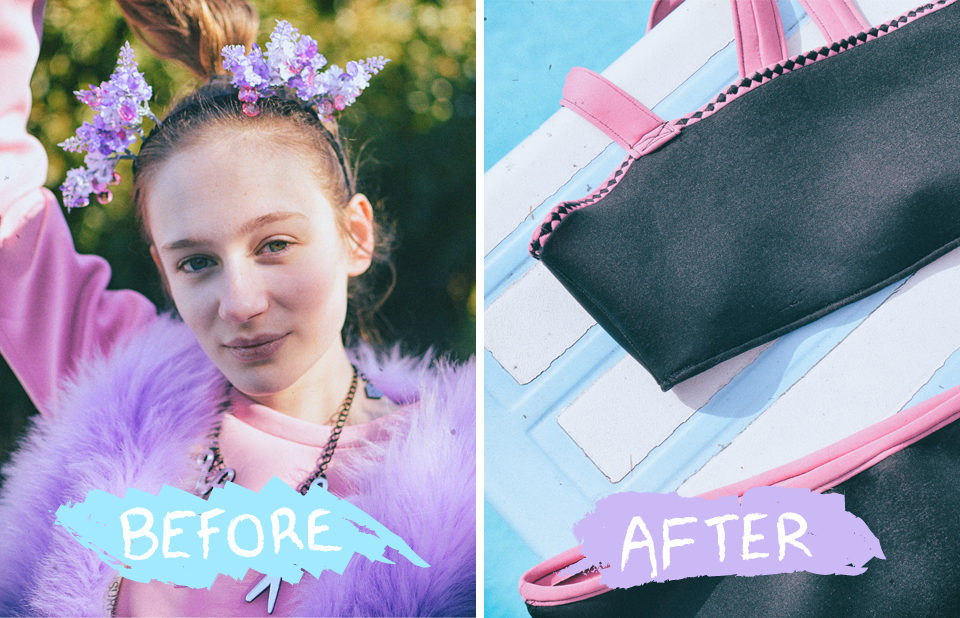
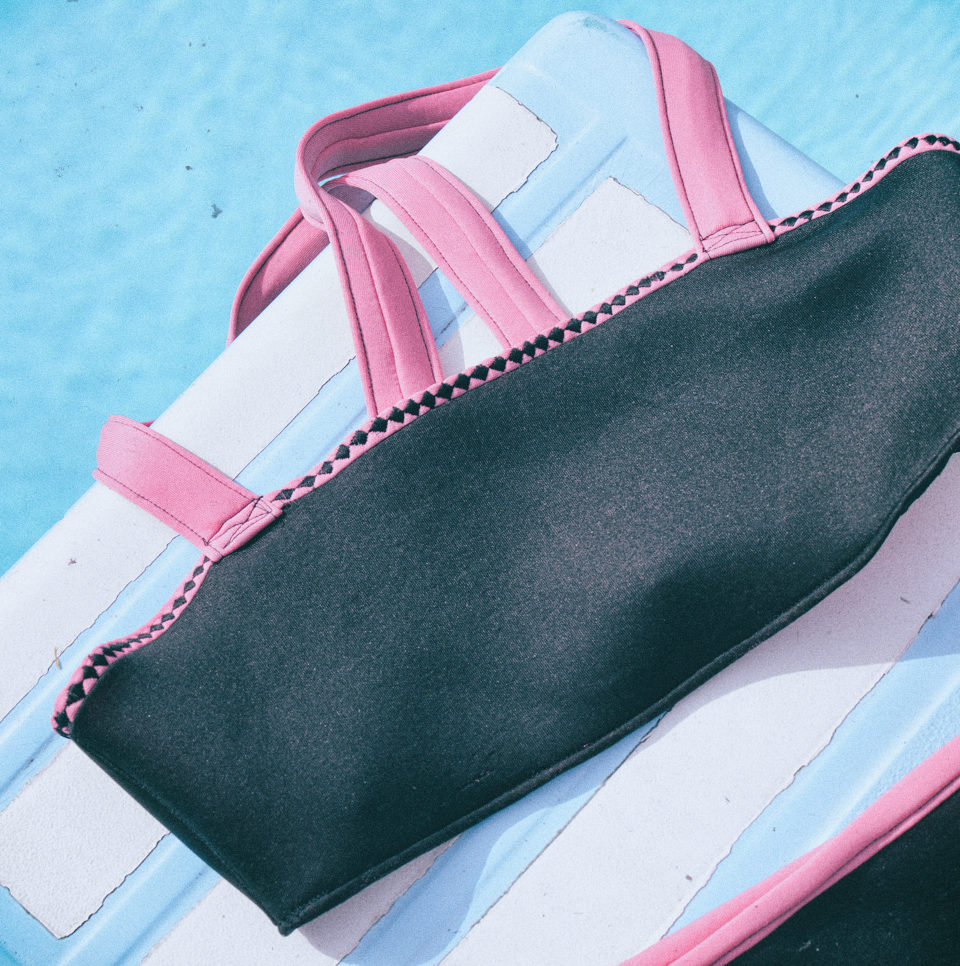
How to Make a Handmade Bikini out of Old Clothes

How to Make a Handmade Bikini out of Old Clothes

You can see in the ‘before’ image above what the top was like previously (the picture is from an outfit post quite a few years ago – leave a comment if you remember it!). A long-sleeved top is a great source of fabric for upcycling because you have a lot of space to work with.

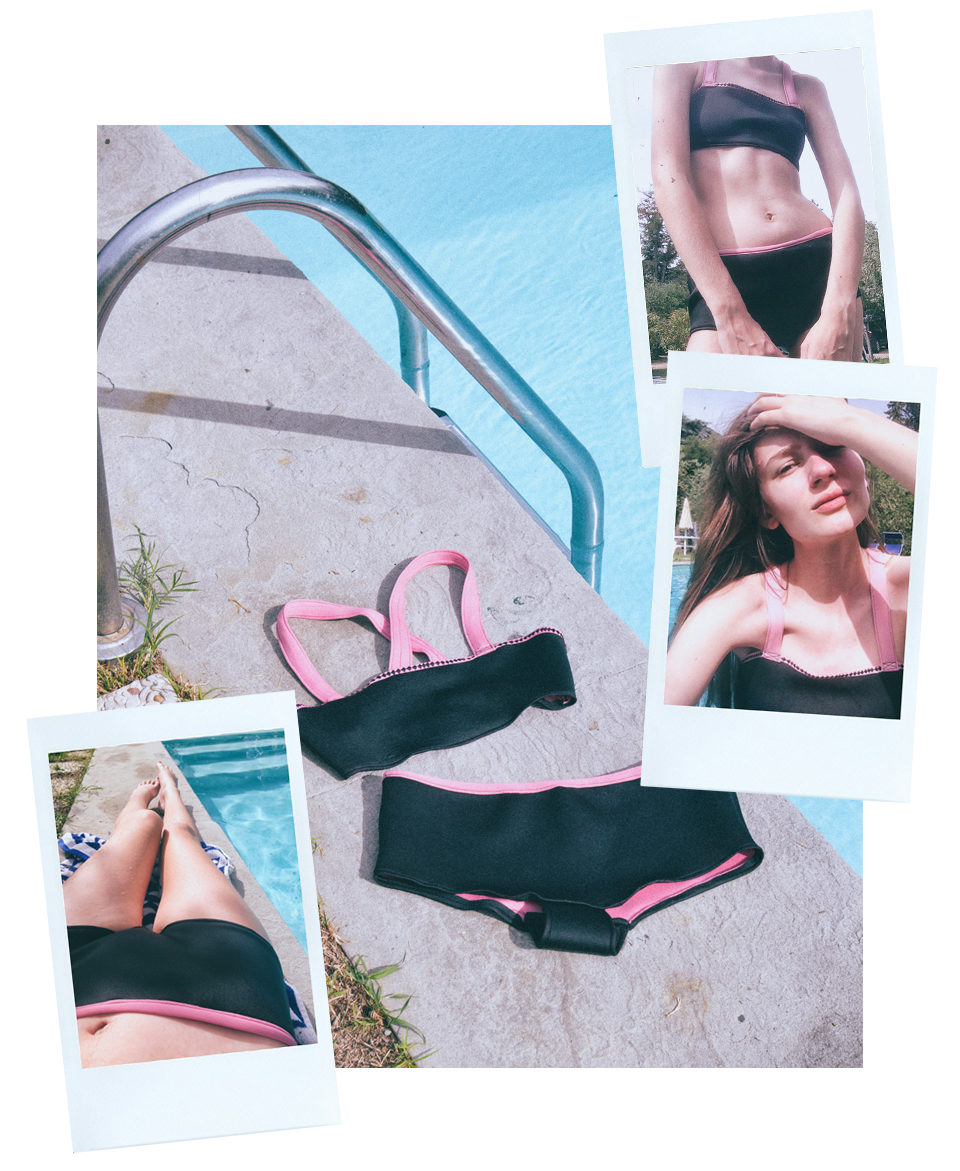
I based the sizing and shape on underwear which fits me nicely; a pair of high-waisted bottoms and a crop top. I adapted things slightly to make it more of a unique design, so, the top became more square shaped and the bottoms became more like a pair of boyshorts that cover me up comfortably.

I created pattern pieces as I went along but I think for a beginner, following what you already own might be the best way to go! You can then personalise and alter your bikini to exactly how you’d like it.

It also allows for wiggle room for details like the straps. I knew from the beginning I wanted them to be thick and secure but the cross-over detail was a spontaneous decision.
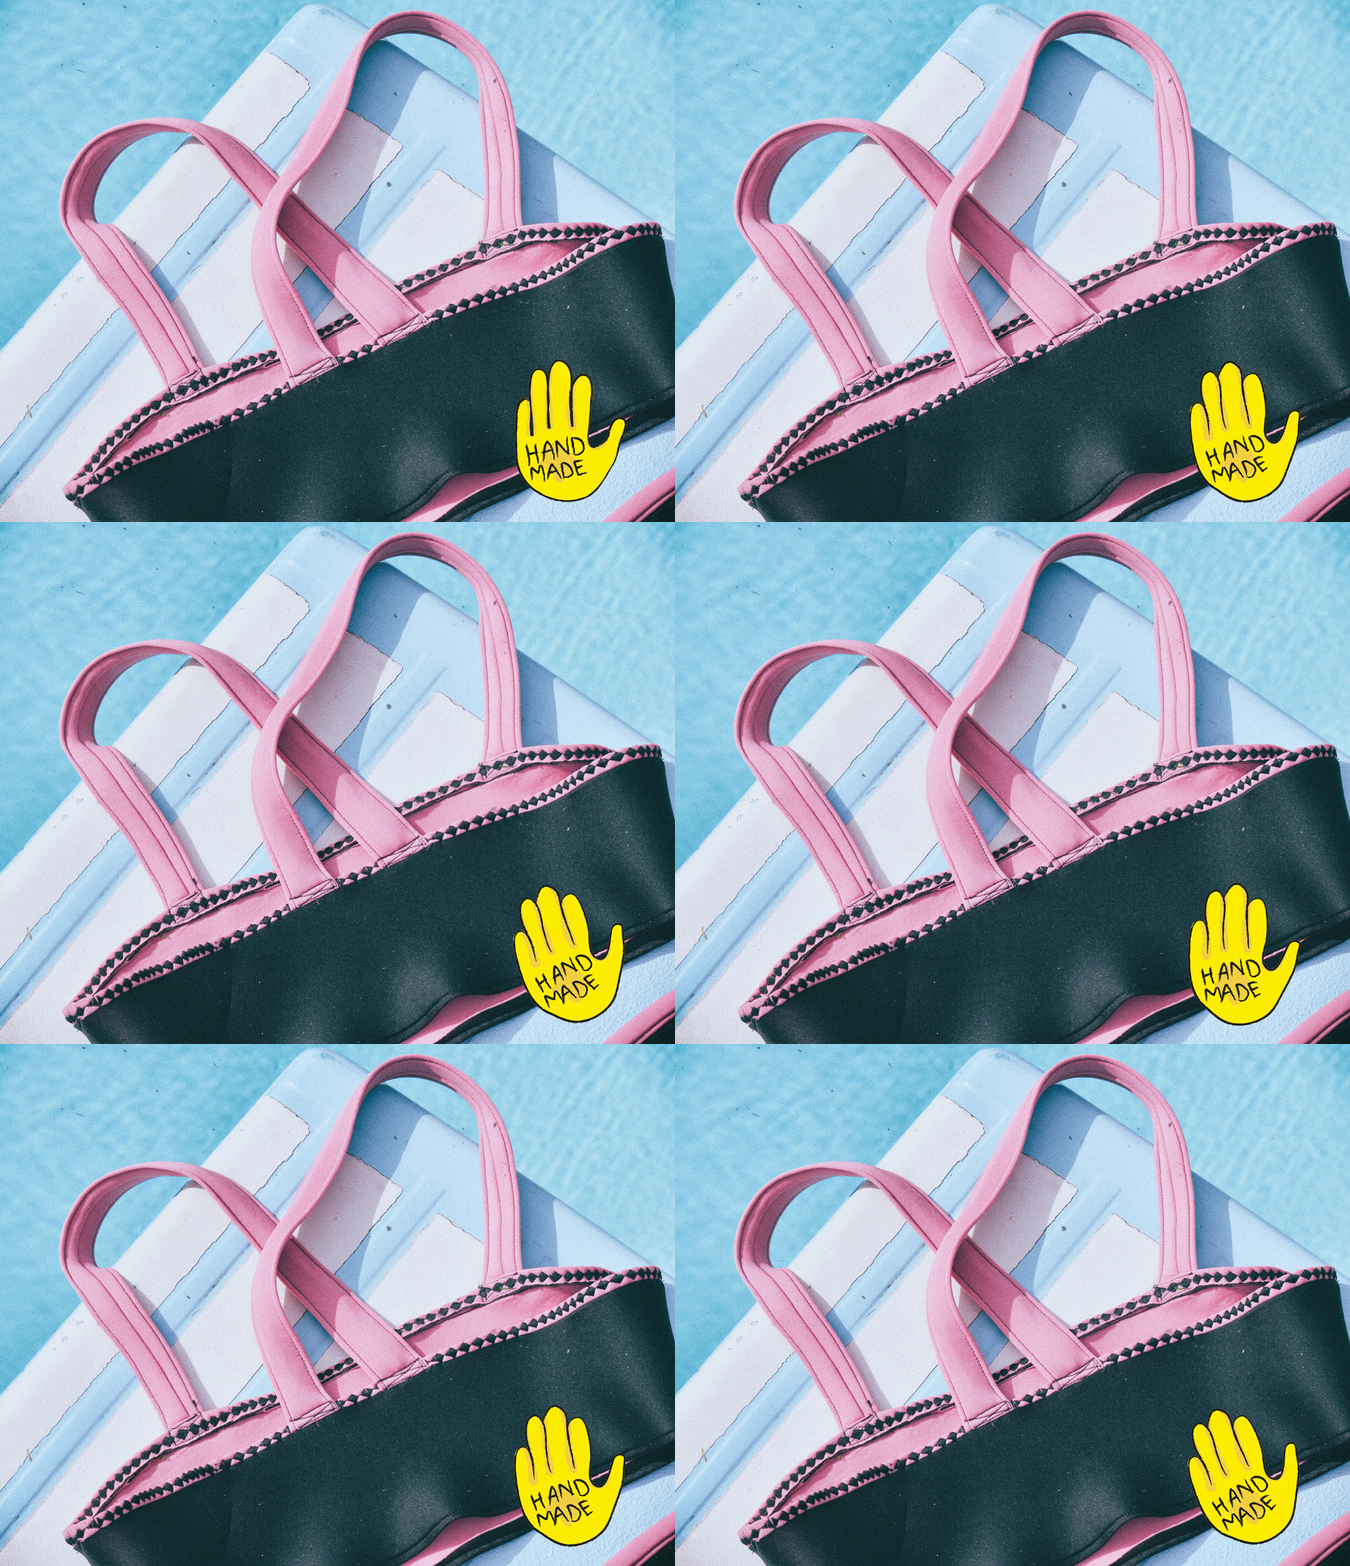
How to Make a Handmade Bikini out of Old Clothes


WHAT DID I LEARN WHILE MAKING THE BIKINI?
Follow me on Instagram for behind-the-scenes on all of my DIYs!

How to Make a Handmade Bikini out of Old Clothes - Tolly Dolly Posh on Instagram

Stick with your initial idea…

One of my main regrets with this project is adding the embroidered stitch to the neckline. Not only did it not come out looking perfect (that’s sewing machines, for you!) but it also made the neckline fit a little looser, where I would have preferred it snug.

But then again, on the contrary, the last minute idea of crossing over the straps worked rather well.

Practice really does make perfect…

Although if you look closely, the finished product might not actually be perfect, doing projects like this really builds your confidence and will most definitely keep you up-to-scratch if you haven’t worked on anything in a while.

Between making the bikini, I worked on making an outfit for a wedding from scratch, which helped me, especially on the sewing machine. This meant that the bikini bottoms only took me a day because I could think of each step a lot more logically.

Loved clothes last…

Despite the fact that the bikini might not be perfect on paper and despite the fact I may have a couple of design-related regrets, love it because I know how much time and effort went into making it.  I’ll always recommend giving a handmade project a go, simply for the chance for you to understand what goes into creating a piece (or two) from scratch.


Want to use the GIF stickers seen in this post? Search “@tollydollyposh” on platforms using GIPHY, such as Instagram Stories. You can see my whole collection of GIFs, here.


What could you transform in your wardrobe? What would you have made with my top? Let me know in the comments!


You Might Also Like

Kitsch Iron-on Embroidered Patches Wishlist

By November 12, 2015 Wishlist

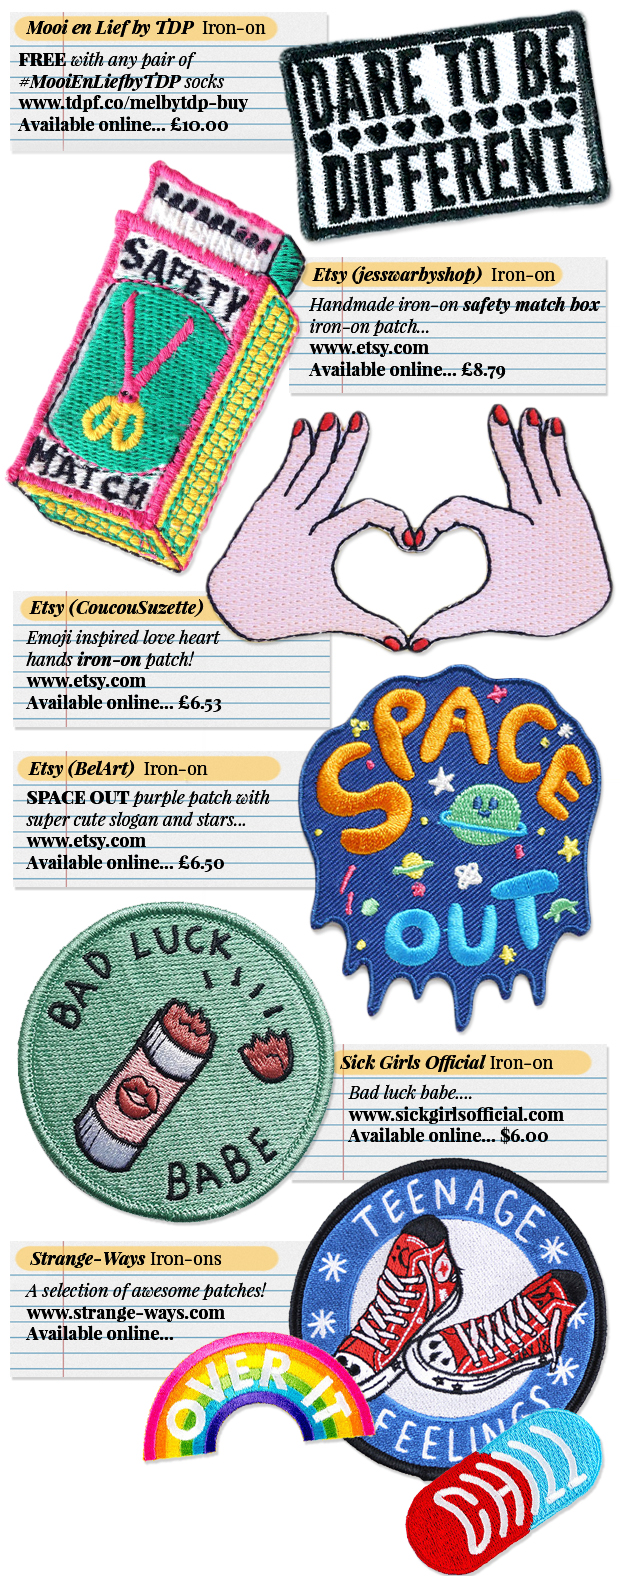
Howdy folks! How are you? I haven’t done a producty/wishlisty post in a very long time mainly because I’ve tried to steer away from that sort content but today I just wanted to do a relaxed post that you can appreciate with all it’s simplicity. So today I thought I’d look at a bunch of iron-on embroidered patches because I’m a pretty big fan. They can add a really cool touch to a denim jacket (dress, dungarees or shorts) and most of them are pretty inexpensive. Here are my favourites… 🙂

Iron-on Embroidered Patches Wishlist - Etsy Mooi en Lief Strange-Ways Sick Girls Official


MOOI EN LIEF // JESSWARBYSHOP // COUCOUSUZETTE // BELSART // SICK GIRLS OFFICIAL // STRANGE-WAYS (123)


My personal favourite style of patches are either bold slogans (like the #MooiEnLiefbyTDP one – FREE with every order of socks!) or the selection from Strange-Ways… they’re simple yet bold and would look totally awesome with different aesthetics (that chill pill would look awesome on a plain sweatshirt). But I also absolutely love the more detailed versions (like the SPACE OUT patch from Etsy) because they’re so intricate and beautiful.

I have a real thing for intricate embroidery as you will probably already know *cough* Valentino *cough* so you can probably tell why I love these patches all so much. Also a lot of these sellers (especially on Etsy) do pin badges on their sites too which is pretty awesome… is it me or do tiny illustrations look way better than big ones sometimes?

Plus, it’s pretty awesome I kind of have my own “Dare to be Different” patch floating around, am I right? Every order peeps, every order!


What did you think of this little round-up? Do you know of any funky patch designers/shops? Definitely let me know in the comments! 


You Might Also Like

DIY Snap On Bracelets | Florals & Pom Poms

By April 15, 2015 DIY & Lifestyle

WOW. Today has been one of those days! I was a right wally and decided to make a video for YouTube (for this DIY post) using files on another computer (via the ‘Network’) and I think the WiFi disconnected so I lost all of what I had done. I feel terrible. For some reason me and YouTube just don’t seem to work. I might try and put it together again, so make sure you subscribe just in case but I didn’t have time tonight so it’s just the blog post for you! So sorry, but I hope you enjoy seeing the end result anyway, it was a super fun DIY to make! 😛

snap on bracelets how to tutorial baker ross

snap on bracelets how to tutorial baker ross

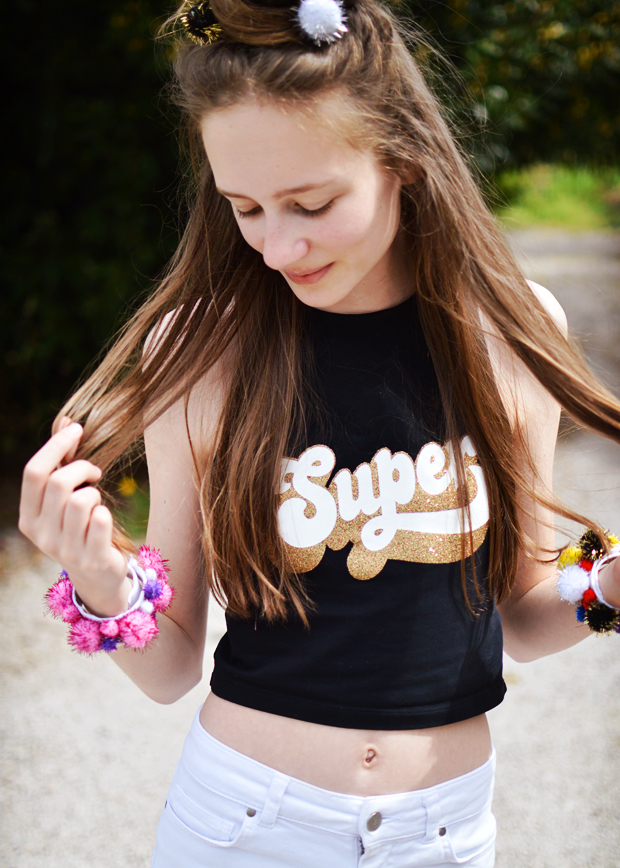
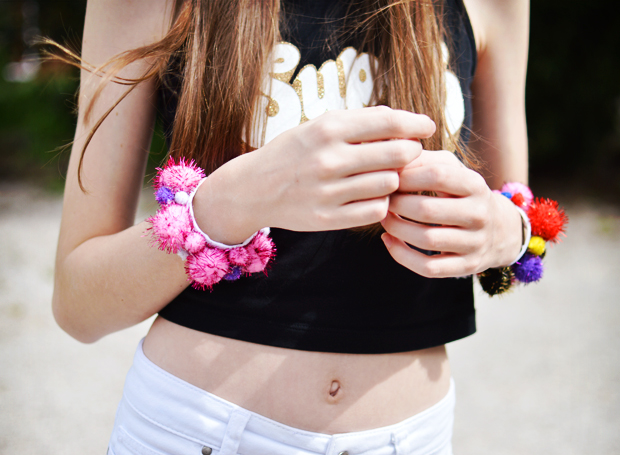
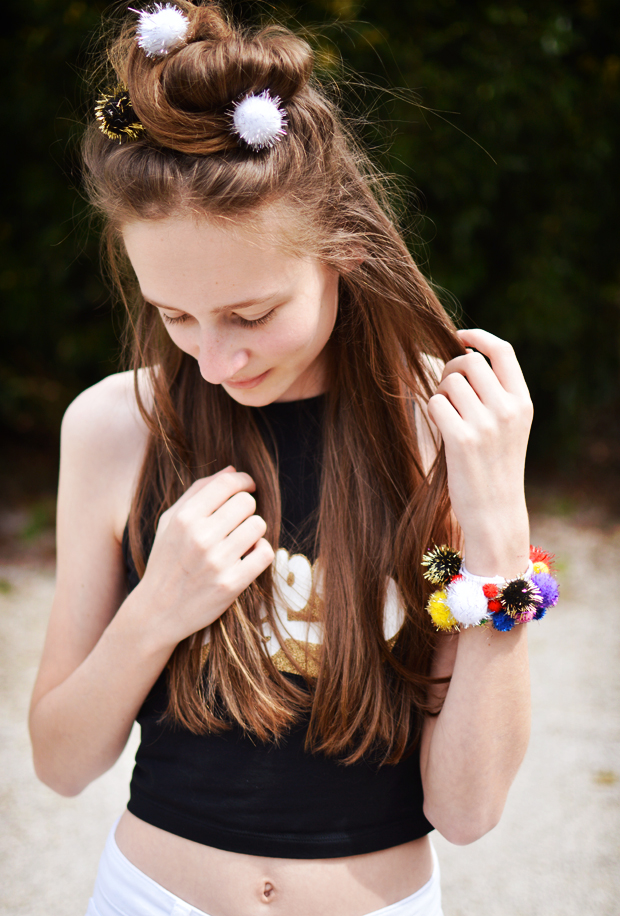
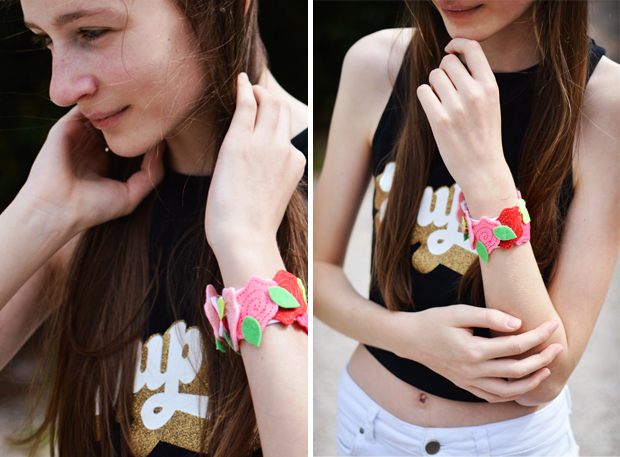
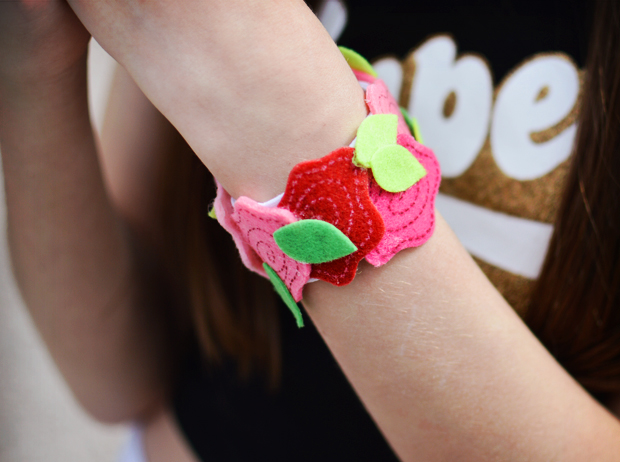
snap on bracelets how to tutorial baker rossThis idea originally came from when I was younger and used to catch the bus home from school in the dark… okay, that sounds weird, but my mum used to make me wear these reflective snap on bracelets around my wrists so I was clearly visible, so I was thinking… why don’t I make some funky ones? I scoured the internet for the perfect bracelets and landed upon these pre-covered slap on bracelets from Baker Ross and started work immediately!

It still sounds weird, right? Well they’re actually kinda’ cool. You slap them on which makes them 10x more fun to wear, but they’re super comfortable as well. They fit to most wrist sizes and you can make them into whatever you like. It’s simple, but if you wanted to take it a step further you could cover it with your own fabric, embroidery… whatever you fancy!

snap on bracelets how to tutorial baker ross

snap on bracelets how to tutorial baker ross

snap on bracelets how to tutorial baker ross

snap on bracelets how to tutorial baker ross


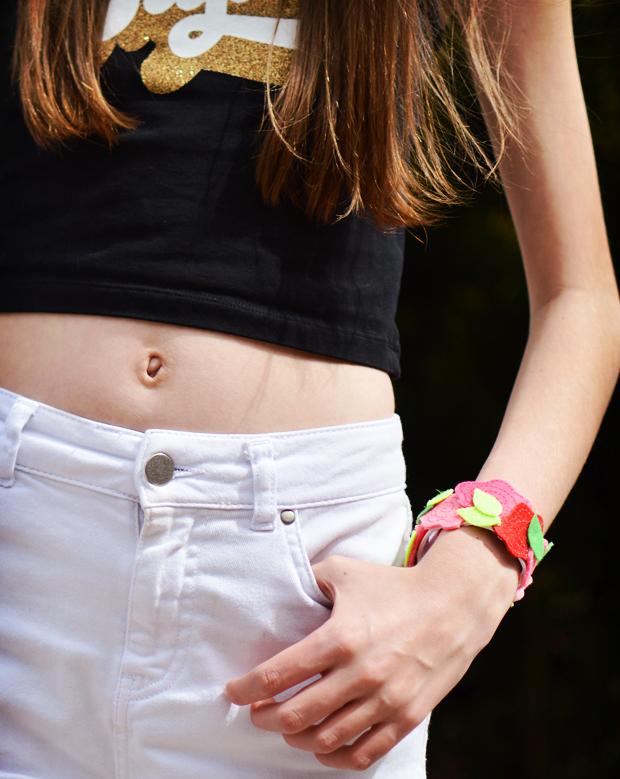
WHAT I WORE: Super Crop Top (ASOS) // Jeans (ASOS) // DIY Snap On Bracelets


snap on bracelets how to tutorial baker ross


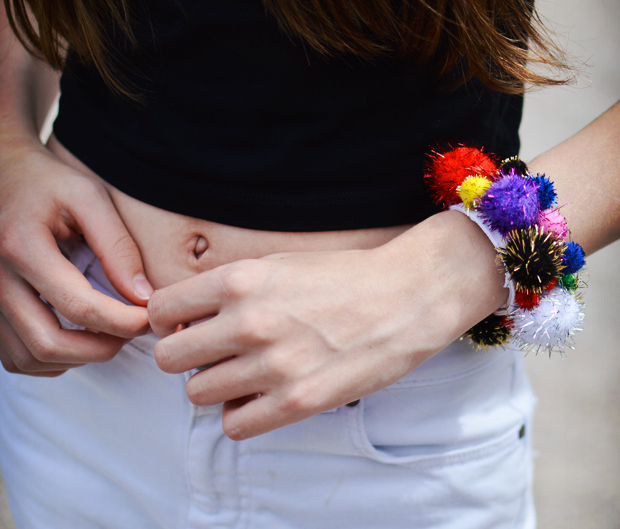
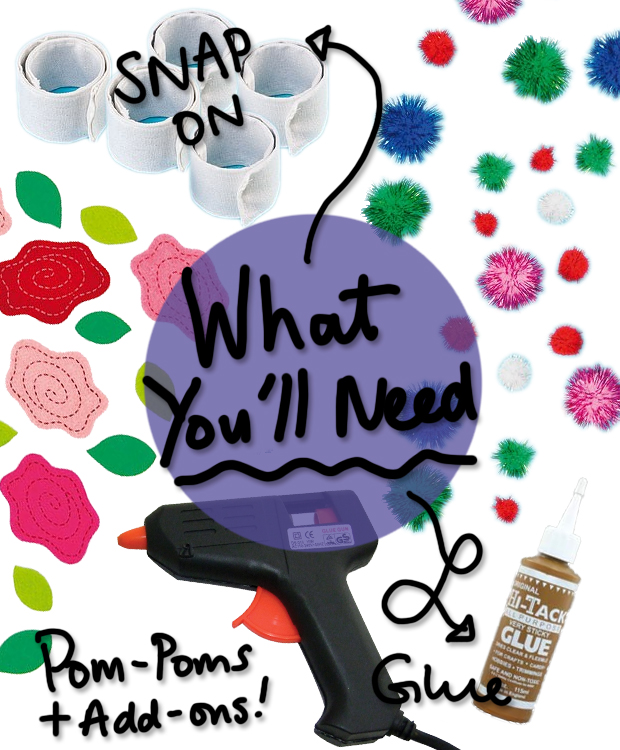
WHAT YOU’LL NEED: Snap On Bracelets (Baker Ross) // Felt Floral Stickers (Baker Ross) // Glitter Pom Poms (Baker Ross) // Hot Glue Gun (Amazon) // Hi Tack Glue (Hobby Craft)


So instead of my YouTube video, I guess I’ll give you a step by step on here! I say step by step, but it’s fairly simple. All you need to do is glue down whatever you’re using to decorate your bracelets, making sure that you’re gluing it to the visible side (otherwise it won’t slap down properly). I used my trusty hot glue gun to secure everything into place afterwards.

For things like pom poms, slap your bracelet on your wrist and make a small mark at the point before your bracelet starts to wrap onto itself. You mustn’t glue anything past this mark otherwise it won’t lay flat. Does that make sense?!


I am honestly so sorry that there was no video with this! I feel so bad about it. I hope you got the jist of it anyway! I will promise to do more DIYs soon, it’s actually surprisingly difficult to document what you do as you go along, so I’ll try my best! I hope you have a lovely rest of your evening and don’t forget to let me know if you give this a try!

You Might Also Like

Floral & Random Hair Crown Collection + Video

By July 4, 2014 My Style

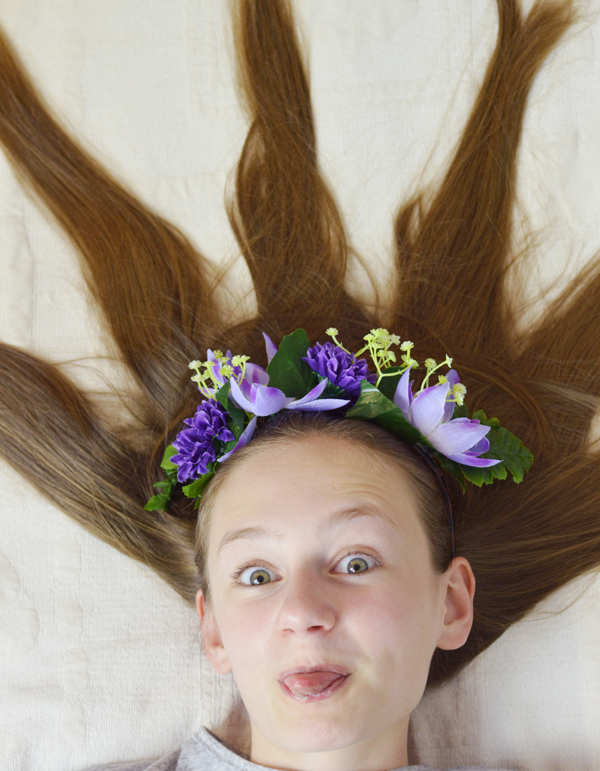
If you haven’t been following this blog for very long, or maybe you just haven’t been paying attention (rude… jokes!), then you may not know that I am a floral (and random) hair crown, addict. I buy and make way too many… I probably have a fairly small ‘hair crown collection compared to some, but it’s slowly getting bigger month by month… so today I’m here to show you every one I own… 

Do you have any floral crowns? Let me know in the comments!
floral and random hair crown collection beauxoxo accessories diy asos claire'sfloral and random hair crown collection beauxoxo accessories diy asos claire's…maybe that’s a lie because I did receive 2 new ones in the post recently (thank you Claire’s!), but this is the majority. I even made a short and snazzy video (this features all of my collection) to go along with them, aww! I have stretchy, alice band, DIY and pom pom ones so it really is a huge variety! I love them all though, I especially loves the ones I make myself because they are 100% unique to me 🙂 I just think hair accessories can really complete an outfit, especially if it is fairly simple. Plus… on hot days when you’re hair isn’t exactly ‘clean’ they can be the best distraction!
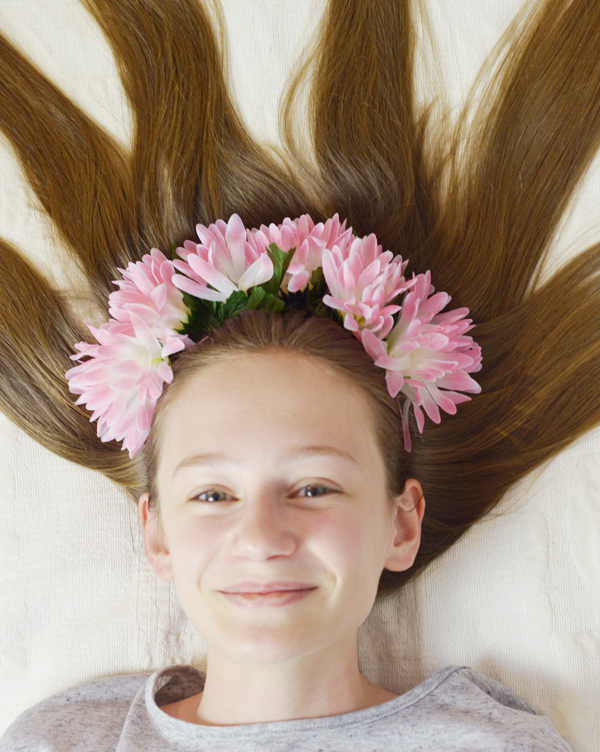
FYI, both the DIY ones are made with false flowers, a hot glue gun and a hair band! So simple to do, it’s just common sense 🙂

floral and random hair crown collection beauxoxo accessories diy asos claire'sDIY FLORAL CROWN – £2 – FLOWERS (CHARITY SHOP) & ALICE BAND (GIFI)

This is one of my most recent ones to my collection, and it’s made by moi! I really like it because the flowers are super oversized, and make a pretty cool statement! I added in some greenery I had left over from another floral crown (scroll down…) and I love it! I feel like it is very Frida Khalo-esque and goes with a lot more than you would expect, plus for £2, you can’t really go wrong!

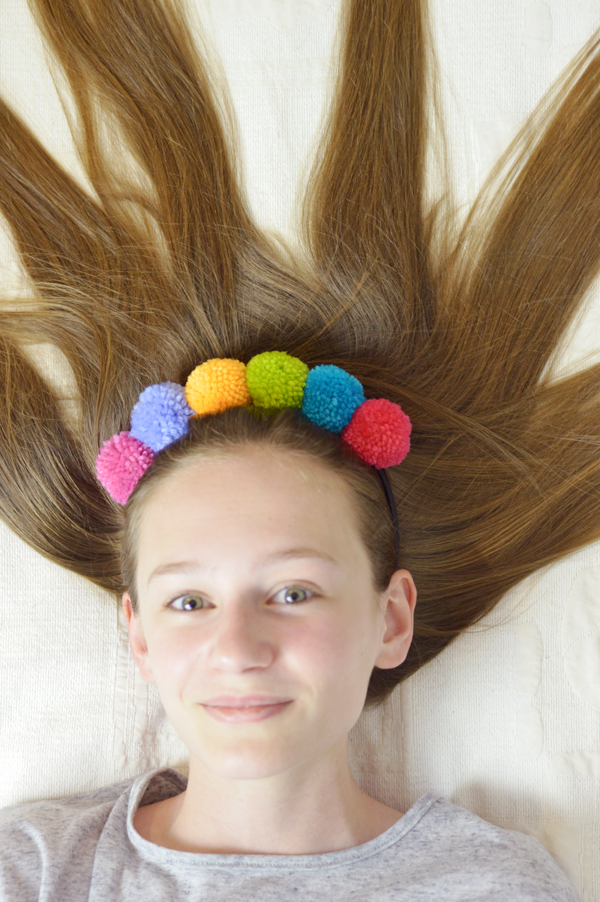
floral and random hair crown collection beauxoxo accessories diy asos claire'sPOM POM HEADBAND – £3.00 – ASOS

I saw this on ASOS ages and ages ago, it went from £10 to about £8, and then when it finally reached £3 very recently, I decided it was about time it became mine! It’s actually a lot smaller than I had anticipated, but I love it nonetheless. The pom poms are so cute and fluffy and actually look quite retro, so I’m excited to style it up! You could easily DIY this one, but because it was on the site for so long, the price was justifiable in the end!

floral and random hair crown collection beauxoxo accessories diy asos claire'sPURPLE OVERSIZED GARLAND – CLAIRE’S*

Claire’s surprised me with a package a while back and inside it was this! I never thought I would like a crown like this because it has a wire band which I tend to stay clear of, but I’m coming around to the idea! I have to say it’s a little awkward to wear, but the colour looks really nice and it should be good for all year round, which is a plus! I think this would look awesome on blonde hair… what do you think?

floral and random hair crown collection beauxoxo accessories diy asos claire'sDIY FLORAL CROWN – FLOWERS (MARKET) & HAIR BAND (..STOLEN FROM MAMA POSH…)

Another DIY, and probably my most favourite of my collection, is this beauty! I just adore the way it looks! I found the flowers at a market and I have been trying to hunt down the same guy again, but no luck! I think buying false flowers online can be way more expensive, so if you can find a local florist who sells them, then you should definitely get them from there! Also, make sure you get some greenery too, it adds a more realistic touch rather than just a bunch of flowers all in the same colour, I think that’s why this is my favourite!

I hope you liked this post and the pictures… it was so funny doing them haha! Sorry if I don’t update my blog lots and lots over the next few weeks, it’s holiday time now with our family so obviously I’m spending time with them! Thanks so much guys! 🙂

You Might Also Like

Embellished Dinosaur Sunglasses DIY

By April 29, 2014 DIY & Lifestyle, My Style

Hello! How are you again my friend? Or maybe you are new here… doesn’t really matter because everybody is welcome. Let’s explain this post before I get too into my rambles… You may have read this post recently about a brand I discovered, and that sparked a light bulb above my head *ding* Why not do a DIY? I’m all about supporting brands, but if I can save a few bob here and there, than I would rather put my own spin on things, so me being me, I am bring you along for the ride and sharing how exactly I re-created these embellished dinosaur sunglasses… Quick note! The Company Magazine #StyleBloggerAwards nominations close tomorrow (aka 30th April), so I would love if you could nominate my blog as Best Teen Style Blog! Click here to do so! Thank you!

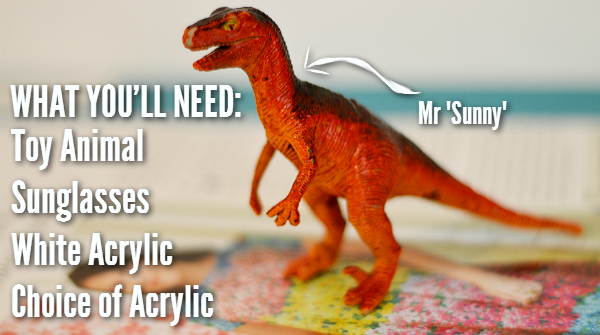
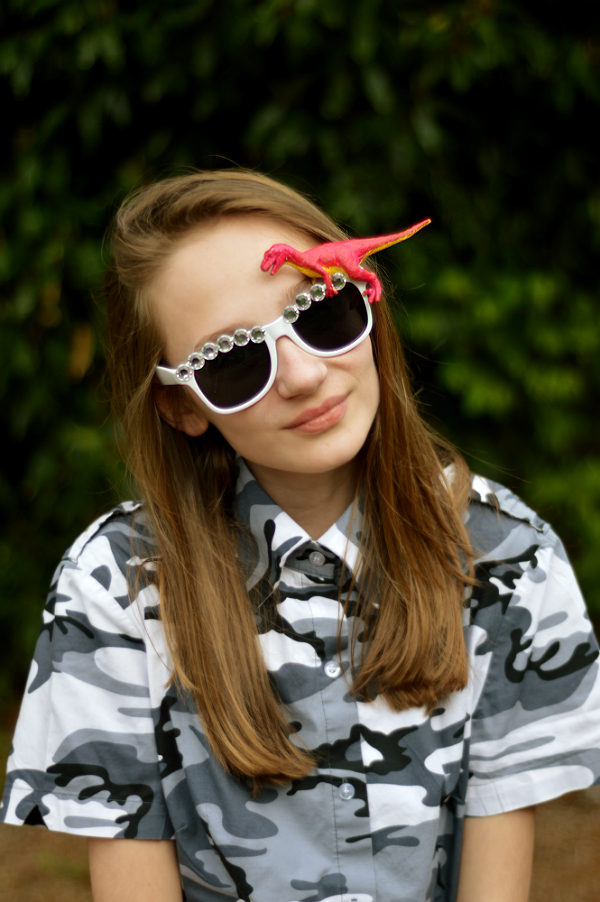
diy embellished dinosaur sunglasses spangled TOY DINOSAUR €0.50 (JUMBLE SALE), SUNGLASSES (eBAY), WHITE ACRYLIC (ART SHOP), PINK ACRYLIC (DALER ROWNEY), YELLOW ACRYLIC (PEBEO STUDIO) & OPTIONAL EMBELLISHMENTS (ART SHOP)

This is basically a list of things you will need… obviously. I went for a dinosaur toy for mine because I like they way they look, plus when you see a basket full of them at a jumble sale, and you are in need of a toy (for DIY purposes… duhh), you obviously don’t pass it by, do you? My sunglasses were really cheap ones which I previously used for this sunglasses DIY. The acrylic paints you can get from anywhere really, I personally prefer the Pebeo Studio ones as they are surprisingly more opaque than the usual Daler Rowney tubes. Oh and don’t forget to name your animal of choice… I asked my brother and he said ‘Sunny’… how original, heh? You can also get some embellishments, but these are of course optional… I think the dinosaur might be enough in itself for some people!

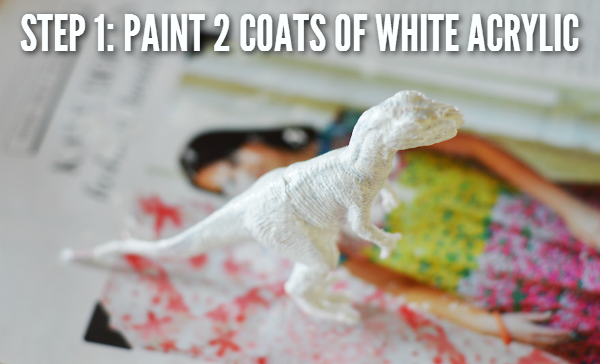
diy embellished dinosaur sunglasses spangled The first step is to paint 2 smooth and even coats of the white acrylic. This helps the colour you put on top really stand out, and also get rid of the previous colour. I could have kept mine red, but there were a few chips on it, so this covered things up! If you have coloured sunglasses you could even keep it at this! I feel sorry for the lady in my ASOS magazine… her dress was so perfect… naughty Mr Sunny getting it all covered in dinosaur footprints! 😉

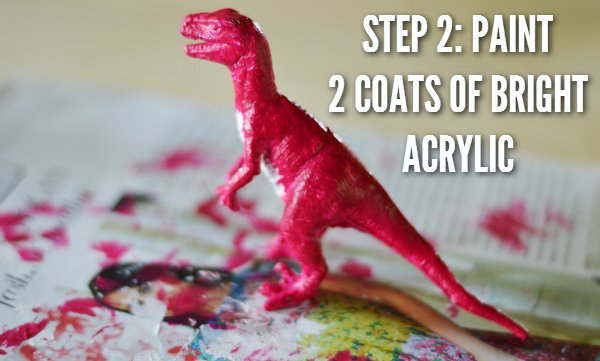
diy embellished dinosaur sunglasses spangled Then you want to paint 2 coats of your acrylic of choice. You may notice that I have left a white space on his tummy… this is because I wanted a bit of a gradient for added definition, but again, this is only optional. If you want it a block colour, then paint it all in and ignore the next step…

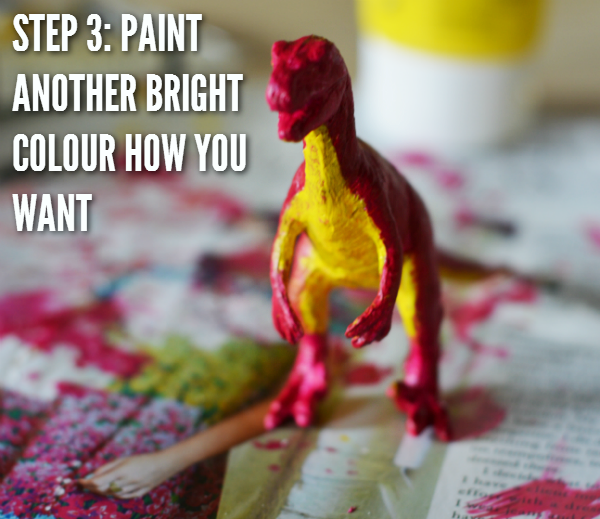
diy embellished dinosaur sunglasses spangled The third step is to fill in the space we left. If you decide you want it a block colour, then ignore this like I mentioned. I think he looks really cute with the pop of yellow! Make sure you are patient with this bit… I rushed because it was getting dark for pictures (#bloggerproblems), so parts of it ended up being a weird orangey, patchy colour. At first I used a sponge to get a gradient effect, but because Mr Sunny has annoying hands (do dinosaurs have hands?!), I ended up going in with a small brush as it was getting a tad messy. I also painted all the way down underneath his tail for an added effect.

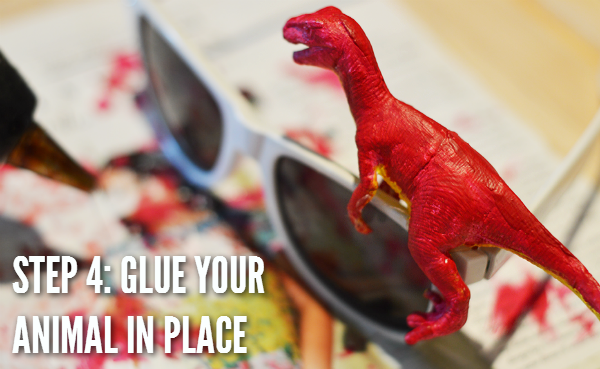
diy embellished dinosaur sunglasses spangled Ergh, ignore the change of light… one day I shall own soft box lights so all my pictures will be perfect! Ha! Step 4 is a little tricky. I recommend waiting until your toy is 100% dry (maybe even wait a day), so the lens of your sunglasses don’t get mucky. For finding the perfect fit, pop on your glasses, then slip your toy friend where you want it to go. I found that Mr Sunny fitted best on the edge… which wasn’t very practical seeing as I can now only close 1 arm/temple of my glasses! You could put yours wherever you like though… just remember that they might not close up! Then whip out that hot glue gun, squeezing some onto the belly of your toy, sticking it in place. Be careful please… I don’t want to be blamed for any burnt fingers!

diy embellished dinosaur sunglasses spangled

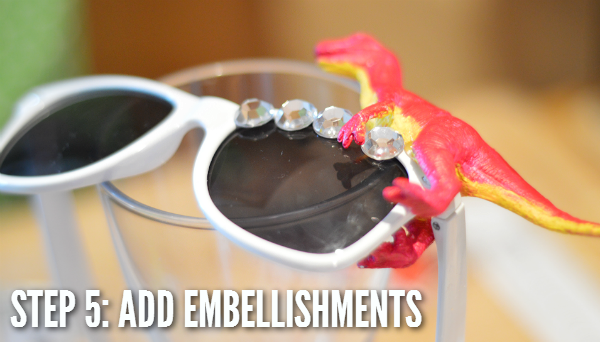
The fifth step is totally optional, but I think it balances the whole thing out. I looked into our ‘buttons’ box, and found these sparkly gems which were the perfect size for my sunglasses. Again, just glue them down with your hot glue gun! I love how it looks like Mr Sunny is holding one of them… maybe their Mr Sunny eggs?… hang on… do male dinosaurs keep the eggs?… maybe Mr Sunny got divorced before the babies were born… and Mrs (or not Mrs anymore) Sunny decided to leave him with them all… Yep, okay I am a tad bit weird discussing an inanimate object’s relationship.

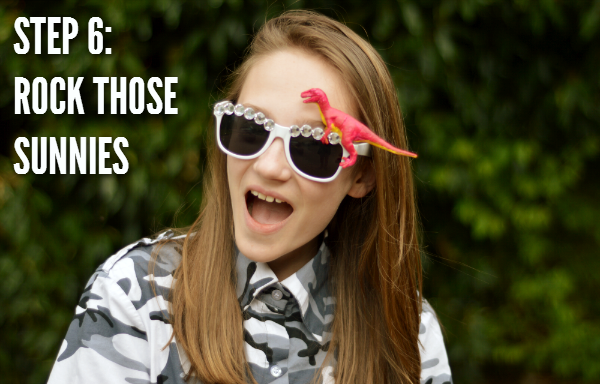
diy embellished dinosaur sunglasses spangled diy embellished dinosaur sunglasses spangled diy embellished dinosaur sunglasses spangled diy embellished dinosaur sunglasses spangled diy embellished dinosaur sunglasses spangled CAMO BLOUSE €2.00 (JUMBLE SALE)

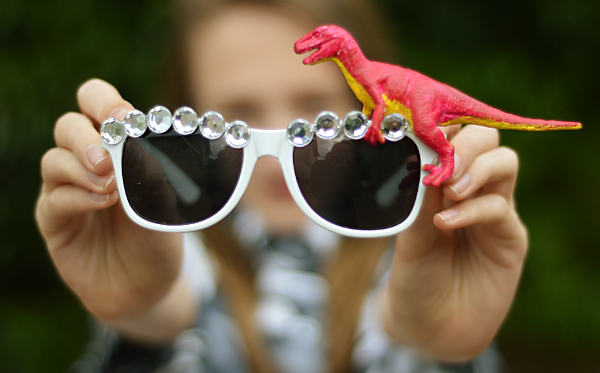
Dah-dah! The final step is to… ROCK THOSE SUNNIES! YEAH! Papa Posh said I was brave to think I might wear these out… maybe I’ll save them for my trip to England, where wearing crazy clothes seems to be more acceptable. I love them though, and I love how Mr Sunny turned out. Do you like his colourful make-over? I certainly do! I do have to say, I’m not sure these will become my every day pair of sunglasses for this summer, but I am sure they will get used *fingers crossed*… and I will be sure to report back on how many strange looks, and laughs I get from the locals… Did I have a bit too much fun with editing that one picture above? Yes. Do I regret it? Absolutely not.

If you re-create these sunglasses, do make sure to tweet me (@TollyDollyPosh), or tag me on Instagram (@tdposh) and I will be sure to RT and have a gander!

If you liked this post and you would like to see more, do leave a comment, and maybe even nominate my blog as Best Teen Style blog here! Thanks so much! 😀

You Might Also Like

DIY: Girl Scout Sash Rookie Mag Inspired*

By February 23, 2014 DIY & Lifestyle, My Style

Howdy! So, quite a while ago now, I had an idea. How about I do DIY each month (or every other), not only for myself to learn things, but for some ideas for you guys?! So, I’m here, and I’m doing it for you! This is the first ‘major’ DIY I have done, so please excuse any mistakes, but I hope it is a fun one! Enjoy…

diy rookie mag sash camp rookie my fabrics

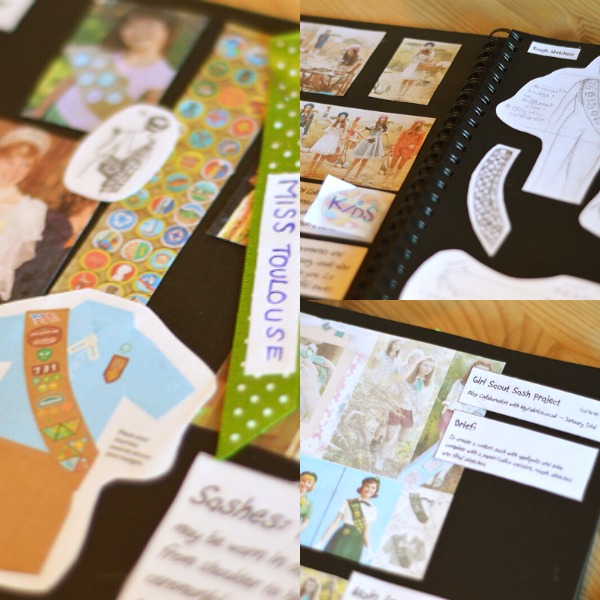
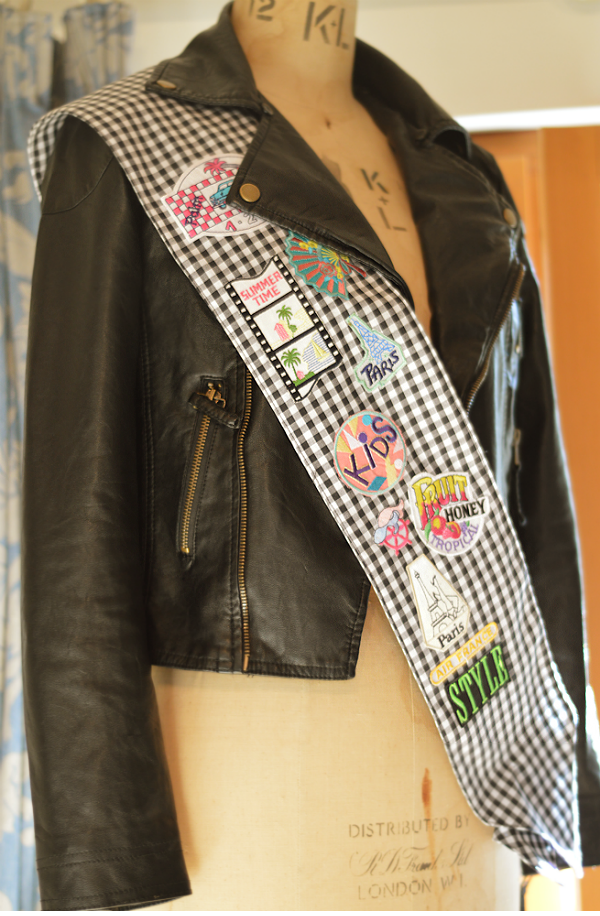
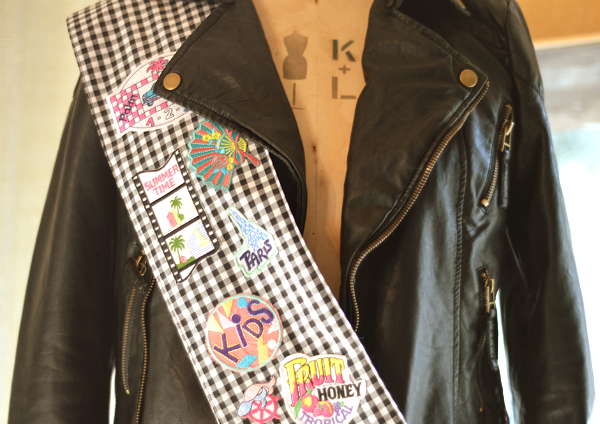
I originally saw this idea in the Rookie Yearbook One, wear they did like a ‘Girl Scout’ inspired shoot, called ‘Camp Rookie’. I thought it was a really cute idea and that a sash could become an awesome fashion accessory. I put a few bits and bobs in my scrap book and started making it up! I also thought it would be cool as Orla Kiely’s SS14 collection was sort of ‘Girl Scout-esque’. So here is my DIY Rookie Mag Sash…

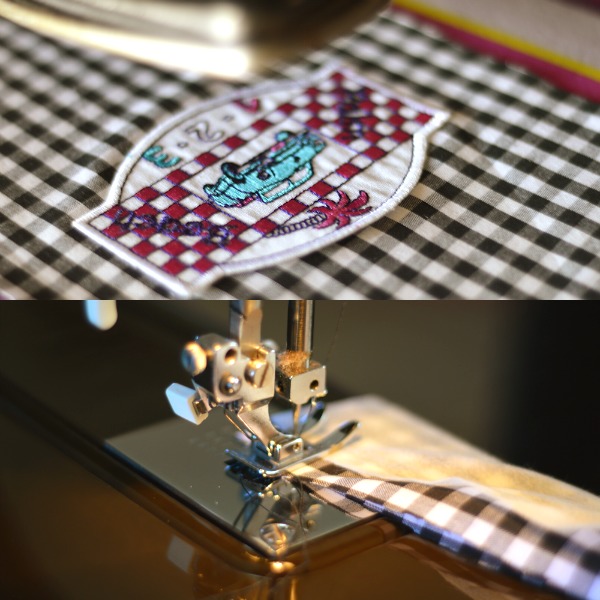
diy rookie mag sash camp rookie my fabricsdiy rookie mag sash camp rookie my fabricsThings You Will Need: Monochrome Check Cotton £6.45/m (My Fabrics)*, Appliqués  (My Fabrics)*, Interfacing, Scissors, Pins, Sewing Machine, Pattern Paper/Baking Paper, Poppers, Un-picker & an Iron.

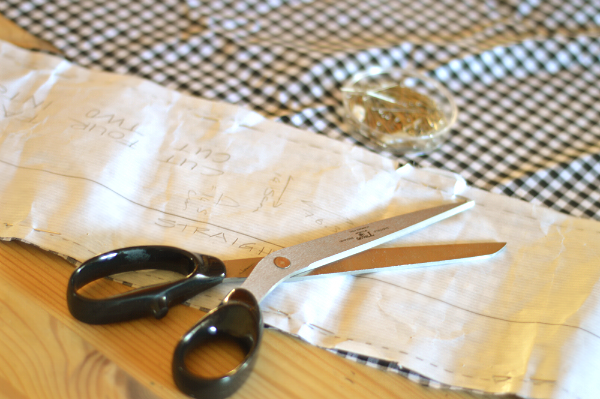
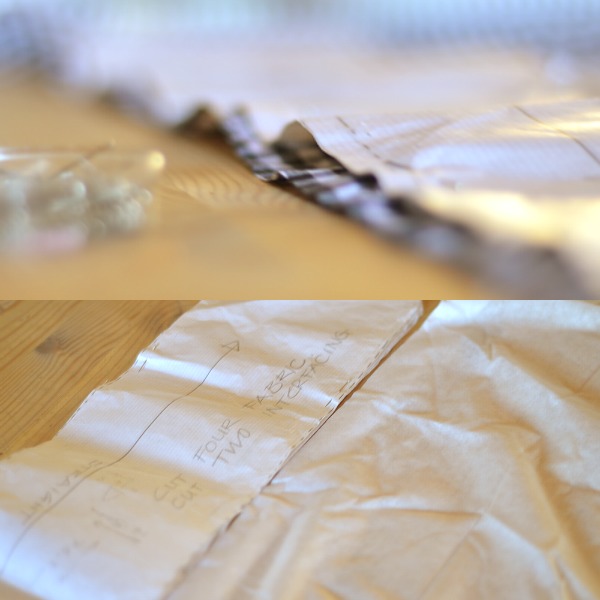
The first thing you need to do is create a pattern. I’ve made a small rough guide for you above, which is the shape you need to go for. I went for 14.5cm wide and 76.3cm long, with the end point being 14.5cm by 14.5cm. You will use this as a guide to cut along. You can either use baking paper, or thick long paper (what I used). Cut that out, and then your pattern is done! You also need some pins out, and of course some scissors to get snipping! On the pattern guide, you will notice I have put ‘STRAIGHT’. This means you need to put the pattern down on the straight grainnot the bias (the stretchy way).

diy rookie mag sash camp rookie my fabricsYou want to cut of the sash shapes on the fabric of choice (make sure you pin the pattern down nice and tight before cutting). I chose this awesome check from MyFabrics who are helping me put together this whole post! The selection on their site is amazing! They have so much and you are bound to find something you like! After you have cut the 4 pieces of fabric, you will want to cut of your interfacing. You don’t have to use interfacing, but it makes the sash more sturdy. Don’t worry about being too neat when cutting as you will be trimming off all the ends later on!
diy rookie mag sash camp rookie my fabricsYou then want to go to your iron. If you are using iron-on interfacing, then at this point you will need to iron the bobbly side onto of the fabric pieces. If your fabric has a pale side, then make sure you are ironing them onto that, but mine was the same on both so there was no need to worry! If you have iron on patches for your sash, then you will need to place and iron, these onto one of the now ‘interfaced’ fabric pieces, obviously, onto the front. You need to make sure to leave 2cm of space on each side, as we will be cutting this off later. I would recommend sewing any non iron-on badges on at this stage. Learn more about Appliqué badges here!

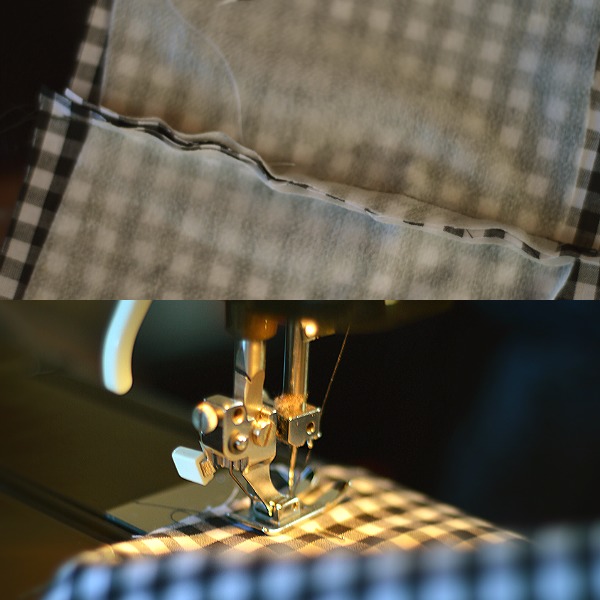
When you have done this, take your 2 ‘interfaced’ fabric pieces, and lay them down interface upwards. Lay them out so that the tops meet (in one long line), and make sure that at least 2cm are overlapping at each ‘top’ end. Do the same to the other two pieces of fabric. Then sew the 2 overlapping pieces together with your sewing machine, just straight down the overlapping part. The below picture is of the 2 ‘interfaced’ pieces and what they should look like…

diy rookie mag sash camp rookie my fabricsAfter you have done that, go back to your iron, and flatten the sticking up pieces, down. This is also a good chance to iron them all over again to remove any creases (this makes it easier in the sewing machine). Then you will need to lay the 2 pieces you now have, over the top of each other, making sure they are perfectly in-line, but read this very clearly: You need to have the piece with your iron-on badges on the bottom, facing with the badges, upwards. Then put the other piece with the interfacing facing, upwards. Then you want to pin these, but making sure that the pins are perfectly straight and the heads are not on the outside edge, otherwise you might break your sewing machine needle! Then sew this all up but make sure to leave a big enough gap so you can turn it the right way out. I would recommend leaving this gap near the middle stitch you made earlier. 

diy rookie mag sash camp rookie my fabricsOnce you have sewn them up, you can now cut off your rough edges, leaving a bit of space around the line you just stitched. Then you will need to pull the fabric through the gap and put it all the right way. After this, it might be a bit puffy. You will need to wet your fingers a bit and sort of roll the edges to get it all straight, making sure you do it all the way round. The points on the end of your sash might be a bit funny and might be still inside the sash, so get an un-picker and slightly pull it out. This will loosen the thread making it a perfect point again. Go back to your iron, and iron it all round very neatly. You then want pop it back into the sewing machine, and go all the way round the sash again, leaving only about 3mm space between the edge, to not only to make the sash a bit neater, but also to close up the gap that is still there.

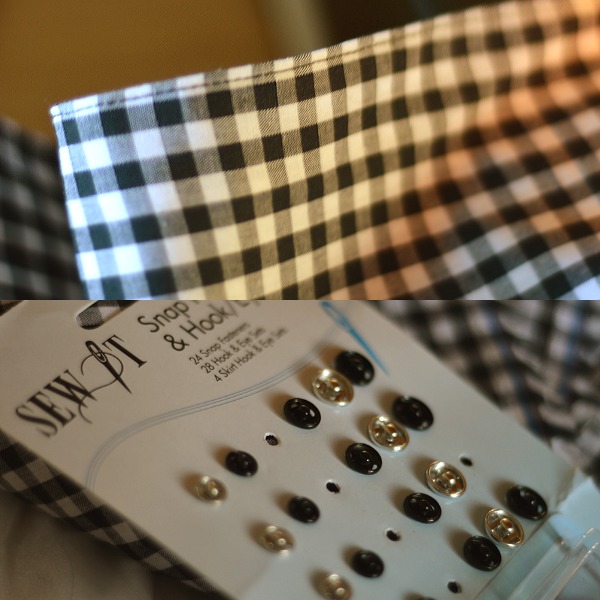
You can now try on your sash, and find a place down by both points that meet nicely. This will be where you put your poppers. You can put an embroidery stitch if you wish, but I think a popper is a lot more practical. Just sew both pieces on, and voila!

diy rookie mag sash camp rookie my fabrics diy rookie mag sash camp rookie my fabrics diy rookie mag sash camp rookie my fabrics diy rookie mag sash camp rookie my fabrics

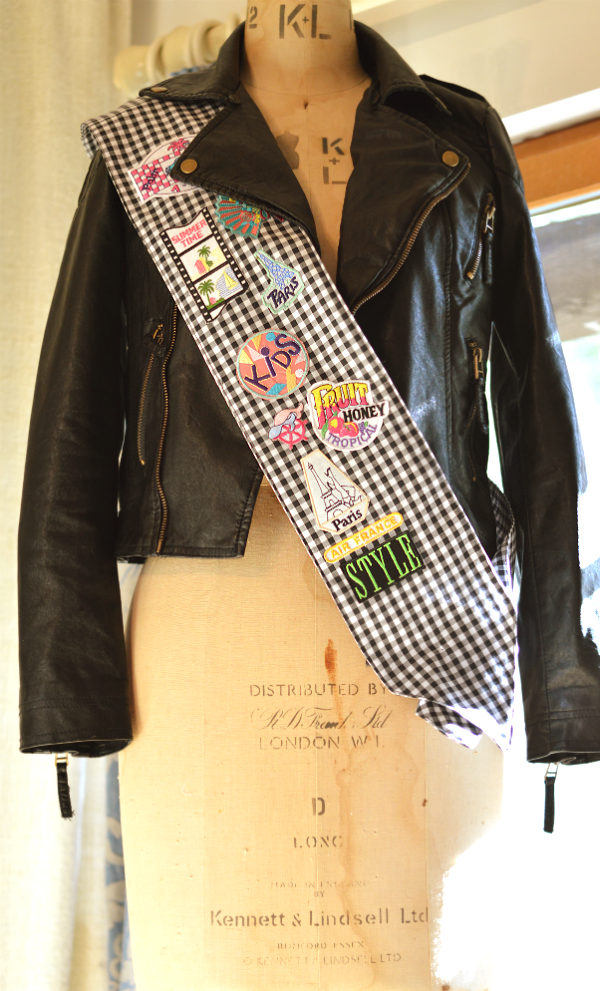
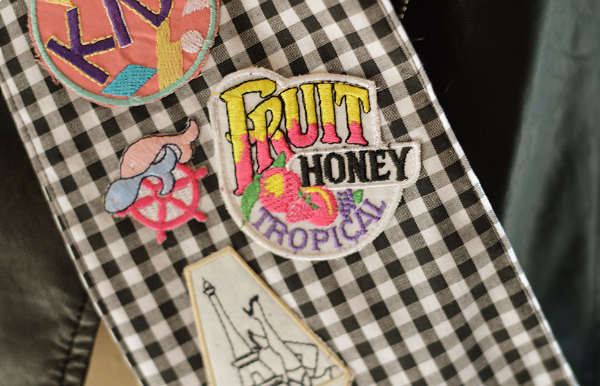
Ta-Da! Job done! I’m really happy with the way it came out as it is quite stiff but you can still move around in it perfectly! I love how bright the badges are and I think making it personal with things like ‘Air France’, makes it properly unique to me! It looks pretty cool around my new faux leather jacket*, non? I think because the checks are monochrome, it will be really versatile and I am sure I will get quite a lot of wear out of it especially in the summer! I really enjoyed doing this little DIY, and if you are interested in making it, but not sure what for, then maybe it would be cool for some kind of photo shoot, or as a gift! There will be an OOTD featuring my awesome sash very soon, so watch out for that! 😀

If you try out this DIY, make sure to take a picture and tag me on Twitter or Instagram! Good Luck! 

(Although MyFabrics provided me with fabric and applique badges, the idea and everything was done by me, absolutely 100%. You can read my full disclaimer here.)

You Might Also Like

DIY Embellished Sunglasses

By May 22, 2013 DIY & Lifestyle, Fashion, My Style

A massive trend which was first introduced by designers such as Chanel, is Embellished Sunglasses. Whether you want studs poking out of your brows, or want a few daisies bordering your eyes, there is something for everyone! Some of these sunglasses cost a BOMB, so I’ve decided to show you how I made some for less than £3.00!! Enjoy 🙂

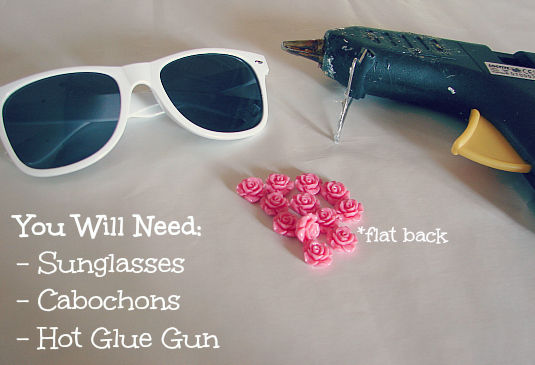
DSC07413Wayfarer Sunglasses – 99p (eBay)//Floral Cabochons – £1.04 (eBay)

The Sunglasses in which I bought are just plain white. I went for this style as it suits me best, but I think any style would do for this DIY, as long as it has room to fit the flowers. You must get ‘Cabochons’ and NOT buttons, as they have flat backs which makes it super easy to stick on. I went for one colour as it was a bit cheaper. You could also use different things, like studs or perhaps little stars, or animals. Mix it up! It is best to use a Hot Glue Gun as it means you can take off any mistakes(?!) as the glue can come off quite easily, but still holds things down for a good amount of time.

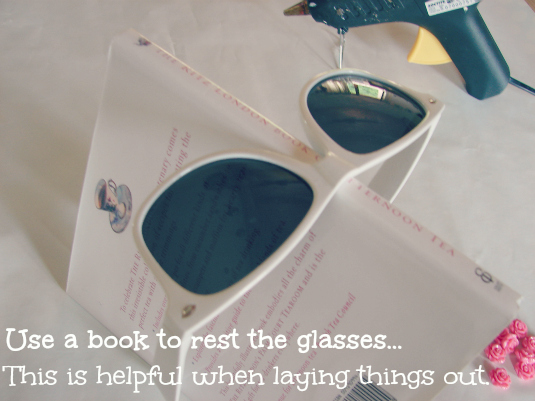
DSC07415First of all you want to heat up the Hot Glue Gun and get it so it is dripping out the end on it’s own, because it will be easier to use. Whilst you wait, think about how you will put the Cabochons on. Put a book underneath so they don’t slip off. The best designs are either across the whole brow, or just in the corners, but you could also do the sides or ‘arms’ of the Sunglasses too.

Secondly, when the Glue has melted fully, add one small dot the place you want to stick the Cabochon onto. DO NOT put the Glue on the Cabochon itself as you could burn yourself, and it may spread out and make the Glue visible when pressing it down. When pulling the Hot Glue Gun away from the glasses, pull them away from the lenses to avoid any glue going onto them. You could put a sticky note over the lenses too to make sure this doesn’t happen. Repeat this process until you have finished the design, and leave them to cool.

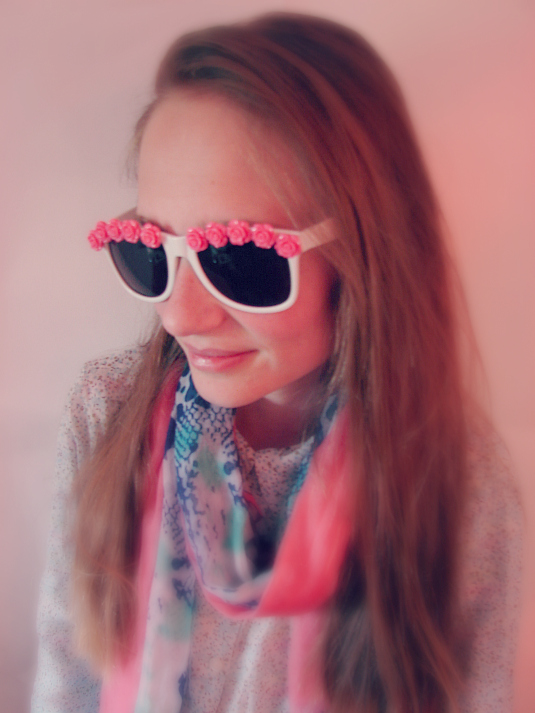
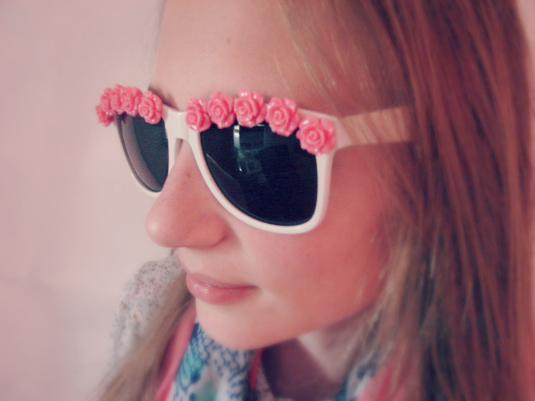
DSC07428 DSC07430The complete design! Pretty cool, huh? 🙂 Make sure to be careful with them!
In total these cost me £2.03, as I already had the Glue, so at the most it will cost you £5.00! It’s super easy, and you can experiment with different designs. I think these will look great for summer, and will be a great statement to add to any outfit. This is a great thing to try out as some cost £15.00, and for £2.00, I think we all know which is the better deal! I hope you enjoyed this ‘DIY Embellished Sunglasses’ tutorial and do make sure to tweet me if you give it a whirl! Or Instagram a picture using #TDPSunnies

Will you be trying this DIY out or will you buy a more expensive pair? Have you already tried this DIY out? Make sure to leave a comment below!

You Might Also Like

A Very Vintage Valentines…

By January 29, 2013 DIY & Lifestyle

I wanted to do a nice post for everyone who needs to make Valentine’s day, that extra special, but I didn’t know what to do! So, I have decided to create an ‘Idea’s Guide’ for little gestures you could put around the house, nice decorations, etc, all for that nice day with that special someone 😉 I hope you enjoy, and I will be doing an outfit post very soon as well, but this is just a little different…

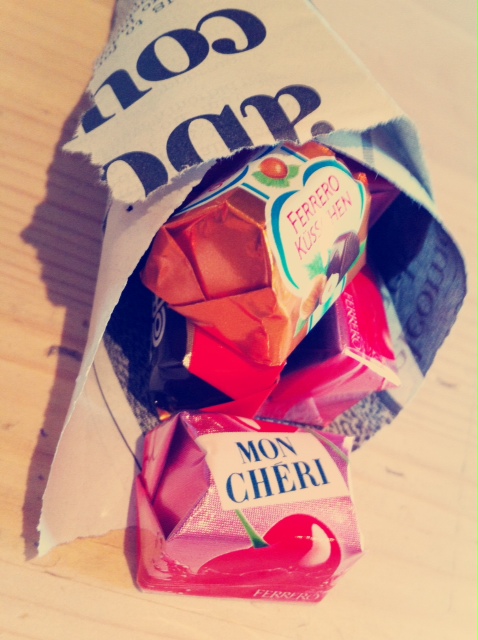
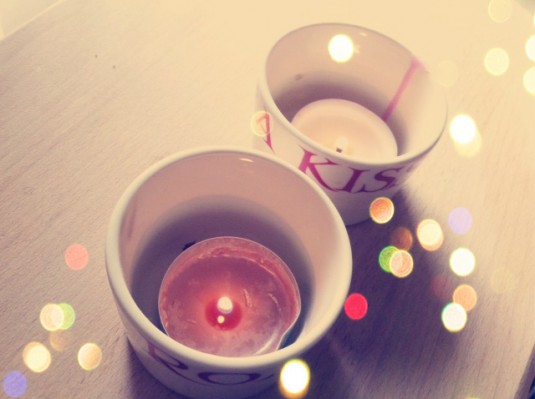
photo7aphoto 1 photo 2 photo 3photo-5
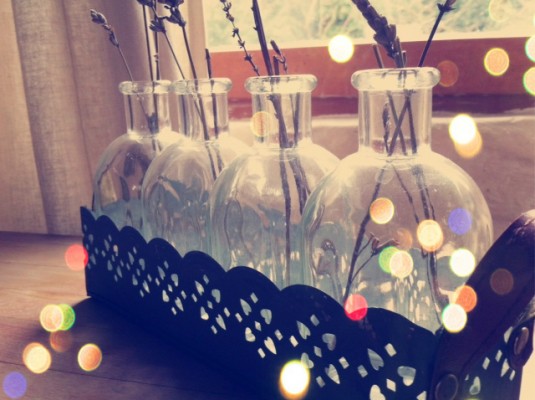
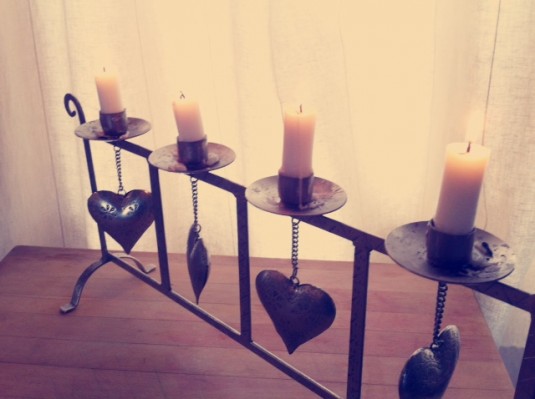
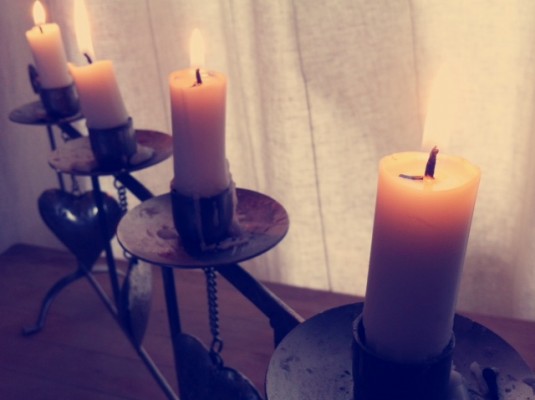
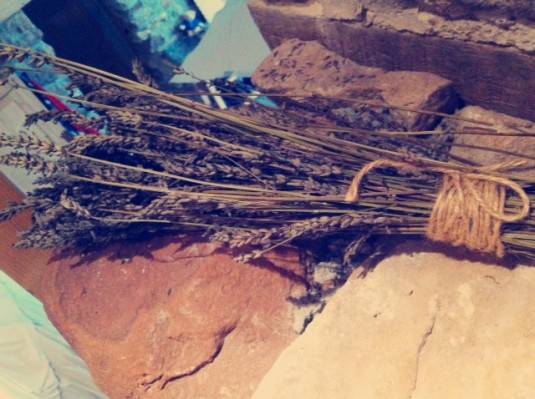
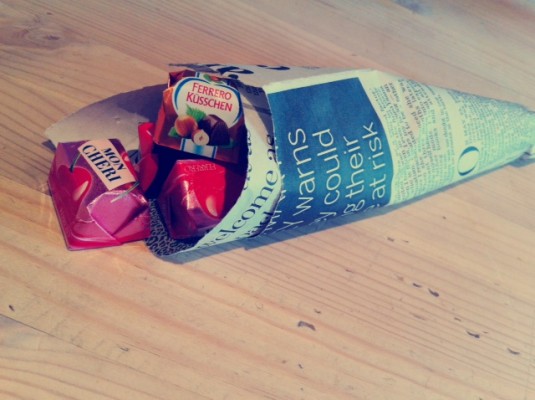
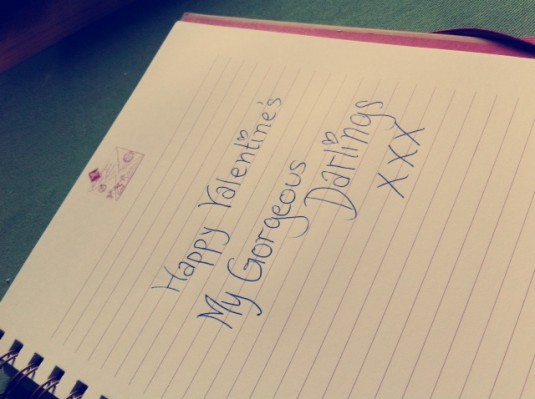
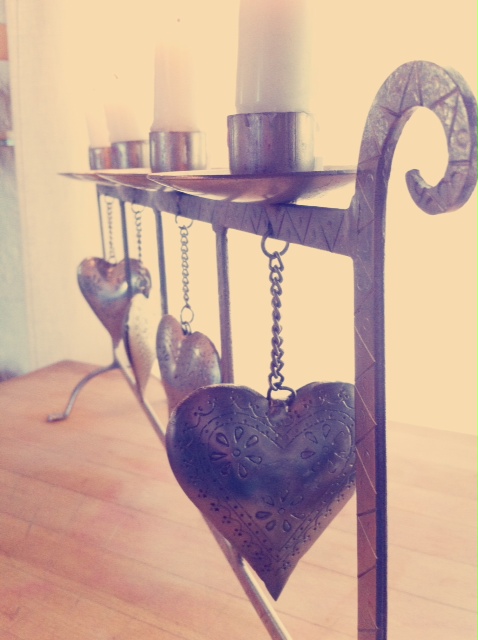
photo 5photo 1photo 4 photo 5photo 2 photo 11 – Lavender in Jars, 2 – Candles & Hearts, 3 – Emma Bridgewater Tea Light Candles, 4 – Wooden Heart, 5 – Lavender Bunch, 6 – Newspaper Chocolates (Just get some newspaper and roll it up into a cone, and fill with your favourite chocolates!), 7 – My Valentine 😉 & 8 – Happy Valentines My Gorgeous Darlings!

I hope you enjoyed this inspiration post, and that you take something from it. I wish you all a great 14th February! Please leave a comment below if you want me to do more of these type of posts, and please make sure to follow on BlogLovin, Twitter & Facebook (In the sidebar!).

You Might Also Like

Photo Editing Softwares: Aviary & Tadaa

By December 20, 2012 General

I am trying to find a new effect software instead of using money grabbing Instagram, so I have put together a review for you guys. Here it is…

Aviary

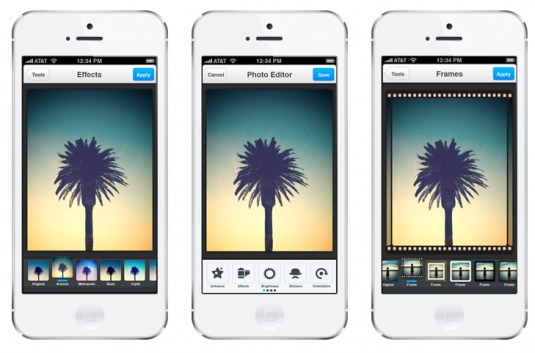
Aviary is a really fresh way of doing photo editing. It is really easy to use, and free! It is for IOS, Android, and Windows 7 Phone. It is super easy to use. Unfortunately I cannot screenshot it because the phone which it is on, home button has broken… meaning I cannot! So, here are a few pictures from Aviary’s site itself…

As you can see above, there are effects, editing tools, and frames. You can download different effects and frames, depending on what they are, depends on the price. At first, you get a screen (on the iPhone this), which you can flick through all your photos, then you click on the photo or Edit This Picture. You can then choose from, Enhancement, Effects, Frames, Stickers, Orientation, Crop, Brightness, Contrast, Saturation, Sharpness, Draw, Text, Redeye, Whiten, Blemish, or Meme. So there is a wide variety on things you can do. I really like the way this app looks, it is clear, and simple, and you don’t have to sign up! So, nobody can steal your pictures or, sell them! My favourite thing is the Meme tool. It’s pretty much a tool so you can put those like caption things on the picture, like you see a dog looking funny and it says ‘Sup?’. I also like how it is really easy to choose frames, and effects, all you have to do is click! And, of course you can take a picture on the app and then edit it as well.

CLEARNESS & OVERALL LOOK: 8/10 – Really easy to look at, and you can find your way around easily.

EASE OF USE: 9/10 – Super easy to use, like super easy.

WORRIES?: 1/10 – I don’t have any fear because you don’t have to sign up! But you can still share.

OVERALL IMPRESSION: 8/10 – Really good, and simple. Easy to use, and does good stuff! Oh, and it has a Meme Tool, so that’s fun!

Tadaa

Tadaa again, is free. But, if you want some of the features, you must sign up. It allows  you to put filters on certain parts of a picture, focus on a certain part, and take a picture with the effect already on it, and make your pictures even better quality. My favourite part is that you can take pictures with the effect on it at the same time. Also, you can snap away, and then edit them later. Here’s a snapshot (Picture from IphoneDarkRoom.com)…

As you can see, you have the choice of many effects, but some you need to sign up to use, you can add frames, change the brightness, use the focus tool, and change saturation. At first I found this app extremely hard to use, so you have to get use to it. It is quite good quality, and you can make a picture look really good, but if you find things hard to understand, this is not for you. Again, you have to sign up to use certain effects and tools, so that is a negative, but it will do if you don’t want that hassle, or the worry of perhaps, getting your pictures sold! 😉 You can actually draw around an area, and it will focus completely on that, which I like, so say, you’re watching something with a crowd,  you can edit it so, you are only focusing on the attraction. Also, you can edit pictures from your camera roll too. I believe this app is only on IOS at the moment.

CLEARNESS & OVERALL LOOK: 6/10 – It’s a bit confusing to look at.

EASE OF USE: 6/10 – Not that easy, but you get used to it.

WORRIES?: 4/10 – If I want to use an effect or tool, I might have to sign up, but I don’t want to do that!

OVERALL IMPRESSION: 7/10 – Quite good, and cool tools, but not very easy to use, and some things aren’t available without sign up!

You Might Also Like

BlogMas: 15 Free & Fun Things To Do At Christmas

By December 17, 2012 DIY & Lifestyle

You Might Also Like