Tolly Dolly Posh Fashion
Tolmeia Gregory New Site
Browsing Tag

diy ideas

Updating Your Wardrobe with Embroidery | #MAKESMTHNG Week

By December 2, 2017 DIY & Lifestyle

This week marks the inaugural #MAKESMTHNG (Make Something) Week by Greenpeace. The holiday season, especially with sales and promotions such as Black Friday and the Boxing Day sales, is one of the busiest shopping periods of the year and although that may be all well and good – especially for gift-giving and saving money on essentials – it’s a time when we often tend to forget other alternatives like making things…

MAKESMTHNG Week with Greenpeace & Fashion Revolution: DIY Embroidery

MAKESMTHNG Week with Greenpeace & Fashion Revolution: DIY Embroidery


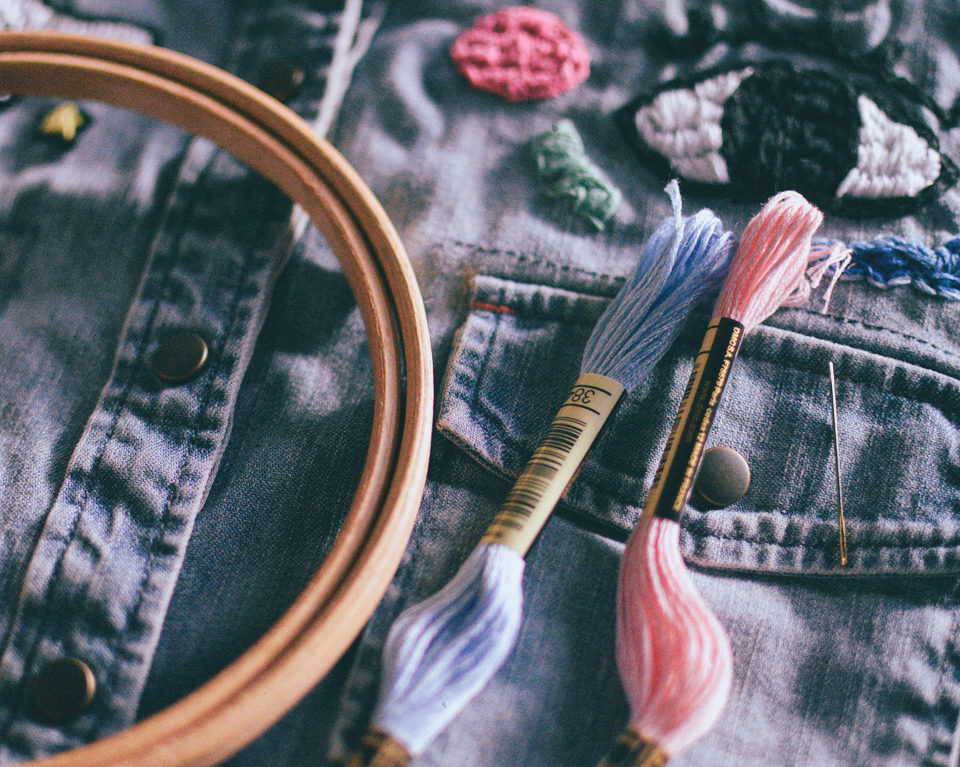
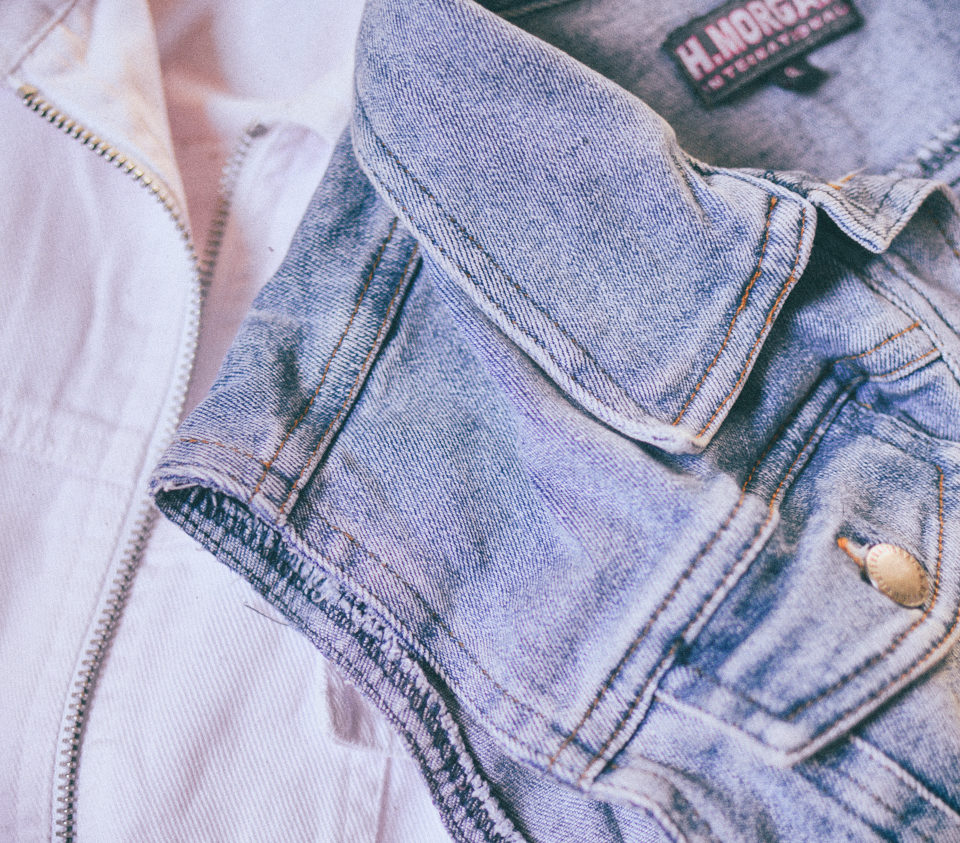
WHAT I USED: Denim Shirt (Originally Johnnie B) // Embroidery Hoops // Embroidery Thread // Embroidery Needles


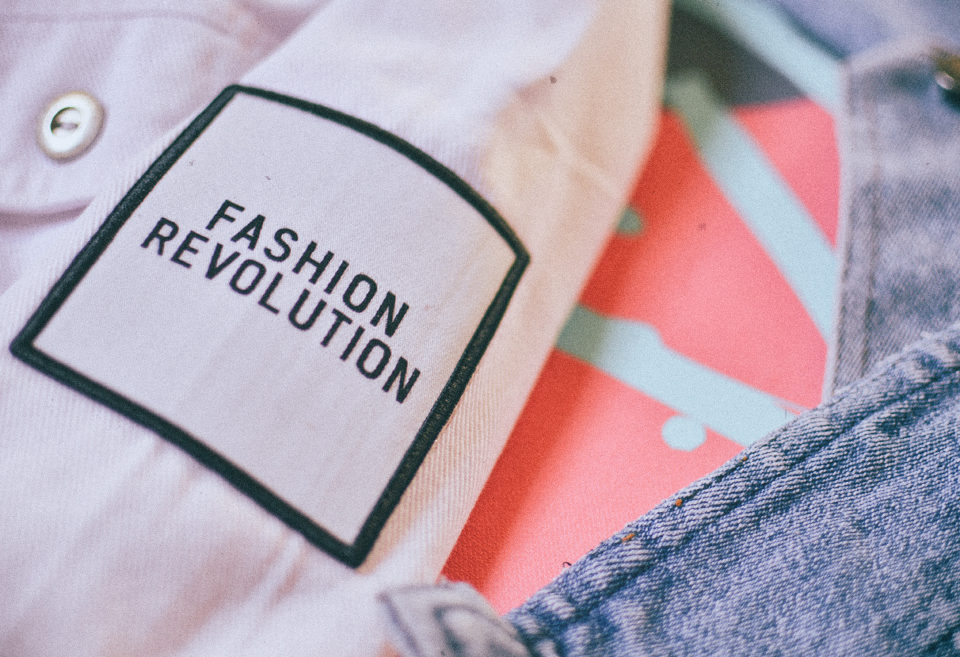
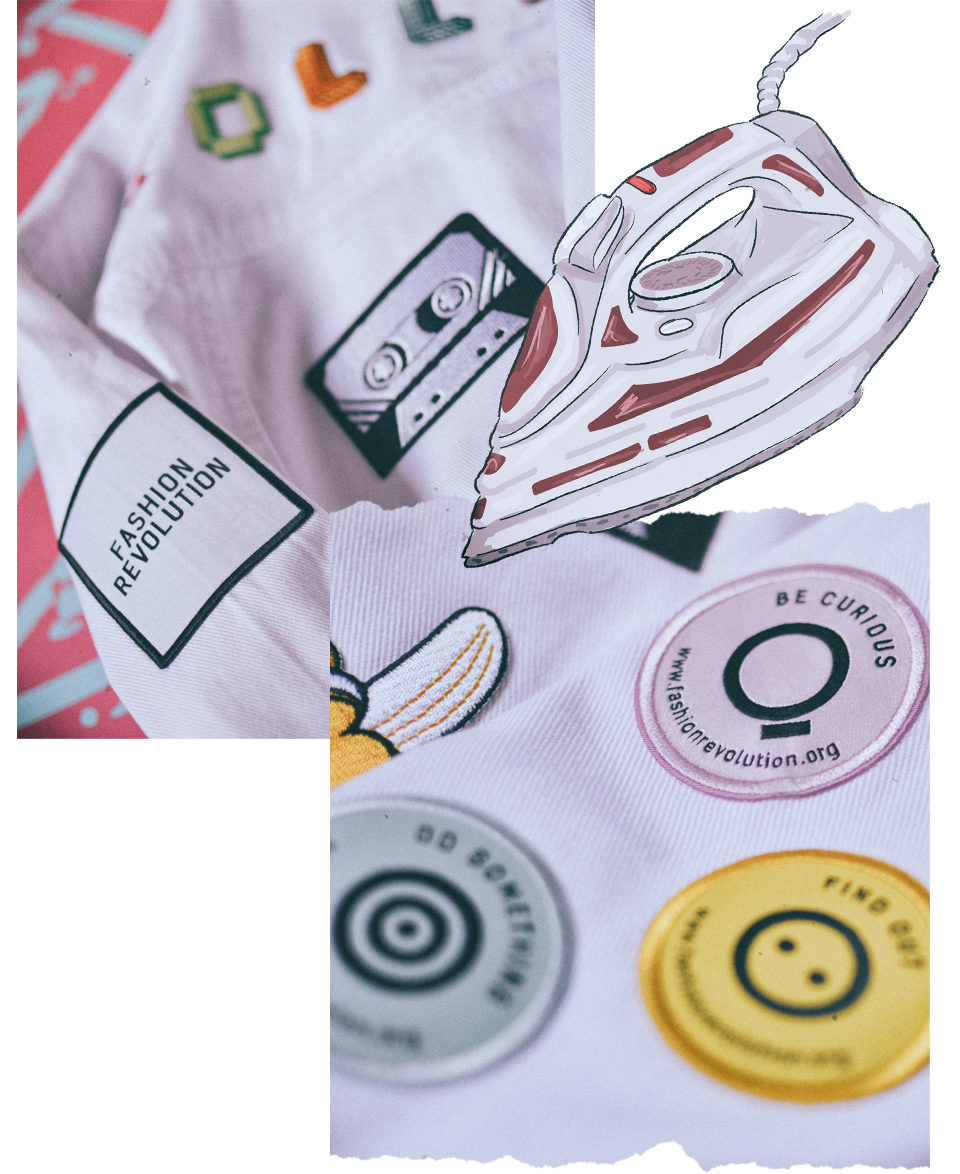
Instead of shopping, Greenpeace alongside Fashion Revolution, are aiming to inspire us all to make something of our own, whether it be big or small, our first project or one of many, in order to take a break from our culture of over-consumption and take a leaf from someone else’s book to understand the true value of how our clothes are made.

I was asked to take part and I have to say, it’s done the trick. I started off small myself as admittedly, I’m still on a journey when it comes to the actual creation of clothes and accessories.

There’s a lot to it and it can feel awfully daunting if you’ve never put needle-to-fabric or iron-to-iron-on-patch, before! The inspiration behind my first project came mainly from the wonderfully woven artwork I’ve been following along on Instagram lately.

MAKESMTHNG Week with Greenpeace & Fashion Revolution: DIY Embroidery

Embroidery may be a trend which flows in-and-out of the fashion cycle every other season but it’s actually a craft which originates from even as early as 300 AD (according to Stitches in Time). Now you can find examples of embroidery by designers such as Valentino – it’s one of the reasons I admire their haute-couture collections so much.

As I said, I’m still an amateur in certain areas and although I’ve dabbled in cross-stitch work in the past, I’ve never properly attempted embroidery.

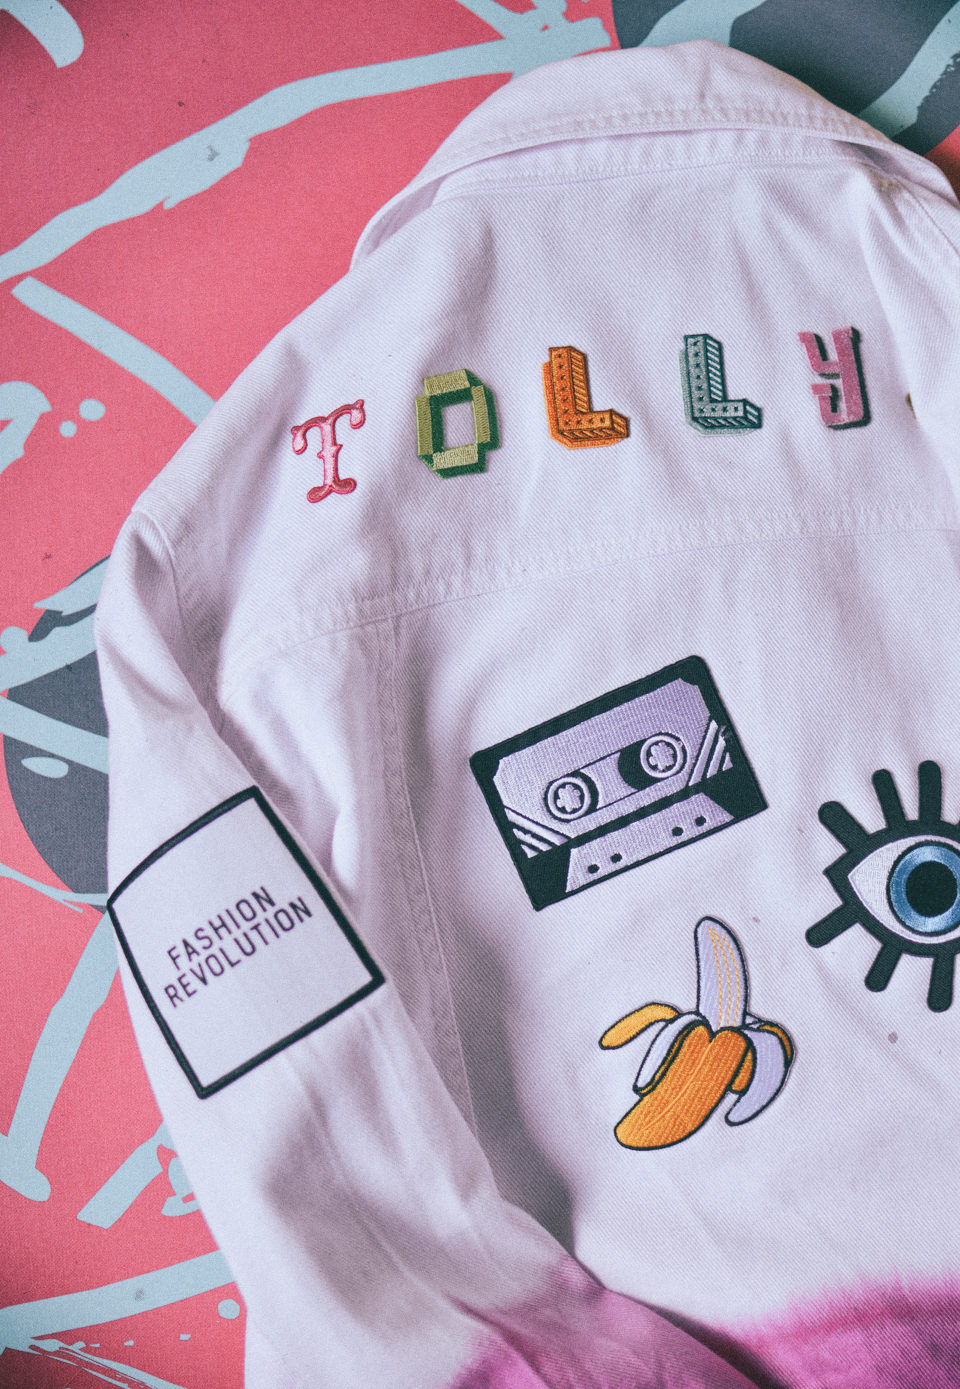
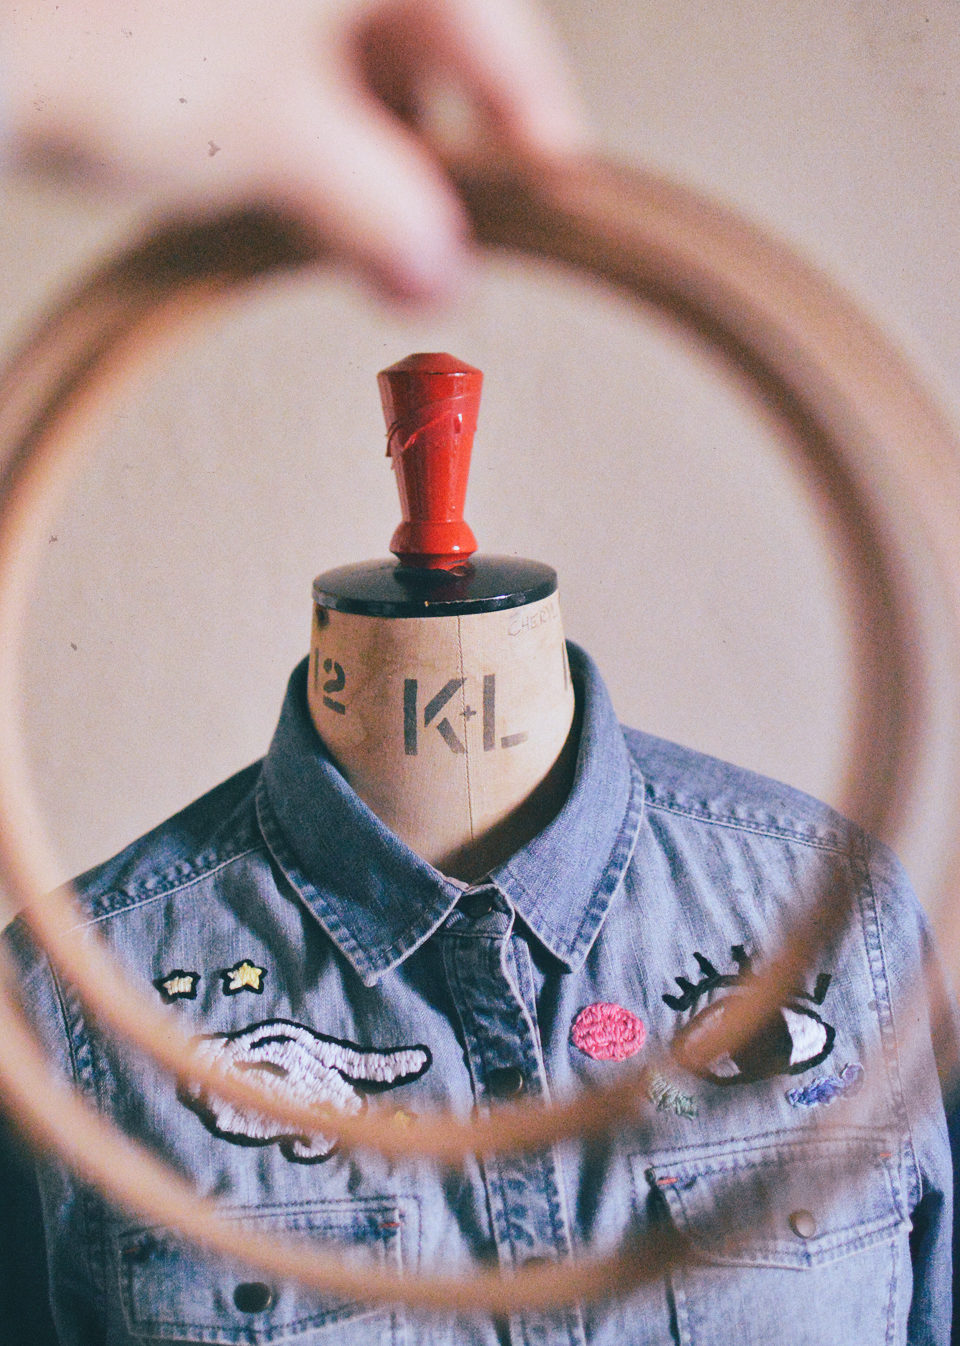
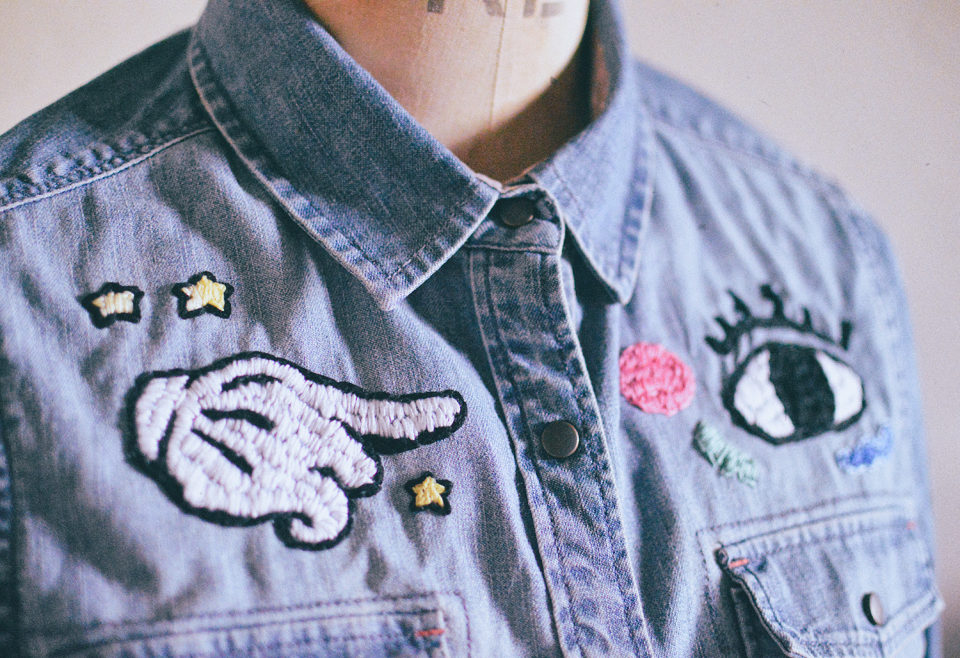
Fuelled by #MAKESMTHNG motivation, I picked up an embroidery hoop, some threads in primary colours and a pack of needles and got stitching some #MAKESMTHNG imagery on to a denim shirt-dress I owned double-of.

MAKESMTHNG Week with Greenpeace & Fashion Revolution: DIY Embroidery

MAKESMTHNG Week with Greenpeace & Fashion Revolution: DIY Embroidery

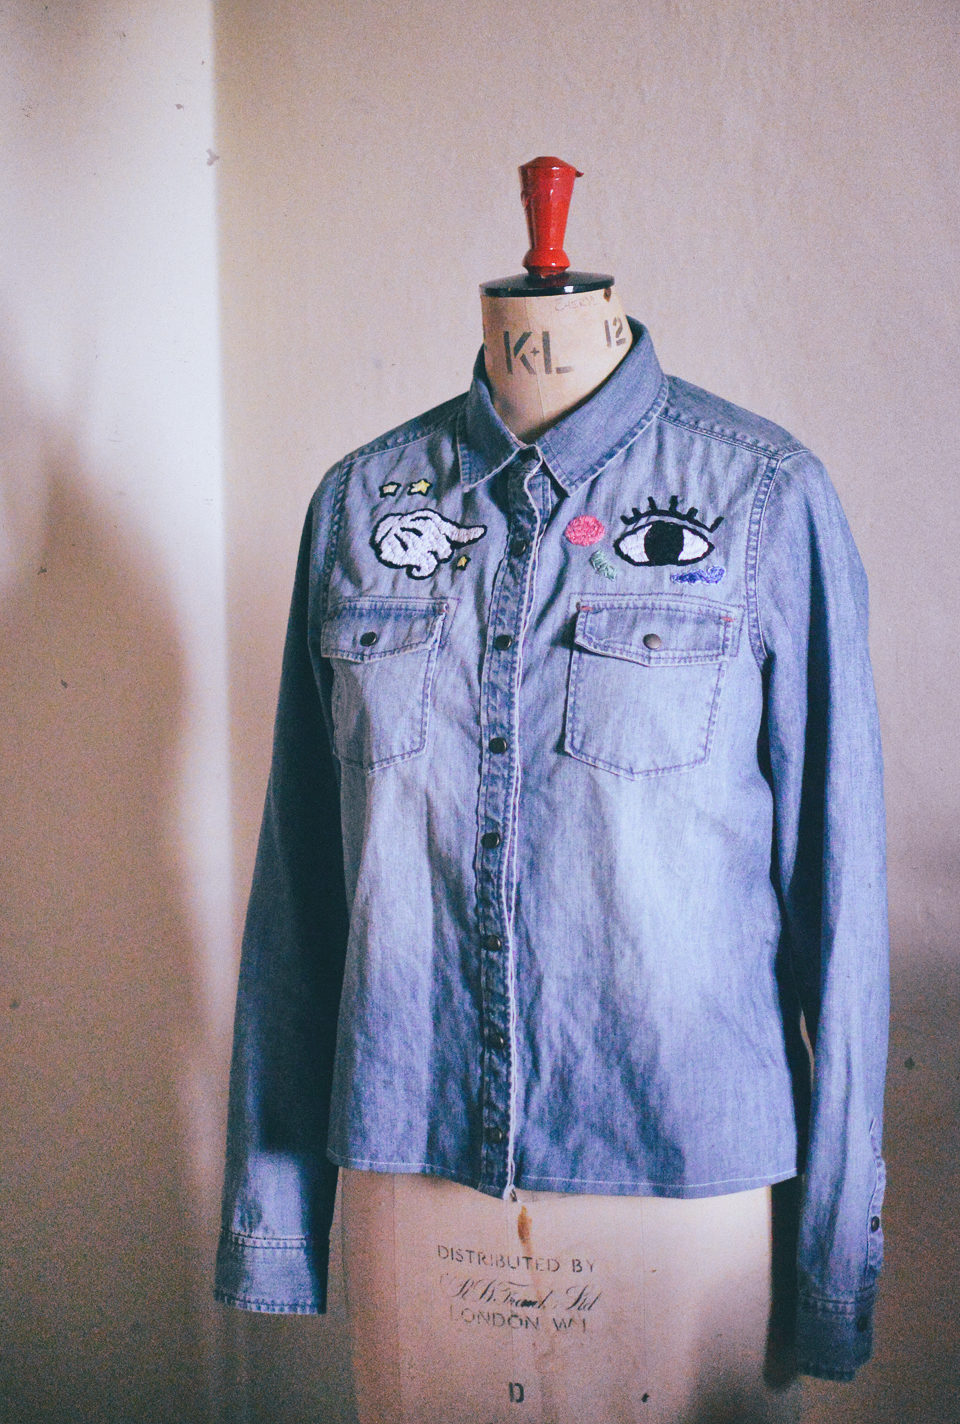
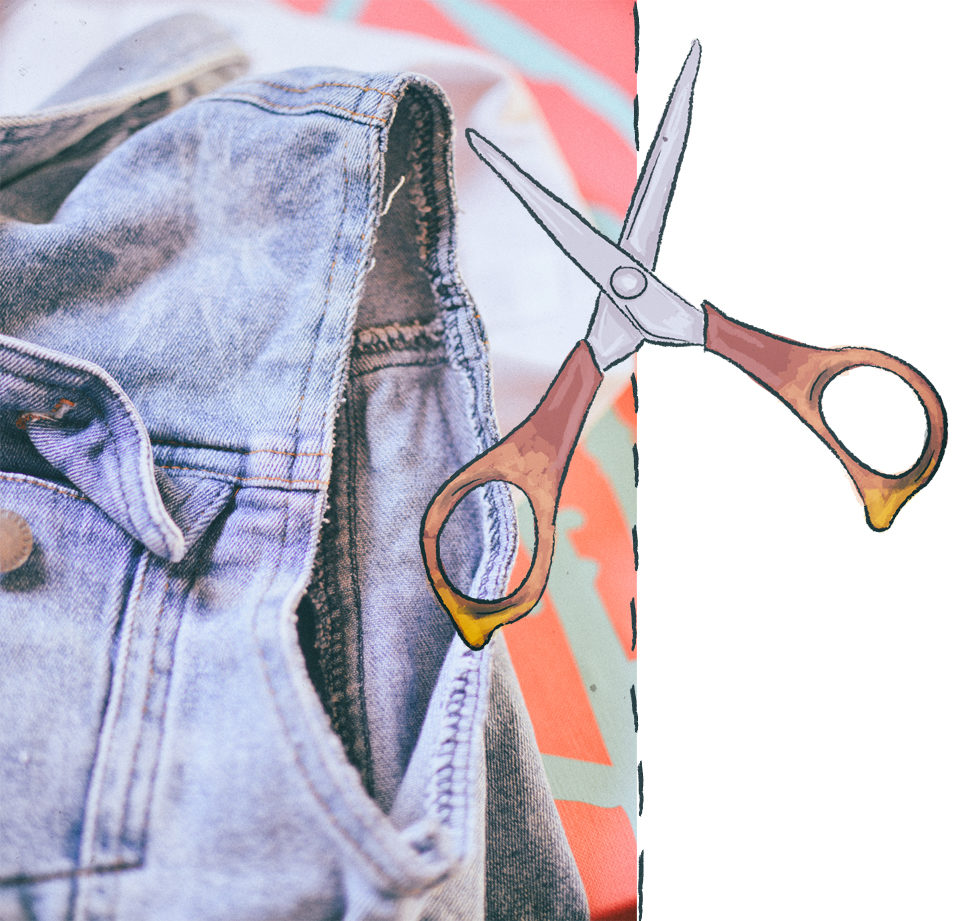
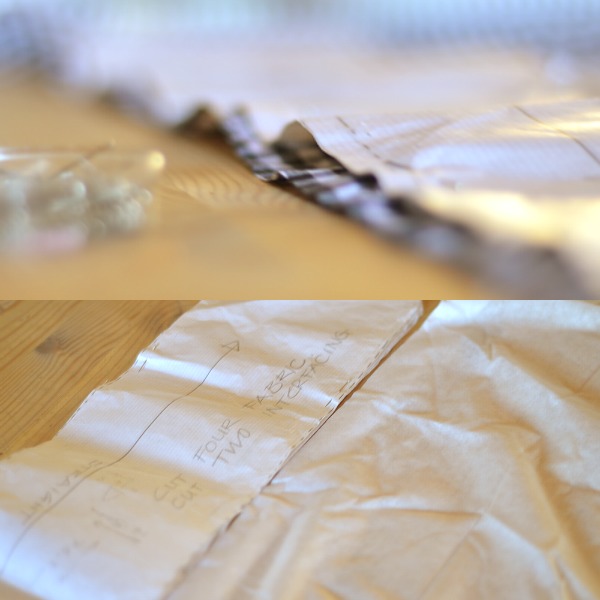
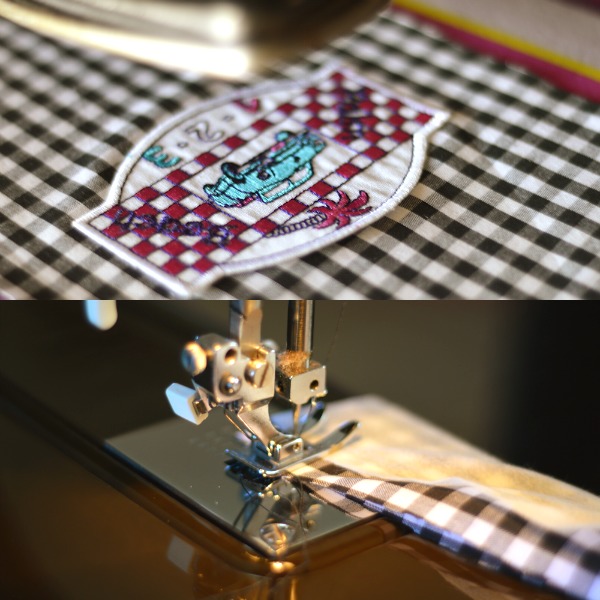
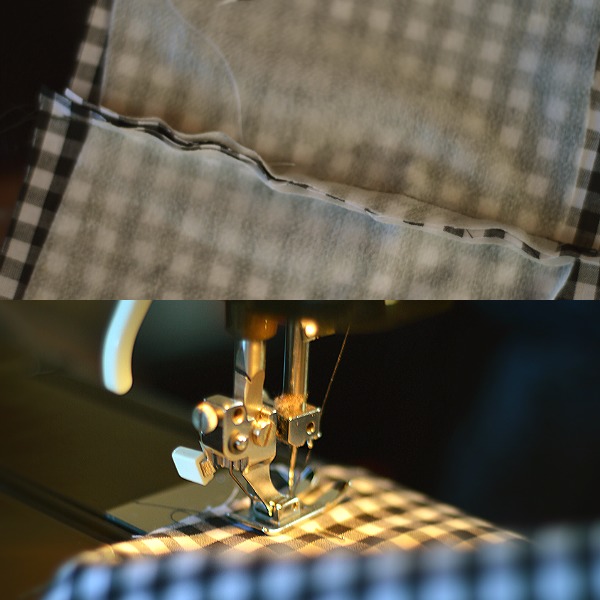
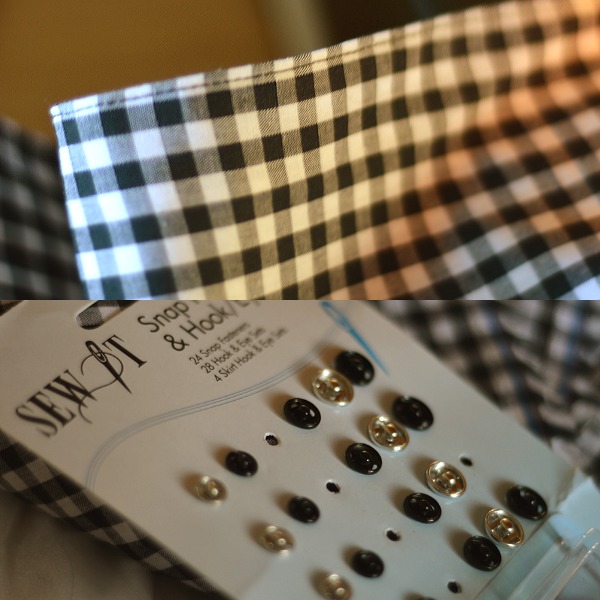
Later on, I also went on to chop down and hem the shirt-dress into a blouse – using a sewing machine – and added a new popper, which was the reason I hadn’t been wearing it in the first place, therefore bringing new life to something that was shoved in a bin-bag.


Here is my advice for helping any fellow embroidery novices:


Having a basic sewing knowledge will help…

Although I definitely had to head to YouTube for some tips on how to achieve different stitches, actually putting them into practice was far easier than I thought because it’s not too far removed from ordinary sewing.

I would recommend having a practice on a scrap piece of fabric (or maybe a t-shirt you could easily unpick on) so that you feel more confident when you start off. Straight stitch is as simple as going in and out of the fabric and back stitch is as simple as going in, well, backwards. Speaking of which…

MAKESMTHNG Week with Greenpeace & Fashion Revolution: DIY Embroidery

Don’t feel like you have to use a strict stitching pattern…

Of course, sticking to the same style of stitch is essential in certain scenarios but don’t feel like you have to only use one style to complete something. I used a mix of straight, back, satin and split stitches to achieve all of the shapes I was working on.

I sort of winged-it in a sense, using what stitch felt best on each area. Satin stitch – stitching as close together as possible – will of course always be easiest for filling in blocks of colour.

MAKESMTHNG Week with Greenpeace & Fashion Revolution: DIY Embroidery


WHAT I WORE: Many Questions T-Shirt £20.00 (Lost Shapes x Tolly Dolly Posh) // Black Trousers (Charity Shop) // Watch (Casio)* 


Be as even as possible…

You can actually see the difference in me implementing this rather obvious piece of advice just by looking at the hand shape versus the eye shape which I embroidered. The white of the eye is a lot less patchy as I took more time to make my satin stitch as smooth as I could.

Satin stitch works best with smaller areas (see my little yellow stars and the pink circle) but you can definitely achieve a similar effect if you put your mind to it. I’m wondering if this was a little trickier as I was working on a denim fabric – if you’re an embroidery expert, please do let me know!

Use interfacing to avoid fraying…

If you’re going to be embroidering on to an item of clothing, use some iron-on interfacing on the backside of your embroidery work. This will help you avoid it coming undone or lessen the chances of it fraying when you wear it. Seeing as it won’t be visible, you don’t have to be too neat with this.


GET INVOLVED WITH #MAKESMNTHNG:
Getting crafty? Tag @makesmthng + @fash_rev in your social media posts with the hashtag #MAKESMNTHNG during the week of December 2nd – December 10th!


I’ll be back soon with another project but for now, let me know what you’ll be making in the comments…


You Might Also Like

Easy DIY Fashion Fix Ideas | Fashion Revolution 2017

By April 30, 2017 DIY & Lifestyle

Fashion Revolution Week was created after the Rana Plaza factory disaster in 2013. The factory home to many big name fast-fashion brands collapsed, killing over 1,100 people and injuring thousands more. In order to create change within the fashion industry, transparency is needed across the board as well as commitment to ethics and sustainability. Fashion Revolution asks you to get involved by sharing a photo/selfie of your favourite clothes asking the brand, #WhoMadeMyClothes?


easy diy fashion fix ideas - fashion revolution - diy patch jacket

easy diy fashion fix ideas - fashion revolution - diy patch jacket

With my penultimate Fashion Revolution post being quite a heavy piece, I thought I would tie this week up along the simpler route by listing out a few of ways that you can make your clothes last longer. Although I talk an awful lot about shopping with more ethically focused brands, the way you care and dispose of your clothes is equally as important as what you buy.

One of Fashion Revolution’s campaigns for 2017 included the #LovedClothesLast short film which focuses on exactly that; how loved clothes will last a lot longer than those which aren’t, whether that means how we care for them or how they were produced. You can watch the full short film here. On top of that, Fashion Revolution are also trying to encourage people to start “fashion fixing”; making your clothes last longer by fixing them rather than throwing them away. Scroll down for some easy ideas that I can guarantee all of you can do from home…

easy diy fashion fix ideas - fashion revolution - diy patch jacket

easy diy fashion fix ideas - fashion revolution - diy patch jacket


~ DIY PATCH JACKET ~
Read the full tutorial here.


This is the jacket that some of you long time TDP readers may recognise. I also featured it in my recent blog post of my trip to Lottozero’s Fashion Revolution event in Prato, Italy. I originally bought the jacket from a jumble sale with the intention of adding more to it; it was a blank white canvas which meant there was an awful lot of room to play with. If you click through to the tutorial you’ll see that not only did I dye the jacket but I also added some patches. 

Iron-on patches are extremely easy to use (all you need is a tea-towel and iron) and are what I used for all of the patches upon it. However, some of the original patches did peal off in the wash, so if you access to a needle and thread, sewing the patches on will make them last even longer. I simply re-ironed them on this time, adding my Fashion Revolution patches along with them. It is possible to find more sustainable patches; Avery Dennis (who produced the exclusive patches) use 90% recycled yarns. 

easy diy fashion fix ideas - fashion revolution - diy patch jacket


~ DIY SLEEVELESS JACKET ~
All you need is scissors!


This might not seem like much of a DIY but it saved this jacket from being taken to a local charity shop. I was wearing this denim jacket “cropped” for a few years, styling it so it looked purposefully fit to be smaller but unfortunately it had reached the stage where it simply just looked too small. I took to it with some sharp scissors though and I have a whole new item in my wardrobe; a sleeveless denim jacket (or waistcoat).

I’m also planning on adding some white pleated ruffles around the armholes using an old white dress. I’ll be getting out my sewing machine soon and will most definitely report back on my progress in the future.

easy diy fashion fix ideas - fashion revolution - diy patch jacket


~ MORE IDEAS ~
Follow my Instagram Story…


Ripped & Dip-dyed Jeans…

To go alongside my dip-dyed jacket, I ripped up some of my white jeans and dyed them in a similar style. They’re still going strong and you can see them styled up in a recent outfit post. Quick, easy, and once again doesn’t require much skill if you haven’t necessarily got the time to learn a new craft.

Crop It…

Take the same principle as I did with my old denim jacket and cut off the length of a t-shirt. It might not seem like you’re doing much but you might just end up falling back in love with its new style. If you want to neaten it up and save it from fraying, find a sewing machine and create a simple hem line, or ask someone who knows how to do it for you.

Add Pom-Poms…

I love this idea from Fashion Revolution themselves; pom-poms are really simple to make once you learn and can definitely add something more interesting to an item you’re getting a little bored of. It also saves you from going out and buying a new pom-pom trend led piece which often aren’t much more than just a sweatshirt and the pom-poms themselves. Being in charge of the process will guarantee that it will last for longer and you can make it look exactly as you like it. 

Use Off-Cuts…

With DIYs, especially those involving cutting and slicing off arms, you’ll often have off-cut pieces of fabric lying about. Don’t throw these out! You can make accessories or use the old buckles and buttons for future projects. Try and reduce your waste as much as possible. 


How will you make your clothes last longer? Have you got any quick DIY ideas? Let me know in the comments!

Thank you so much for joining me this Fashion Revolution Week! Be sure to subscribe to my newsletter as I’ll be sending out a round-up shortly.

You Might Also Like

Wishlist: Patchwork Denim, Red, White & Blue*

By March 10, 2016 Wishlist

I haven’t put up a wishlist style post in a while, so seeing as a new season is about to set in, I thought I’d put one up. I’ve been seeing a lot of patchwork denim around the place as well as the still ever growing trend of embroidered badges so that’s basically what this consists of. You can see which are my favorites below…

SS16 Trends Wishlist Patchwork Denim - ASOS Dr Martens River Island SPRINGTIME


Heels (River Island @ ASOS) // Surrender Badge (Rosie Wonders @ ASOS) // Purse (Springtime)* // Clutch (SPRINGTIME)* // Skirt (ASOS) // Rose Badge (Rosie Wonders @ ASOS) // Dr Martens (Dr Martens) // Wallet (SPRINGTIME)* // Pinafore (ASOS)


I’m ever so slowly becoming a shoe person, and I’m also ever so slowly starting to fall in love with heels (eek!) and this combination of a shoe, heel, denim and patchwork has me with heart shaped eyes. I’m not sure the boot style would actually fit my very slim figure though… which is a shame because they really are quite delightful.

To match those, this dress and and this skirt would work perfectly. I’ve actually had my eye on that patchwork denim pinafore for a while now and I’m thinking it would look pretty great this summer with a crisp white blouse (which I’m now an owner of – it’s a Stradivarius number) underneath and then quite possibly a cool pair of Dr Martens on my feet… these Valentine’s pair are pretty funky, right?

In terms of the accessories, like I mentioned, it seems that embroidered patches aren’t going anywhere soon and I’m pretty happy about that… did I mention that my socks come with a free embroidered badge, yet? 

I’ve included a few SPRINGTIME pieces there too because I love what they’re brand is all about. You may have noticed the new addition to my sidebar, which has a handy link straight to their site. When the lovely team got in touch with me, I knew I had to work with them because they have such an awesome message about achieving your dreams and spreading that passion to everyone around you. I’m all for it and the fact that they’re pieces are all very denim orientated… well it makes them that much better.


What have you been wishing for recently? Let me know in the comments!

(This is a sponsored post in collaboration with SPRINGTIME. All thoughts and opinions are 100% honest. You can read my full disclaimer here.)


You Might Also Like

3 Bottle Cap Fashion DIY Ideas

By June 15, 2014 DIY & Lifestyle

Honey, I’m hommeeee! Sorry about the delay, but if you didn’t know already, I’ve been home in the UK for a while again, back tomorrow! I hope you didn’t miss me too much 😉 Shall we get on to the post now? Yeah! It’s just a quick one but I hope you like it nonetheless… I found out about Coca-Cola’s new idea to stop the waste of their bottles, and I suddenly had a light-bulb moment! Why not think of 3 easy ideas which can be made with house hold items… especially bottle types?! Genius… hehe (Images via Pinterest & Coca-Cola)

3 fashion diy ideas bottle caps coca-cola 2nd life

The whole idea, like I said, is to reduce the waste of Coca-Cola bottles. So they’ve come up with a scheme (only in available in Vietnam currently, I believe!) to give out packs of bottle tops with different uses. From spray bottles, pens, sharpeners, to toys, and even lights! I think it’s such a cool idea! I want one… I would 100% pay my very own money for a pack. Would you?! 🙂

3 fashion diy ideas bottle caps coca-cola 2nd lifeSPRAY BOTTLE – BLEACH GALAXY PRINT

My first idea is so simple. Just pop some bleach (or paint) in to an old spray bottle, and spritz at your shorts, top or shoes, and then just add on some details for that whole ‘galaxy’ look. I’ve never been the biggest fan, but I think if you put your own twist on it, you could create something really cool! My favourite version of this is the bleached jumper!

TUTORIAL #1TUTORIAL #2TUTORIAL #3
3 fashion diy ideas bottle caps coca-cola 2nd lifePEPPER SHAKER – SEQUIN SHOES

This is probably my favourite idea! Take an empty pepper/salt shaker (I mean, you could do it full if you really wanted that kind of vibe…), fill it up with glitter/sequins, and then glue all over your desired shoes, and sprinkllleeeee! All you have to do after is just touch up any bare patches, but if you get a good glue, this should be really easy and fun to achieve! I think turquoise glitter looks awesome!

TUTORIALS (ALL OVER THE INTERWEBS) 
3 fashion diy ideas bottle caps coca-cola 2nd lifeSQUEEZY BOTTLE – SPLATTER PAINT CLOTHES

This brings back my Carrie Diaries memories *sobs that it has been cancelled*…. and also ART lessons! Fill up an old ketchup bottle (or a few), with coloured paint, and splatter it all over your item of choice! I would recommend putting a small amount in the bottle, which will help it ‘squirt’ rather than just squeeze, to create the splattered effect. Or do it with a fine paint brush to do the Carrie Bradshaw bag… I still haven’t shown you mine! You guys must remind me 😉

TUTORIAL #1OTHER TUTORIALS

What other household items would make awesome DIYs? Let me know in the comments, I would love to know! I shall see you in my next post with some graffiti… say whatttt?!

You Might Also Like

Embellished Dinosaur Sunglasses DIY

By April 29, 2014 DIY & Lifestyle, My Style

Hello! How are you again my friend? Or maybe you are new here… doesn’t really matter because everybody is welcome. Let’s explain this post before I get too into my rambles… You may have read this post recently about a brand I discovered, and that sparked a light bulb above my head *ding* Why not do a DIY? I’m all about supporting brands, but if I can save a few bob here and there, than I would rather put my own spin on things, so me being me, I am bring you along for the ride and sharing how exactly I re-created these embellished dinosaur sunglasses… Quick note! The Company Magazine #StyleBloggerAwards nominations close tomorrow (aka 30th April), so I would love if you could nominate my blog as Best Teen Style Blog! Click here to do so! Thank you!

diy embellished dinosaur sunglasses spangled TOY DINOSAUR €0.50 (JUMBLE SALE), SUNGLASSES (eBAY), WHITE ACRYLIC (ART SHOP), PINK ACRYLIC (DALER ROWNEY), YELLOW ACRYLIC (PEBEO STUDIO) & OPTIONAL EMBELLISHMENTS (ART SHOP)

This is basically a list of things you will need… obviously. I went for a dinosaur toy for mine because I like they way they look, plus when you see a basket full of them at a jumble sale, and you are in need of a toy (for DIY purposes… duhh), you obviously don’t pass it by, do you? My sunglasses were really cheap ones which I previously used for this sunglasses DIY. The acrylic paints you can get from anywhere really, I personally prefer the Pebeo Studio ones as they are surprisingly more opaque than the usual Daler Rowney tubes. Oh and don’t forget to name your animal of choice… I asked my brother and he said ‘Sunny’… how original, heh? You can also get some embellishments, but these are of course optional… I think the dinosaur might be enough in itself for some people!

diy embellished dinosaur sunglasses spangled The first step is to paint 2 smooth and even coats of the white acrylic. This helps the colour you put on top really stand out, and also get rid of the previous colour. I could have kept mine red, but there were a few chips on it, so this covered things up! If you have coloured sunglasses you could even keep it at this! I feel sorry for the lady in my ASOS magazine… her dress was so perfect… naughty Mr Sunny getting it all covered in dinosaur footprints! 😉

diy embellished dinosaur sunglasses spangled Then you want to paint 2 coats of your acrylic of choice. You may notice that I have left a white space on his tummy… this is because I wanted a bit of a gradient for added definition, but again, this is only optional. If you want it a block colour, then paint it all in and ignore the next step…

diy embellished dinosaur sunglasses spangled The third step is to fill in the space we left. If you decide you want it a block colour, then ignore this like I mentioned. I think he looks really cute with the pop of yellow! Make sure you are patient with this bit… I rushed because it was getting dark for pictures (#bloggerproblems), so parts of it ended up being a weird orangey, patchy colour. At first I used a sponge to get a gradient effect, but because Mr Sunny has annoying hands (do dinosaurs have hands?!), I ended up going in with a small brush as it was getting a tad messy. I also painted all the way down underneath his tail for an added effect.

diy embellished dinosaur sunglasses spangled Ergh, ignore the change of light… one day I shall own soft box lights so all my pictures will be perfect! Ha! Step 4 is a little tricky. I recommend waiting until your toy is 100% dry (maybe even wait a day), so the lens of your sunglasses don’t get mucky. For finding the perfect fit, pop on your glasses, then slip your toy friend where you want it to go. I found that Mr Sunny fitted best on the edge… which wasn’t very practical seeing as I can now only close 1 arm/temple of my glasses! You could put yours wherever you like though… just remember that they might not close up! Then whip out that hot glue gun, squeezing some onto the belly of your toy, sticking it in place. Be careful please… I don’t want to be blamed for any burnt fingers!

diy embellished dinosaur sunglasses spangled

The fifth step is totally optional, but I think it balances the whole thing out. I looked into our ‘buttons’ box, and found these sparkly gems which were the perfect size for my sunglasses. Again, just glue them down with your hot glue gun! I love how it looks like Mr Sunny is holding one of them… maybe their Mr Sunny eggs?… hang on… do male dinosaurs keep the eggs?… maybe Mr Sunny got divorced before the babies were born… and Mrs (or not Mrs anymore) Sunny decided to leave him with them all… Yep, okay I am a tad bit weird discussing an inanimate object’s relationship.

diy embellished dinosaur sunglasses spangled diy embellished dinosaur sunglasses spangled diy embellished dinosaur sunglasses spangled diy embellished dinosaur sunglasses spangled diy embellished dinosaur sunglasses spangled CAMO BLOUSE €2.00 (JUMBLE SALE)

Dah-dah! The final step is to… ROCK THOSE SUNNIES! YEAH! Papa Posh said I was brave to think I might wear these out… maybe I’ll save them for my trip to England, where wearing crazy clothes seems to be more acceptable. I love them though, and I love how Mr Sunny turned out. Do you like his colourful make-over? I certainly do! I do have to say, I’m not sure these will become my every day pair of sunglasses for this summer, but I am sure they will get used *fingers crossed*… and I will be sure to report back on how many strange looks, and laughs I get from the locals… Did I have a bit too much fun with editing that one picture above? Yes. Do I regret it? Absolutely not.

If you re-create these sunglasses, do make sure to tweet me (@TollyDollyPosh), or tag me on Instagram (@tdposh) and I will be sure to RT and have a gander!

If you liked this post and you would like to see more, do leave a comment, and maybe even nominate my blog as Best Teen Style blog here! Thanks so much! 😀

You Might Also Like

Brand Appreciation: Spangled Sunglasses

By April 15, 2014 Fashion

Quite recently, via Twitter and the wonderful blogger, Lexi, I discovered the wonderful site which is Wanelo. I swear this isn’t sponsored, but I am OBSESSED with that site. Absolutely obsessed, I think it may even be better than Tumblr because it’s full of clothes *evil cackle* You can follow me on it here if you wanna…. but, on that site, I found the awesome brand which is Spangled. It’s insane… (Images via Spangled)

spangled sunglasses shop spangled sunglasses shop spangled sunglasses shopI told you Spangled was insane. DINOSAURS, SPARKLE AND NEON GEMS. What more do you want?! Before I start a huge great big ramble on how much I NEED their stuff, can we just appreciate that, that male model… O_O MIND BLOWN *fireworks and explosions* …back to the glasses Tolly, back to the glasses… If you have known me and my blog for a while now, you’ll know that I would die to wear these glasses because they are everything I look for in an partner  accessory. The shape, the colours, the gems, the animals, the glitter, the EVERYTHING. Just imagine having pastel dinosaurs on the front of your noggin? Pretty cool, pretty darn cool. Spangled were born from the love of Festival dress up and aims to bejazzle you with limited edition handmade items that will make you stand out from the crowd. From bodysuits, to spangled sunglasses, sparkly spandex, outrageous prints, customised items and much much more. Dayum gurl!

spangled sunglasses shop spangled sunglasses shop spangled sunglasses shop

Not only do Spangled specialise (by specialise I mean… DO THE BEST BLIMMING JOB) at Sunglasses, they also do awesome clothes like the neon two piece above. Totally on my wishlist. All of their stuff is so colourful and bright and just perffffect. Plus, if you wanna’ look good down at the beach, then you need to look at their swimwear range… oh Spangled, you do keep getting better and better. When I tweeted them they said that they actually have a new collection coming soon, which I am TOTES EXCITED (totes… really Tolly?) about. For realz. Anyway, I shall leave you to stare at these pictures in amazement… and the male model one more time, and then you can look at even more pictures hereCheck em’ out people! Enjoy 😉 😀

If you liked this post then you may want to nominate me as Best Teen Style Blog! You can do so, by clicking HERE! 

You Might Also Like

DIY: Girl Scout Sash Rookie Mag Inspired*

By February 23, 2014 DIY & Lifestyle, My Style

Howdy! So, quite a while ago now, I had an idea. How about I do DIY each month (or every other), not only for myself to learn things, but for some ideas for you guys?! So, I’m here, and I’m doing it for you! This is the first ‘major’ DIY I have done, so please excuse any mistakes, but I hope it is a fun one! Enjoy…

diy rookie mag sash camp rookie my fabrics

I originally saw this idea in the Rookie Yearbook One, wear they did like a ‘Girl Scout’ inspired shoot, called ‘Camp Rookie’. I thought it was a really cute idea and that a sash could become an awesome fashion accessory. I put a few bits and bobs in my scrap book and started making it up! I also thought it would be cool as Orla Kiely’s SS14 collection was sort of ‘Girl Scout-esque’. So here is my DIY Rookie Mag Sash…

diy rookie mag sash camp rookie my fabricsdiy rookie mag sash camp rookie my fabricsThings You Will Need: Monochrome Check Cotton £6.45/m (My Fabrics)*, Appliqués  (My Fabrics)*, Interfacing, Scissors, Pins, Sewing Machine, Pattern Paper/Baking Paper, Poppers, Un-picker & an Iron.

The first thing you need to do is create a pattern. I’ve made a small rough guide for you above, which is the shape you need to go for. I went for 14.5cm wide and 76.3cm long, with the end point being 14.5cm by 14.5cm. You will use this as a guide to cut along. You can either use baking paper, or thick long paper (what I used). Cut that out, and then your pattern is done! You also need some pins out, and of course some scissors to get snipping! On the pattern guide, you will notice I have put ‘STRAIGHT’. This means you need to put the pattern down on the straight grainnot the bias (the stretchy way).

diy rookie mag sash camp rookie my fabricsYou want to cut of the sash shapes on the fabric of choice (make sure you pin the pattern down nice and tight before cutting). I chose this awesome check from MyFabrics who are helping me put together this whole post! The selection on their site is amazing! They have so much and you are bound to find something you like! After you have cut the 4 pieces of fabric, you will want to cut of your interfacing. You don’t have to use interfacing, but it makes the sash more sturdy. Don’t worry about being too neat when cutting as you will be trimming off all the ends later on!

diy rookie mag sash camp rookie my fabricsYou then want to go to your iron. If you are using iron-on interfacing, then at this point you will need to iron the bobbly side onto of the fabric pieces. If your fabric has a pale side, then make sure you are ironing them onto that, but mine was the same on both so there was no need to worry! If you have iron on patches for your sash, then you will need to place and iron, these onto one of the now ‘interfaced’ fabric pieces, obviously, onto the front. You need to make sure to leave 2cm of space on each side, as we will be cutting this off later. I would recommend sewing any non iron-on badges on at this stage. Learn more about Appliqué badges here!

When you have done this, take your 2 ‘interfaced’ fabric pieces, and lay them down interface upwards. Lay them out so that the tops meet (in one long line), and make sure that at least 2cm are overlapping at each ‘top’ end. Do the same to the other two pieces of fabric. Then sew the 2 overlapping pieces together with your sewing machine, just straight down the overlapping part. The below picture is of the 2 ‘interfaced’ pieces and what they should look like…

diy rookie mag sash camp rookie my fabricsAfter you have done that, go back to your iron, and flatten the sticking up pieces, down. This is also a good chance to iron them all over again to remove any creases (this makes it easier in the sewing machine). Then you will need to lay the 2 pieces you now have, over the top of each other, making sure they are perfectly in-line, but read this very clearly: You need to have the piece with your iron-on badges on the bottom, facing with the badges, upwards. Then put the other piece with the interfacing facing, upwards. Then you want to pin these, but making sure that the pins are perfectly straight and the heads are not on the outside edge, otherwise you might break your sewing machine needle! Then sew this all up but make sure to leave a big enough gap so you can turn it the right way out. I would recommend leaving this gap near the middle stitch you made earlier. 

diy rookie mag sash camp rookie my fabricsOnce you have sewn them up, you can now cut off your rough edges, leaving a bit of space around the line you just stitched. Then you will need to pull the fabric through the gap and put it all the right way. After this, it might be a bit puffy. You will need to wet your fingers a bit and sort of roll the edges to get it all straight, making sure you do it all the way round. The points on the end of your sash might be a bit funny and might be still inside the sash, so get an un-picker and slightly pull it out. This will loosen the thread making it a perfect point again. Go back to your iron, and iron it all round very neatly. You then want pop it back into the sewing machine, and go all the way round the sash again, leaving only about 3mm space between the edge, to not only to make the sash a bit neater, but also to close up the gap that is still there.

You can now try on your sash, and find a place down by both points that meet nicely. This will be where you put your poppers. You can put an embroidery stitch if you wish, but I think a popper is a lot more practical. Just sew both pieces on, and voila!

diy rookie mag sash camp rookie my fabrics diy rookie mag sash camp rookie my fabrics diy rookie mag sash camp rookie my fabrics diy rookie mag sash camp rookie my fabrics

Ta-Da! Job done! I’m really happy with the way it came out as it is quite stiff but you can still move around in it perfectly! I love how bright the badges are and I think making it personal with things like ‘Air France’, makes it properly unique to me! It looks pretty cool around my new faux leather jacket*, non? I think because the checks are monochrome, it will be really versatile and I am sure I will get quite a lot of wear out of it especially in the summer! I really enjoyed doing this little DIY, and if you are interested in making it, but not sure what for, then maybe it would be cool for some kind of photo shoot, or as a gift! There will be an OOTD featuring my awesome sash very soon, so watch out for that! 😀

If you try out this DIY, make sure to take a picture and tag me on Twitter or Instagram! Good Luck! 

(Although MyFabrics provided me with fabric and applique badges, the idea and everything was done by me, absolutely 100%. You can read my full disclaimer here.)

You Might Also Like

A Quick Idea: Recycle & Re-Vamp!

By November 29, 2012 DIY & Lifestyle

This is a really easy and quick thing that I did, like, literallly, just like 5 minutes ago! So, I was thinking of things to do, so I went into my room, and looked in my old school ‘magazine’ desk, and grabbed a few old Company magazines, and remembered and idea I saw on YouTube and decided to it with magazines. So basicly, you just cut out 10 x 10 squares of magazine pages, then fold the corners in, and there you have it! Origami! Yes, so simple, and so quick! Here’s the finished result….

I’m going to stick them on my wall, so they are going to look super cute! You can do them with coloured card etc, and they still look amazing 🙂

Just a cool picture of them with my magazines. You can use any magazine, I just love the funky look of the Company Magazine, and also the texture of the paper 🙂

I know I have been doing a lot of DIY things just recently, but I think it’s just because I love doing it, and I feel that it adds that bit of personality to your room or house 🙂 That’s exactly why I have created the DIY & Lifestyle page, so that you can browse the DIY things that I do, instead of just looking at Fashion!

You Might Also Like

DIY: Inspiration & Friendship Decoration Tags

By November 28, 2012 DIY & Lifestyle, General

Sounds odd, doesn’t it? But, I loved creating them! I got the idea when I was really bored, and was thinking about something I could do for my room, and it’s all I could think of! So here it is, my unique, Inspiration & Friendship Decoration Tags!

I put one pink and one green on each tag.

I am going to get my friend and my sister to write a note on the back, so they are personal to me 🙂

You can make these personal, inspiration, or just plain funky 🙂 You could even make them into christmas cards 😉


You Might Also Like