
Hello! How are you again my friend? Or maybe you are new here… doesn’t really matter because everybody is welcome. Let’s explain this post before I get too into my rambles… You may have read this post recently about a brand I discovered, and that sparked a light bulb above my head *ding* Why not do a DIY? I’m all about supporting brands, but if I can save a few bob here and there, than I would rather put my own spin on things, so me being me, I am bring you along for the ride and sharing how exactly I re-created these embellished dinosaur sunglasses… Quick note! The Company Magazine #StyleBloggerAwards nominations close tomorrow (aka 30th April), so I would love if you could nominate my blog as Best Teen Style Blog! Click here to do so! Thank you!
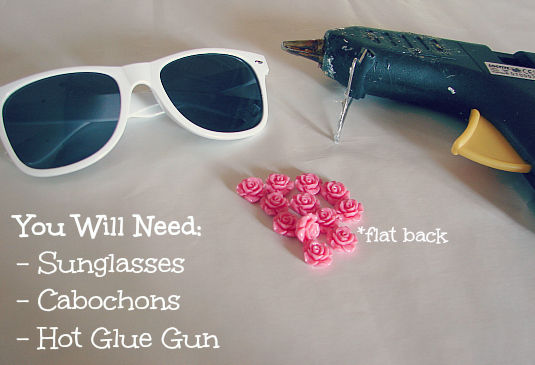
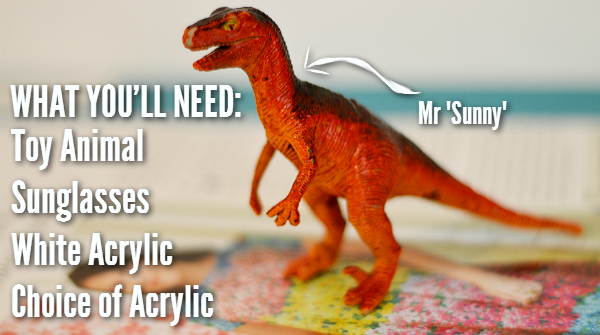 TOY DINOSAUR €0.50 (JUMBLE SALE), SUNGLASSES (eBAY), WHITE ACRYLIC (ART SHOP), PINK ACRYLIC (DALER ROWNEY), YELLOW ACRYLIC (PEBEO STUDIO) & OPTIONAL EMBELLISHMENTS (ART SHOP)
This is basically a list of things you will need… obviously. I went for a dinosaur toy for mine because I like they way they look, plus when you see a basket full of them at a jumble sale, and you are in need of a toy (for DIY purposes… duhh), you obviously don’t pass it by, do you? My sunglasses were really cheap ones which I previously used for this sunglasses DIY. The acrylic paints you can get from anywhere really, I personally prefer the Pebeo Studio ones as they are surprisingly more opaque than the usual Daler Rowney tubes. Oh and don’t forget to name your animal of choice… I asked my brother and he said ‘Sunny’… how original, heh? You can also get some embellishments, but these are of course optional… I think the dinosaur might be enough in itself for some people!
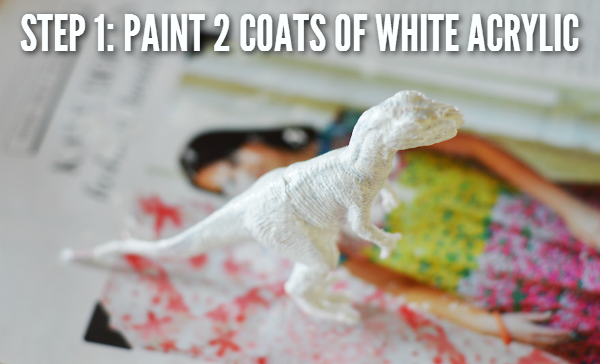 The first step is to paint 2 smooth and even coats of the white acrylic. This helps the colour you put on top really stand out, and also get rid of the previous colour. I could have kept mine red, but there were a few chips on it, so this covered things up! If you have coloured sunglasses you could even keep it at this! I feel sorry for the lady in my ASOS magazine… her dress was so perfect… naughty Mr Sunny getting it all covered in dinosaur footprints! 😉
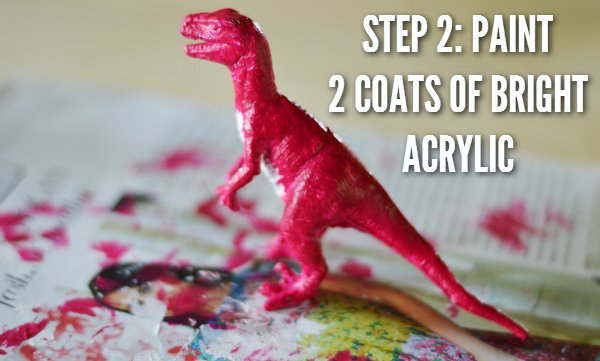 Then you want to paint 2 coats of your acrylic of choice. You may notice that I have left a white space on his tummy… this is because I wanted a bit of a gradient for added definition, but again, this is only optional. If you want it a block colour, then paint it all in and ignore the next step…
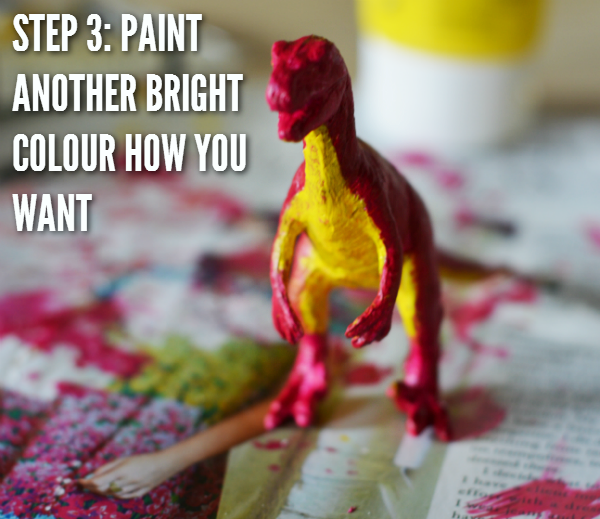 The third step is to fill in the space we left. If you decide you want it a block colour, then ignore this like I mentioned. I think he looks really cute with the pop of yellow! Make sure you are patient with this bit… I rushed because it was getting dark for pictures (#bloggerproblems), so parts of it ended up being a weird orangey, patchy colour. At first I used a sponge to get a gradient effect, but because Mr Sunny has annoying hands (do dinosaurs have hands?!), I ended up going in with a small brush as it was getting a tad messy. I also painted all the way down underneath his tail for an added effect.
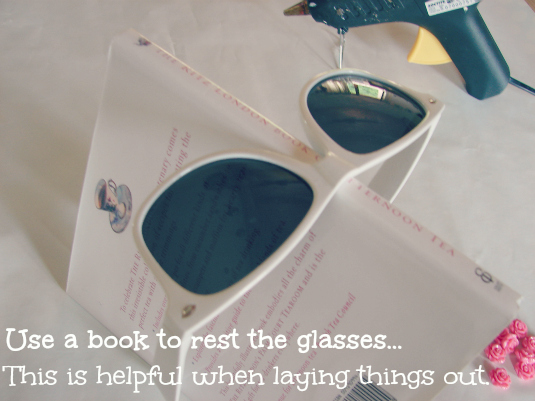
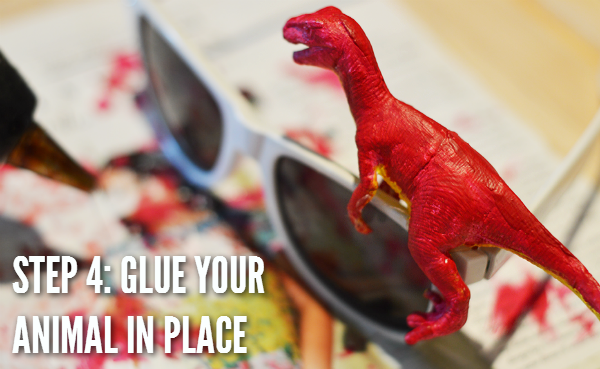 Ergh, ignore the change of light… one day I shall own soft box lights so all my pictures will be perfect! Ha! Step 4 is a little tricky. I recommend waiting until your toy is 100% dry (maybe even wait a day), so the lens of your sunglasses don’t get mucky. For finding the perfect fit, pop on your glasses, then slip your toy friend where you want it to go. I found that Mr Sunny fitted best on the edge… which wasn’t very practical seeing as I can now only close 1 arm/temple of my glasses! You could put yours wherever you like though… just remember that they might not close up! Then whip out that hot glue gun, squeezing some onto the belly of your toy, sticking it in place. Be careful please… I don’t want to be blamed for any burnt fingers!
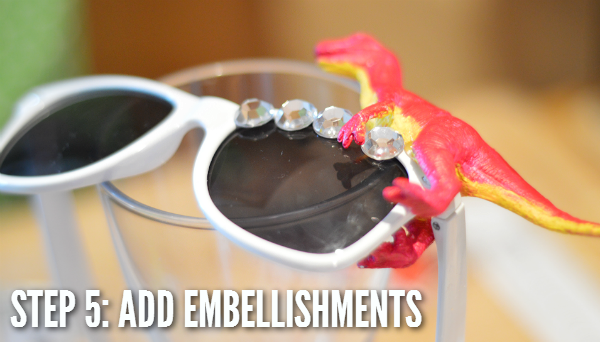
The fifth step is totally optional, but I think it balances the whole thing out. I looked into our ‘buttons’ box, and found these sparkly gems which were the perfect size for my sunglasses. Again, just glue them down with your hot glue gun! I love how it looks like Mr Sunny is holding one of them… maybe their Mr Sunny eggs?… hang on… do male dinosaurs keep the eggs?… maybe Mr Sunny got divorced before the babies were born… and Mrs (or not Mrs anymore) Sunny decided to leave him with them all… Yep, okay I am a tad bit weird discussing an inanimate object’s relationship.

 CAMO BLOUSE €2.00 (JUMBLE SALE)
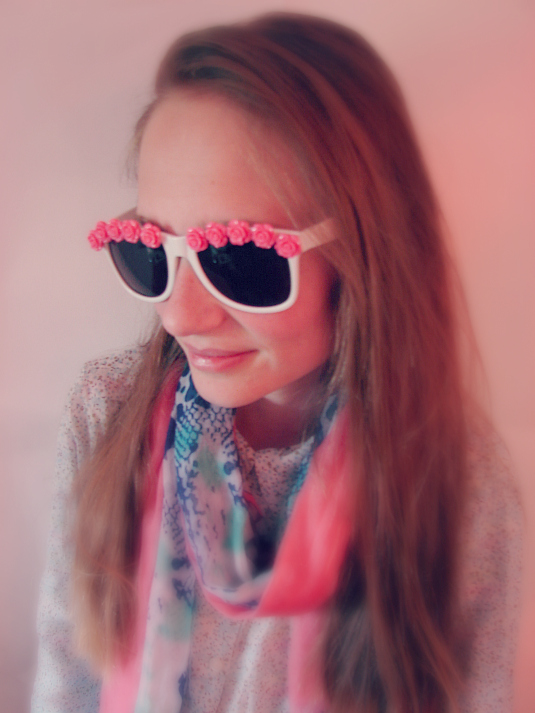
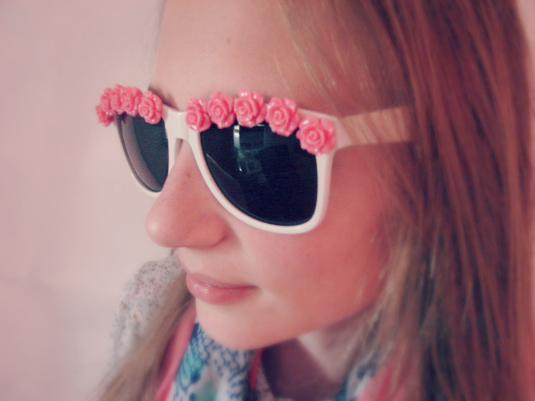
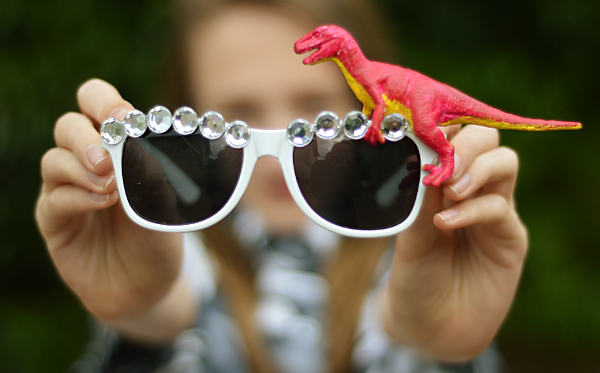
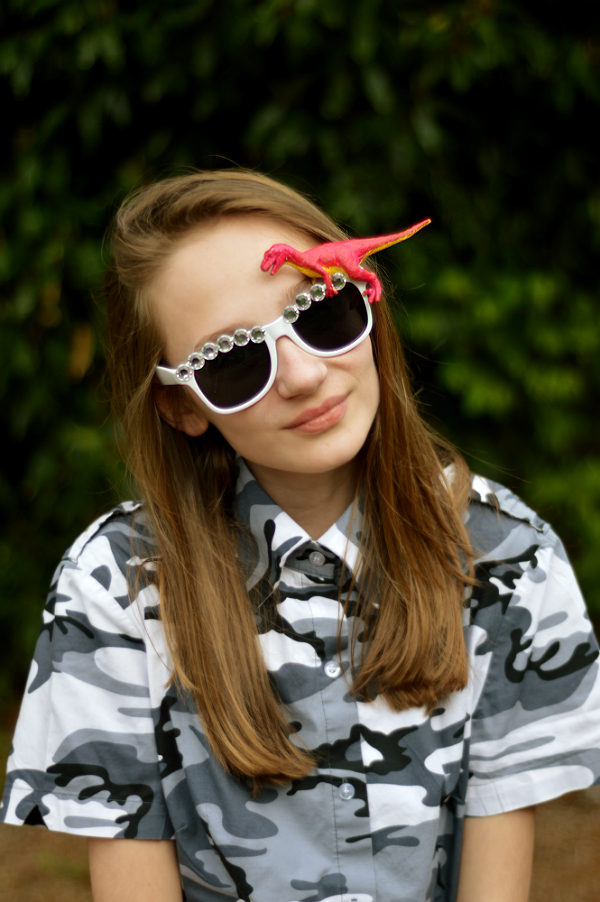
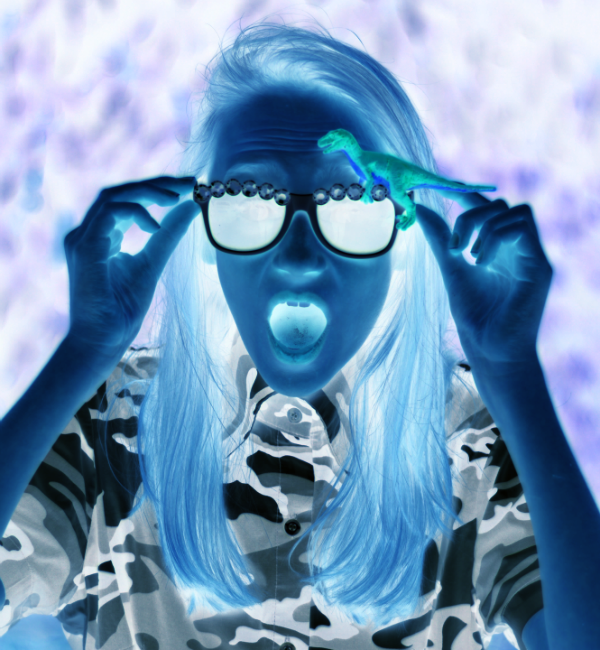
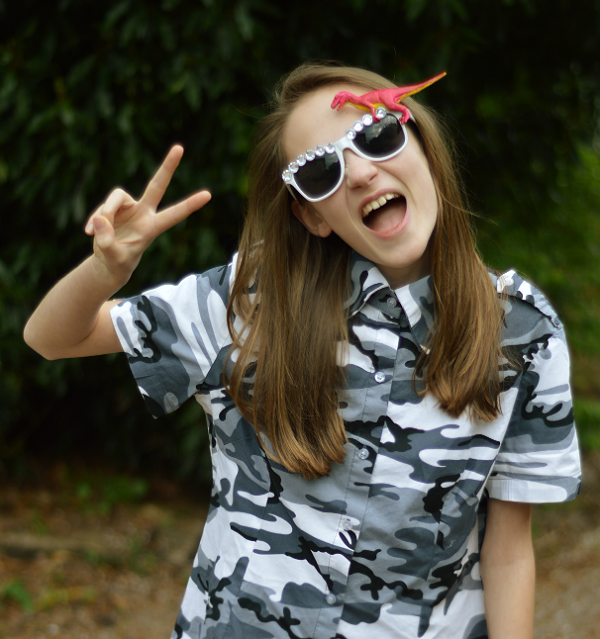
Dah-dah! The final step is to… ROCK THOSE SUNNIES! YEAH! Papa Posh said I was brave to think I might wear these out… maybe I’ll save them for my trip to England, where wearing crazy clothes seems to be more acceptable. I love them though, and I love how Mr Sunny turned out. Do you like his colourful make-over? I certainly do! I do have to say, I’m not sure these will become my every day pair of sunglasses for this summer, but I am sure they will get used *fingers crossed*… and I will be sure to report back on how many strange looks, and laughs I get from the locals… Did I have a bit too much fun with editing that one picture above? Yes. Do I regret it? Absolutely not.
If you re-create these sunglasses, do make sure to tweet me (@TollyDollyPosh), or tag me on Instagram (@tdposh) and I will be sure to RT and have a gander!
If you liked this post and you would like to see more, do leave a comment, and maybe even nominate my blog as Best Teen Style blog here! Thanks so much! 😀